Tools
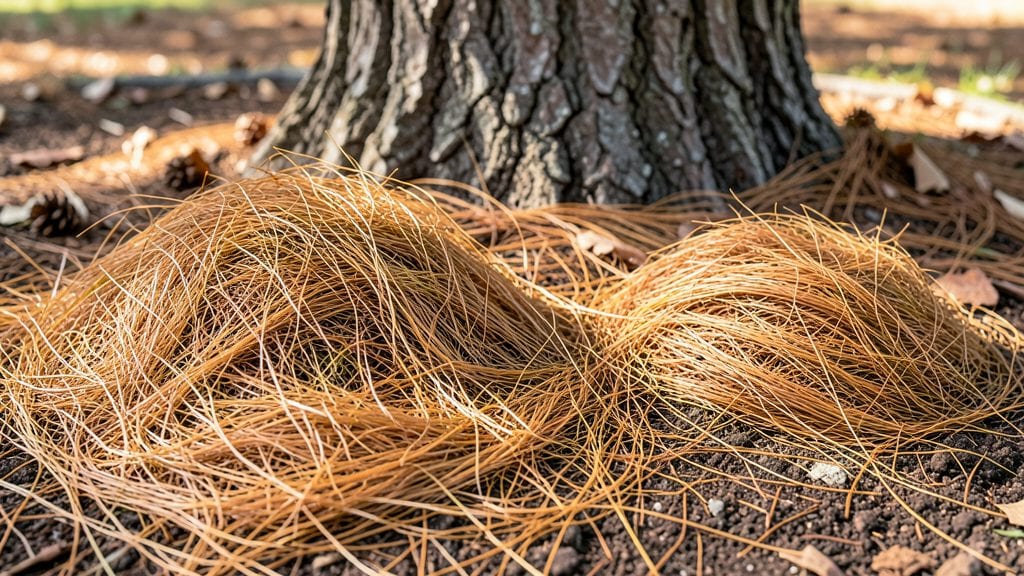
My garden pine straw transformed my yard from a high-maintenance battleground to a moisture-rich, weed-resistant oasis—no more fighting dry soil or pulling weeds every weekend.
The golden needles from longleaf or slash pines create a natural carpet that holds water like a sponge while blocking light from weed seeds, and it lasts 12-18 months before breaking down naturally.
The best part? It’s foolproof once you know the trick: spread a 3-inch layer over prepared soil in early spring or fall, keeping it clear of plant stems.
Works best in zones 7-10 where pine trees thrive, but even cooler climates can use it as a top layer over other mulches. My azaleas and vegetable beds now stay lush without extra watering—just refresh the layer when it thins.
You’ll notice soil staying damp longer, fewer weeds popping up, and plants looking healthier with less stress. The straw also insulates roots in winter and keeps them cool in summer, making it perfect for shrubs, perennials, and even vegetable gardens.
Plus, it adds a natural, rustic look that blends seamlessly with any landscape.
For best results, pair it with compost beneath the layer to feed soil as it breaks down, and avoid piling it against tree trunks. Works year-round in mild climates, but in colder areas, apply it after the last frost.
Here’s how to make it work for your plants—no green thumb required.
📚 In This Guide
- What you need
- Instructions
- Tips and common mistakes
- Wrapping up and next steps
What you need
- ● Pine straw mulch: 3–4 bales (covers ~100–150 sq. ft. per bale; adjust based on garden size). Look for long-staple (3–4") for better weed suppression.
- ● Garden rake: 1 (for spreading and leveling straw). A bow rake with 4–6" tines works best.
- ● Gloves: 1 pair (heavy-duty work gloves to protect hands from splinters and debris).
- ● Water source: Hose or watering can (to dampen straw before applying for even distribution).
- ○ Pruners or shears: 1 (optional but helpful for trimming edges or clearing weeds before mulching).
- ● Wheelbarrow or tarp: To haul straw from the delivery truck to your garden.
- ● Shovel: For moving stubborn clumps or adjusting uneven areas.
- ● Edging tool: To create clean lines around mulch beds.
- ● Broadcast spreader: For large areas (saves time and ensures even coverage).
- ● Soil test kit: To check pH before applying straw (ideal pH: 5.0–6.0 for pine straw-friendly plants).
- ● Clear existing weeds or debris from the garden bed (use a rake or hoe).
- ● Ensure soil is moist but not soggy before applying straw (helps straw settle evenly).
- ● Choose a dry, overcast day for application to avoid straw blowing away.
Step-by-Step guide to using garden pine straw for weed control and moisture retention
This is the mulching method I rely on to keep my garden lush, weed-free, and consistently moist with minimal effort.
Prepare the Garden Bed
Start by clearing the area of any existing weeds, rocks, or debris. Use your hands or a small hand fork to loosen the top 2-3 inches of soil—this helps pine straw settle naturally and prevents matting. I always work on a dry day so the soil isn't muddy, which makes handling the straw easier later.
If your soil is compacted, add a thin layer of compost (about ½ inch) and lightly rake it in. This gives the pine straw something to nestle into while improving soil structure over time. The key here is to create a clean, level surface—uneven spots will cause the straw to bunch up and leave gaps where weeds can sneak through.
Apply Pine Straw Evenly
Spread the pine straw over the prepared bed in a 3-4 inch thick layer. I like to work in small sections, fluffing the straw with my hands as I go to ensure even coverage. Thicker layers work better for moisture retention, but anything over 4 inches can smother plants or create a fire hazard in dry climates.
Leave a 1-2 inch gap around plant stems to prevent rot while still blocking weeds. You'll see the straw settle slightly after watering, so don't worry if it looks a bit uneven at first. For larger beds, I use a rake to smooth out edges, but for small gardens, my hands work perfectly. The straw should look like a soft, golden blanket—no bare spots or clumps.
Water Thoroughly After Application
Give the bed a deep watering immediately after spreading the straw. This helps the straw settle into the soil and prevents it from blowing away in windy conditions. I water until the soil is 2-3 inches deep and moist—you should see water running out of the drainage holes if you're using containers, or feel dampness when you push your finger into the ground.
Over the next 24 hours, check for dry spots and water again if needed. The pine straw will wick moisture up from the soil, keeping roots consistently damp without the risk of overwatering. This is the secret to maintaining that perfect moist-but-not-soggy balance the whole growing season.
Maintain and Refresh as Needed
Pine straw breaks down slowly, so you'll only need to replenish it once a year—usually in early spring before planting season. I spread a fresh 2-3 inch layer over the existing straw, mixing in any remaining bits from the previous year. This top-up keeps the weed-suppressing benefits going strong.
Watch for thinning spots where weeds might start to peek through. If you see bare patches, simply add more straw to maintain that consistent 3-4 inch thickness. The straw will also help regulate soil temperature, keeping roots cooler in summer and warmer in winter—ideal for year-round gardening.
Remove and Replace When Necessary
After 12-18 months, the pine straw will decompose enough to lose its effectiveness. You'll notice it becoming darker, thinner, and less fluffy. When this happens, rake out the old straw completely and replace it with fresh material. This prevents a buildup of organic matter that could compact the soil or attract pests.
I always save the old straw for compost or use it as a mulch layer in my pathways. The decomposition process enriches my compost pile, and the pathways stay weed-free naturally. This cycle keeps my garden thriving with minimal waste—plus, it's a great way to extend the life of each pine straw purchase.
Tips & tricks for perfect garden pine straw application
These game-changing insights will help you maximize the benefits of pine straw while avoiding common pitfalls that can turn your mulch into a maintenance headache.
Soil Preparation is Key: The 2-3 inch soil loosening in Step 1 isn't just about aesthetics—it creates tiny air pockets that help the pine straw nestle properly. I've learned the hard way that compacted soil leads to uneven settling, creating gaps where weeds thrive. Use a garden fork to break up any hardpan layers before adding compost. This extra effort pays off by preventing that "patchwork" look where some areas stay moist while others dry out.
Layer Thickness Matters: That 3-4 inch thickness recommendation in Step 2 is non-negotiable for moisture retention. I've tested thinner layers and they simply don't hold enough water during dry spells. For containers, you can go slightly thicker (up to 4 inches) since they dry out faster, but never exceed this in garden beds. The straw's natural acidity also helps suppress weeds—thinner layers lose this effectiveness.
Watering Strategy Makes All the Difference: The deep watering in Step 3 should penetrate to 2-3 inches—this is how you establish that perfect moist-but-not-soggy balance. I use a soil probe to check moisture levels after watering. In hot climates, you might need to water twice daily during the first 24 hours to help the straw settle properly. The goal is to mimic natural rainfall patterns that gradually penetrate the mulch.
Year-Round Maintenance Secret: That annual refresh in Step 4 is your secret weapon for long-term success. I mark my calendar for early spring to spread fresh straw before planting season begins. This timing ensures maximum weed suppression during the critical early growth phase. For containers, you can extend this to every 12 months since they experience more rapid drying. The key is consistency—never let the layer drop below 2 inches or you'll lose both moisture retention and weed control.
Pro Tips for Garden Pine Straw
- These game-changing insights will help you maximize the benefits of pine straw while avoiding common pitfalls that can turn your mulch into a maintenance headache.
- Soil Preparation is Key: The 2-3 inch soil loosening in Step 1 isn't just about aesthetics—it creates tiny air pockets that help the pine straw nestle properly.
- Layer Thickness Matters: That 3-4 inch thickness recommendation in Step 2 is non-negotiable for moisture retention.
Frequently asked questions
Got questions about using garden pine straw? You’re not alone! Here are some of the most common concerns—and their simple solutions—to help you mulch like a pro.
What’s the best time of year to apply pine straw?
Apply pine straw in late winter or early spring (just before new growth starts) or early fall (after summer heat fades). Avoid applying in peak summer—it can smother tender plants or dry out too quickly. A 2- to 3-inch layer works best for weed suppression and moisture retention.
Does pine straw help with drought conditions?
Pine straw is a natural moisture barrier, reducing evaporation by up to 70%. It’s especially effective in dry climates or during hot summers. Just keep it 2–4 inches thick and water deeply once a week to maximize its benefits.
Will pine straw attract pests like termites or ants?
Pine straw is termite-resistant (unlike wood mulch), but it can occasionally draw ants or earwigs. To deter pests, avoid piling straw against tree trunks and keep beds well-aerated. If needed, sprinkle diatomaceous earth lightly around the edges.
Can I reuse pine straw from year to year?
Yes! Pine straw decomposes slowly (taking 2–3 years to break down fully), so you can rake and redistribute it each season. Just remove debris (like leaves or twigs) and fluff it up to restore its insulating properties. For best results, top it off with fresh straw every 12–18 months.
Are there eco-friendly alternatives to pine straw?
If you’re looking for sustainable options, try:
- Coconut coir (biodegradable, holds moisture well)
- Wood chips (from sustainably sourced trees)
- Grass clippings (free if you mow your lawn!)
- Leaf mold (great for acid-loving plants like azaleas)
Wrapping up and next steps
Transforming your garden with pine straw mulch is a game-changer—it’s easy, cost-effective, and eco-friendly! 🌱 Whether you’re battling weeds, conserving water, or boosting soil health, this natural mulch delivers year-round benefits with minimal effort. Ready to give your plants the perfect growing conditions?
Your next step? Grab a bale of garden pine straw and start mulching—your garden (and future self) will thank you! 🌿 For extra tips, check out our FAQs or dive into DIY mulching techniques.