Size
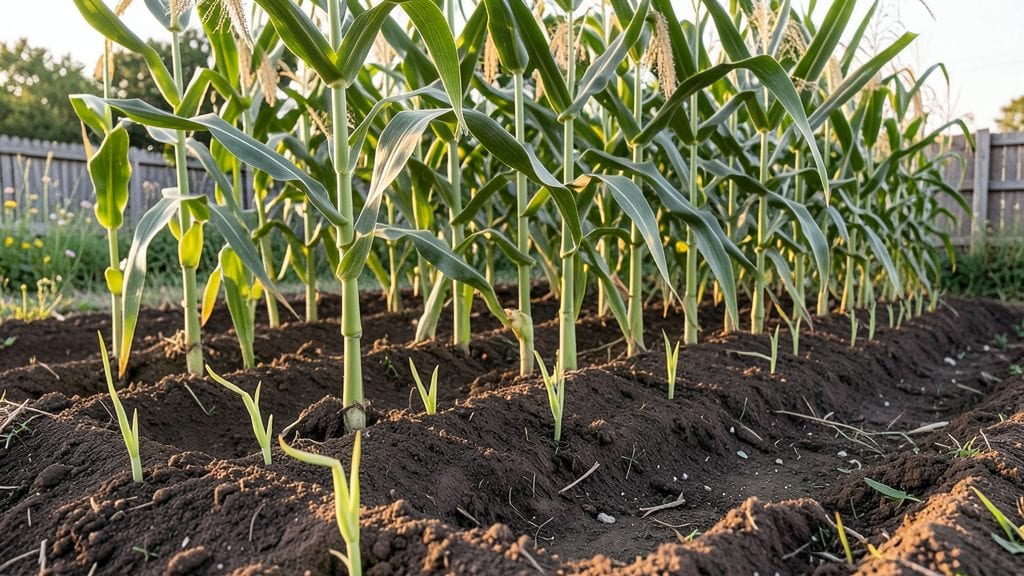
Growing corn in a garden transforms a sunny patch into a towering, rustling food forest by summer. 🌽 I learned the hard way that corn needs more than just space—it demands rich soil, consistent water, and a patient hand.
The first year I planted, my stalks grew tall but produced only a few ears because I ignored spacing and fertilization. Now, my rows produce enough sweet corn for summer barbecues and share with neighbors.
The secret to success starts with soil: corn loves well-drained, nitrogen-rich dirt. Work in compost or aged manure before planting, and space seeds 1 inch deep with 12 inches between plants and 36 inches between rows. A block planting (rather than single rows) improves pollination and yields.
You’ll need full sun (6+ hours daily) and 1-1.5 inches of water per week, keeping soil moist but not soggy—drought stress leads to poor ear development.
By mid-summer, you’ll see 7-foot stalks with tassels swaying in the breeze, and that’s when the real work begins. Fertilize with a balanced 10-10-10 mix at planting, then switch to a high-nitrogen fertilizer when stalks reach knee height.
Watch for corn earworm damage (silk clippings or holes in ears) and handpick or use row covers early in the season. The payoff? Juicy, golden ears ready to harvest when silks turn brown and kernels dent with pressure—60-90 days after planting, depending on variety.
This method works for home gardens in zones 4-10, though shorter-season varieties suit cooler climates. For small spaces, try dwarf varieties like ‘Bodacious’ or ‘Golden Bantam’—they still produce sweet corn without taking over the yard.
The key is consistency: once you master the basics, corn becomes one of the most rewarding crops to grow.
📚 In This Guide
- What you need
- Instructions
- Tips and common mistakes
- Wrapping up and next steps
What you need
- ● Corn Seeds: Choose heirloom or hybrid varieties (e.g., 'Golden Bantam,' 'Silver Queen,' or 'Ambrosia'). Buy 1–2 lbs per 100 sq ft—about 12–15 seeds per plant (though not all will sprout). Opt for organic, non-GMO seeds if preferred.
- ● Garden Soil: Well-draining, fertile loam with a pH of 6.0–7.0. Amend with compost or aged manure (2–3 inches mixed into the top 6–12 inches of soil).
- ● Fertilizer: Balanced fertilizer (10-10-10 or 5-10-10): Apply 1 lb per 100 sq ft at planting and side-dress with nitrogen-rich fertilizer (e.g., blood meal or 34-0-0) when plants reach 6–12 inches tall.
- ○ Optional: Slow-release organic fertilizer (like fish emulsion) for eco-friendly growth.
- ● Watering Supplies: A hose with a gentle spray nozzle or drip irrigation system (corn needs 1–2 inches of water per week, especially during tasseling and ear formation).
- ● Garden Tools: Trowel or transplanting spade
- ● Garden rake (for smoothing soil)
- ● Pruners (for removing dead leaves or pests)
- ● Measuring tape or ruler (to space plants 12–18 inches apart in rows 2–4 feet apart)
- ● Mulch: Straw or grass clippings to retain moisture and suppress weeds.
- ● Trellis or Stakes: For pole beans or climbing varieties planted alongside corn (a classic "Three Sisters" garden combo!).
- ● Row Covers: Lightweight fabric to protect seedlings from pests or late frosts.
- ○ Corn Glue or Pollination Aid: A mix of sugar water + corn silk (optional for hand-pollination in poor wind conditions).
- ● Harvest Tools: Sharp knife or pruners for clean cuts when harvesting.
- ● Sunlight: A full-sun spot (6–8+ hours of direct sunlight daily)—corn is a sun-lover!
- ● Space: Minimum 100 sq ft for 10–12 plants (or 1 plant per 1 sq ft in tight spaces).
- ● Warm Soil: Wait until soil temps reach 60°F+ (use a soil thermometer if unsure).
- ● Windbreaks: Plant near fences or walls to protect tall stalks from toppling.
Step-by-step instructions for growing corn in your garden
Here's the foolproof method I rely on for growing sweet, sturdy corn stalks that produce ears worthy of braising.
🌱 Step 1: Prepare the Soil and Plant Seeds
Corn thrives in loose, fertile soil with a pH between 6.0 and 6.8. Work the 3 gallons of compost into the top 12 inches of soil before planting. This ensures roots have room to spread and access nutrients. I like to add 1 cup of 10-10-10 fertilizer per 10 feet of row at planting time for an extra boost.
Plant seeds 1 inch deep and 4 inches apart in rows spaced 3 feet apart. Corn needs good airflow to prevent fungal diseases, so resist the urge to crowd. For 4 plants, you'll need about 12 feet of row space. If your growing season is short, plant 2-3 varieties with staggered maturity dates to extend harvest time.
💧 Step 2: Water Deeply and Maintain Moisture
Keep the soil consistently moist but never soggy—corn roots need 1-2 inches of water per week, especially during tasseling and ear formation. Water deeply 2-3 times per week until the top 4 inches of soil feel dry. Avoid overhead watering after seedlings emerge; instead, water at the base to prevent fungal spores from splashing onto leaves.
Here's the thing—corn is sensitive to drought stress. If the soil dries out completely at any growth stage, ears may develop poorly or kernels may be shriveled. You'll know moisture is right when the soil surface looks slightly damp but not glistening.
☀️ Step 3: Provide Full Sun and Monitor Growth
Corn demands full sun (6-8 hours daily) for proper development. Plant in the warmest, sunniest spot in your garden, as even slight shade can reduce ear size. As plants grow, they'll develop silk strands—these appear when the plant is ready for pollination. If silks dry out before pollination (usually 7-10 days after emergence), gently water them to revive.
Watch for tassels (the pollen-producing stalks) to emerge from the top of the plant. This signals that pollination is imminent. If you planted 4 plants, you'll need at least 2 plants for successful pollination—corn is wind-pollinated, but a small block improves cross-pollination.
✂️ Step 4: Fertilize and Thin for Optimal Harvest
When plants reach 12-18 inches tall, apply ½ cup of 10-10-10 fertilizer per 10 feet of row to encourage strong stalk development. Side-dress the fertilizer 2 inches away from the stalk to avoid burning roots. Corn is heavy feeders, so don't skimp on nutrients—this is what builds those plump, sweet kernels.
Thin seedlings to 12 inches apart when they reach 6 inches tall. This ensures each plant has enough nutrients and space to develop properly. You'll see stronger stalks and larger ears when plants aren't competing for resources.
⏰ Step 5: Harvest at Peak Ripeness
Corn is ready to harvest when the silks turn brown and the kernels are plump and milky when pierced with a fingernail. For sweet corn, harvest in the morning when sugars are at their peak. Twist the ear sharply to avoid damaging the stalk. If you miss the window, ears will turn starchy and tough within 2-3 days.
For storage, keep ears in the fridge for up to 5 days or blanch and freeze for longer preservation. I always save a few ears to dry for cornmeal—just let them dry on the stalk in a warm, dry place before husking and grinding.
Tips & tricks for perfect corn growth
Here's what I've learned from years of growing corn—these tricks will help you avoid common pitfalls and maximize your harvest.
Soil Preparation Secret: Before adding your 3 gallons of compost to the top 12 inches of soil, consider mixing in a handful of wood ash to help raise the pH slightly if your soil tests on the acidic side. I've found that corn especially benefits from a pH between 6.0 and 6.8, and this small adjustment can make all the difference in stalk strength and ear development. The compost alone won't always be enough to shift the pH if your soil is naturally acidic.
Planting Layout Strategy: When planting your 4 plants in rows 3 feet apart, consider creating a small square or rectangle rather than a straight line. This creates a more natural windbreak and improves cross-pollination between plants. The 12 feet of row space you'll need for 4 plants becomes a 12-foot square when arranged this way, and you'll notice the tassels pollinate more effectively, leading to better ear set.
Watering Technique: For the 1-2 inches of water per week requirement, I've found that using soaker hoses or drip irrigation at the base of plants works best. This delivers water directly to the roots while avoiding the fungal risks of overhead watering after seedlings emerge. The key is maintaining that slightly damp soil surface—you'll know you're doing it right when the top 4 inches feel moist but not soggy to the touch.
Pollination Boost: If you notice your silks drying out before pollination occurs (usually around 7-10 days after emergence), try gently shaking the plants during dry periods. This mimics natural wind pollination. For even better results, plant at least 2 varieties with different maturity dates—this staggered approach not only extends your harvest window but also improves cross-pollination between different genetic lines, often resulting in larger, sweeter ears.
Pro Tips for Grow Corn In A Garden
- Here's what I've learned from years of growing corn—these tricks will help you avoid common pitfalls and maximize your harvest.
- Soil Preparation Secret: Before adding your 3 gallons of compost to the top 12 inches of soil, consider mixing in a handful of wood ash to help raise the pH slightly if your soil tests on the acidic side.
- Planting Layout Strategy: When planting your 4 plants in rows 3 feet apart, consider creating a small square or rectangle rather than a straight line.
Frequently asked questions
Got questions about growing corn in your garden? You're not alone! Here are answers to some of the most common queries to help you cultivate a thriving corn patch with confidence.
How close together can I plant corn seeds?
Space corn seeds 1–2 inches apart in rows 2–4 feet apart (closer for bush varieties, wider for pole types). Overcrowding leads to weak stalks, poor pollination, and disease. If space is tight, try block planting (planting in squares instead of rows) to improve cross-pollination.
When is the best time to harvest corn?
Harvest when kernels are plump, milky-white, and firm—usually 18–22 days after pollination (or ~70–100 days after planting, depending on variety). Test readiness by piercing a kernel with your fingernail: if it oozes creamy liquid, it’s perfect! Corn loses sweetness quickly, so harvest promptly.
What are the most common corn pests, and how do I prevent them?
Watch for corn earworms, cutworms, and corn rootworms. Use row covers early in the season, practice crop rotation, and handpick pests. For rootworms, plant Bt corn varieties or interplant with marigolds to deter them. Healthy soil = stronger stalks that resist damage!
Can I grow corn in containers or small spaces?
Yes! Choose bush varieties (like 'Golden Bantam' or 'Temptation') and use 5-gallon containers or raised beds. Ensure containers are at least 12 inches deep and provide full sun. Pollination may be trickier in small spaces, so plant multiple varieties or hand-pollinate with a paintbrush if needed.
Why did my corn tassels dry up before the silks appeared?
This usually means poor pollination, often caused by heat stress (above 90°F), drought, or overcrowding. To fix it, water deeply during tasseling (when silks emerge), thin plants for better airflow, and consider shading cloth in extreme heat. If silks appear but dry quickly, hand-pollinate by transferring pollen from tassels to silks with a brush.
Wrapping up and next steps
Growing corn in your garden is a rewarding journey that brings fresh, homegrown goodness to your table! With the right soil, sunlight, and care, you’ll soon be harvesting sweet, golden ears—perfect for grilling, boiling, or even popping into a pot of chili.
Start small, experiment with varieties, and don’t forget to enjoy the process along the way.
Ready to take the next step? Plant your seeds this season and watch your garden transform into a cornfield oasis! 🌽✨