Container Gardens
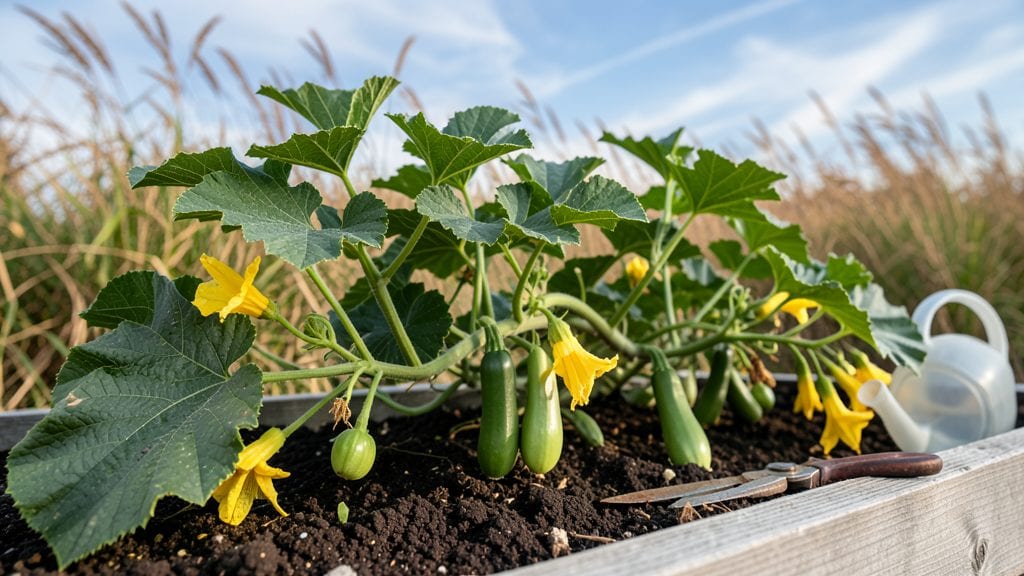
A container garden squash thrives on balconies and patios—no backyard required—so I’ve grown bush varieties in 5-gallon buckets for years, and the results are surprisingly productive when you pick the right types. 🌱 The key is choosing compact varieties like 'Eight Ball' or 'Patio Star' that stay manageable instead of sprawling vines.
You’ll need containers at least 10-15 gallons for each plant, with drainage holes to prevent soggy roots. Fill them with a mix of potting soil and compost—squash loves rich, well-draining soil that stays moist but never waterlogged.
Place your containers in full sun (6+ hours daily) and expect vines to spread 2-3 feet wide, though pruning keeps them tidy.
By mid-summer, you’ll be harvesting 1-2 pounds of squash per plant weekly, with fruits ready in as little as 50 days for bush types. The plants thrive with consistent watering (1-2 inches per week) and occasional fertilizer, and they’re less prone to pests than their vine-heavy cousins.
Overcrowding is the biggest mistake—space plants 12-18 inches apart to avoid competition.
This method works for urban apartments, rooftops, or even sunny windowsills with grow lights. The same principles apply whether you’re growing zucchini, pattypan, or acorn squash—just adjust container size for larger varieties. Ready to grow?
📚 In This Guide
- What you need
- Instructions
- Tips and common mistakes
- Wrapping up and next steps
What you need
- ● Container: A 5-gallon bucket or larger (minimum 10-15 gallons for bush varieties like ‘Eight Ball’ or ‘Jackpot’; 20+ gallons for vining types like ‘Straightneck’). Ensure it has drainage holes.
- ● Potting Mix: A high-quality, well-draining container mix (avoid garden soil—it compacts!). Aim for 3-4 cubic feet per container.
- ● Squash Seeds or Seedlings: Bush varieties (compact): 1-2 seeds per container (e.g., ‘Eight Ball’, ‘Jackpot’, ‘Table Queen’).
- ● Vining varieties (larger containers): 1 seed per container (e.g., ‘Straightneck’, ‘Cocozelle’).
- ● Fertilizer: A balanced, slow-release granular fertilizer (10-10-10 or 5-5-5) or compost (1-2 cups per container at planting).
- ● Mulch: Straw or shredded leaves (2-3 inches) to retain moisture and suppress weeds.
- ● Gloves (gardening or nitrile)
- ● Trowel or small shovel for planting
- ● Watering can or hose with gentle spray nozzle
- ● Pruners or scissors (for harvesting and occasional trimming)
- ○ Support (optional): A small trellis or cage (for vining varieties, though many bush types don’t need it!).
- ● Sunlight: 6-8+ hours of direct sun daily (south-facing spot is ideal!).
- ● Warmth: Soil temps should be 60°F+ before planting (use a soil thermometer if unsure).
- ● Space: Ensure containers are 12+ inches apart to allow airflow and prevent disease.
- ● Patience: Squash takes 50-70 days to mature—plan ahead for a summer harvest! 🕒
Step-by-step instructions for growing compact squash in containers
Here’s how to cultivate bush varieties that produce abundant fruit without sprawling into your yard.
🪴 Step 1: Select the Right Containers and Varieties
Choose 5-gallon containers with drainage holes—squash roots need room to spread, but not too much. I recommend bush varieties like 'Eight Ball' or 'Patio Star' squash, which stay compact and produce fruit in 4-6 weeks instead of sprawling vines. These work perfectly for patios and balconies.
Place containers on a drip tray or saucer to catch excess water and prevent messes. If your space gets hot, position pots where they’ll get morning sun and afternoon shade—this prevents the soil from overheating and drying out too quickly.
🌱 Step 2: Prepare Soil and Plant Seeds
Fill containers with sterile potting mix mixed with compost (about 20% compost by volume). Squash roots need loose, well-draining soil to prevent rot. I plant 2-3 seeds per container—they germinate quickly, and you can thin later. Press seeds 1 inch deep and cover lightly with soil.
Water gently until the soil is evenly moist but not soggy. Keep containers in a warm spot (70-80°F) until germination, which usually happens in 5-10 days. Avoid overwatering now—too much moisture can cause seeds to rot before sprouting.
☀️ Step 3: Provide Light and Support Growth
Once seedlings emerge, move containers to a sunny spot with at least 6-8 hours of direct light daily. If your space lacks full sun, supplement with a grow light for 12-14 hours per day. You’ll see first true leaves (not the initial seed leaves) in about 2 weeks—this is your cue to start fertilizing lightly.
When seedlings are 4 inches tall, thin to the strongest plant per container. Use a small amount of balanced fertilizer (10-10-10) to encourage bushy growth. Watch for yellowing leaves—this often signals overwatering or nutrient deficiency, so adjust accordingly.
💧 Step 4: Water and Maintain Through Fruiting
Water deeply when the top inch of soil feels dry, aiming for 1 gallon per container every 2-3 days in hot weather. Squash plants need consistent moisture, but soggy soil invites disease. Mulch the soil surface with straw or shredded leaves to retain moisture and keep roots cool.
When flowers appear, hand-pollinate by gently shaking the plant in the morning—this mimics bees and ensures fruit set. Harvest small squash (4-6 inches long) for best flavor, or let them grow larger if you prefer. Prune any yellow or diseased leaves immediately to keep the plant healthy.
✂️ Step 5: Extend the Season and Prevent Pests
As temperatures drop, protect containers with frost cloth if nights dip below 50°F. Squash is sensitive to cold, so bring pots indoors or to a sheltered spot before the first frost. I’ve kept plants producing well into fall by covering them at night and uncovering in the morning.
Watch for squash vine borers—tiny holes in leaves or wilting vines mean it’s time to act. Remove affected leaves and treat with neem oil if needed. With proper care, your compact squash plants will reward you with plenty of fruit in a fraction of the space a traditional garden requires.
Tips & tricks for perfect container garden squash
These game-changing insights will help you maximize your compact squash harvest without the common pitfalls that trip up beginners.
Container Selection: While 5-gallon containers are ideal, you can also use 7-gallon containers if you want to grow slightly larger varieties like 'Bush Delicata.' Just ensure they have drainage holes—this prevents root rot, which is the #1 killer of container-grown squash. Place containers on casters if possible so you can easily rotate them to ensure even sunlight exposure throughout the day.
Soil Preparation: The 20% compost ratio is critical for nutrient balance, but don't skimp on the sterile potting mix—regular garden soil compacts too much and drains poorly in containers. I like to add a handful of perlite to the mix for extra aeration, especially if your potting soil feels dense. This helps prevent the dreaded "soggy bottom" that leads to root disease.
Light Management: The 6-8 hours of direct sunlight is non-negotiable, but here's the trick: if you're using grow lights, position them 6-12 inches above the plants and adjust as they grow. Most grow lights lose intensity over time, so you might need the full 12-14 hours during cloudy days or in winter months. Monitor leaf color—pale yellow leaves mean more light is needed, while crispy edges signal too much intensity.
Watering Strategy: The 1-gallon-per-container guideline works well, but timing matters more than volume. Water in the morning so leaves have all day to dry—this prevents fungal diseases like powdery mildew, which thrives in damp conditions. I use a moisture meter to check soil dryness rather than relying on the "top inch" test, especially in hot weather when evaporation happens quickly. Mulching with straw isn't just about moisture retention—it also keeps soil temperatures stable, which is crucial for squash roots that prefer consistent conditions.
Pro Tips for Container Garden Squash
- These game-changing insights will help you maximize your compact squash harvest without the common pitfalls that trip up beginners.
- Container Selection: While 5-gallon containers are ideal, you can also use 7-gallon containers if you want to grow slightly larger varieties like 'Bush Delicata.'
- Soil Preparation: The 20% compost ratio is critical for nutrient balance, but don't skimp on the sterile potting mix—regular garden soil compacts too much and drains poorly in containers.
Frequently asked questions
about growing squash in containers—because even the smallest garden deserves a harvest!What’s the best type of squash for containers?
Look for bush varieties like Eight Ball or Patio Star—they stay compact (under 2 ft tall) and don’t need trellises. Avoid vining types like zucchini or spaghetti squash unless you have a large container (5+ gallons) and space for sprawling vines.
When should I plant squash in containers?
Wait until after the last frost and soil temps hit 60°F+ (use a soil thermometer to check!). Start seeds indoors 2–3 weeks before transplanting, or buy young plants from a nursery. Squash is heat-loving—plant too early, and it’ll sulk!
How often do I need to water container-grown squash?
Containers dry out fast—check soil daily! Water when the top inch is dry, aiming for 1–2 inches per week. Use a self-watering container or drip irrigation to keep moisture steady. Pro tip: Mulch with straw to retain water and prevent weeds.
Why are my squash leaves turning yellow?
Yellow leaves usually mean overwatering, nutrient deficiency, or pests. Check for:
- Root rot: Ensure containers have drainage holes and aren’t soggy.
- Nitrogen deficiency: Feed with a balanced fertilizer (like 10-10-10) every 2–3 weeks.
- Squash bugs/squash vine borers: Handpick pests or use row covers early in the season.
Can I grow squash in containers if I live in a small apartment?
Choose dwarf or bush varieties and place containers on a balcony, patio, or even a sunny windowsill (south-facing). Just ensure:
- Containers are at least 5 gallons for one plant.
- They get 6+ hours of sunlight daily.
- You rotate containers weekly for even growth.
Bonus: Compact varieties like Bush Delicata or Sweet Dumpling are perfect for tiny spaces!
Wrapping up and next steps
Growing squash in containers isn’t just possible—it’s a rewarding way to enjoy fresh, homegrown produce, even in the smallest of spaces! 🌱 Whether you’re a seasoned gardener or just starting out, compact varieties like ‘Eight Ball’ or ‘Patio Star’ prove that big harvests come in tiny packages.
With the right container, soil, and care, you’ll be savoring your own homegrown squash in no time.
Ready to take the next step? Start small—pick your favorite variety, grab a container, and get planting! Once you see those first vines sprawl, you’ll be hooked on the joy (and flavor!) of container gardening. Happy growing! 🌿