Light Requirements
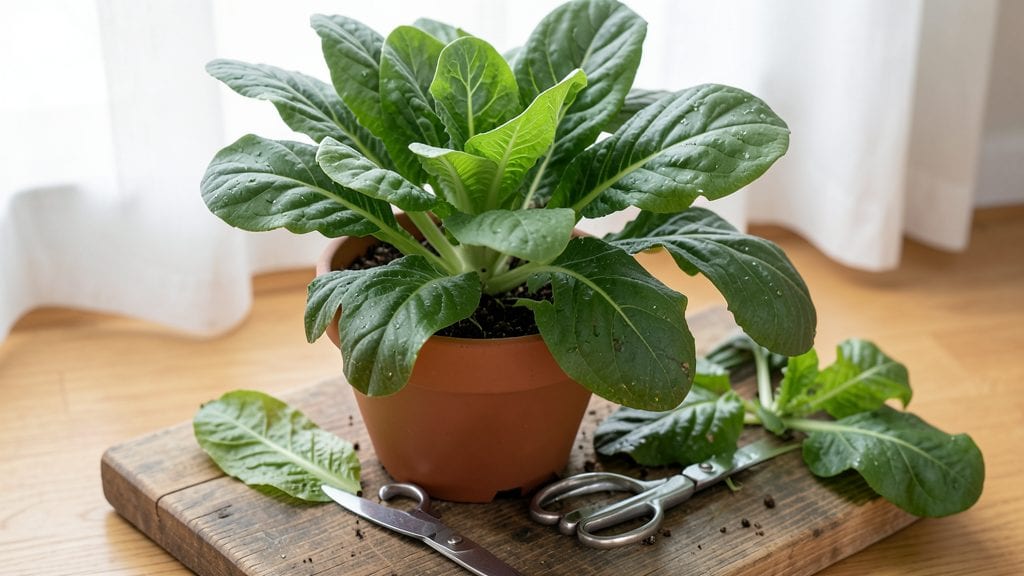
My indoor kitchen garden transformed from a sad basil plant to a thriving herb and microgreen station—all within a 3-foot windowsill. 🌱 The key? Matching the right plants to your light, not the other way around.
I’ve grown everything from crispy microgreens to fragrant thyme in spaces that get just a few hours of sunlight daily.
You don’t need fancy grow lights or deep pockets to start—just a sunny spot, a few shallow containers, and plants that thrive in low light.
Basil, parsley, and chives grow like weeds in a south-facing window, while microgreens like radish or broccoli sprout in as little as 3 days under a basic LED bulb. The best part? Everything’s within arm’s reach when you’re cooking.
By summer’s end, you’ll have snipped enough fresh herbs to make a year’s worth of meals, and your kitchen will smell like a Mediterranean market. The greens add vibrant color to countertops, and the convenience of grabbing cilantro straight from the windowsill changes how you cook forever.
Works for apartments, condos, or even dark kitchens—just adjust the light and plant choices. Let’s get growing!
📚 In This Guide
- What you need
- Instructions
- Tips and common mistakes
- Wrapping up and next steps
What you need
- ● Containers: 1–3 6–12-inch deep pots or planters with drainage holes (for herbs/greens)
- ● 1 shallow tray (4–6 inches deep) for microgreens or sprouts
- ● Growing Medium: High-quality potting mix (sterilized, seed-starting blend preferred)
- ○ Optional: Coco coir or hydroponic clay pellets for soilless setups
- ● Seeds or Seedlings: Herb seeds (basil, parsley, chives) or pre-sprouted seedlings (faster growth!)
- ● Leafy greens like lettuce, spinach, or kale (choose compact varieties)
- ● Lighting: 1 grow light (LED, 12–15W, full-spectrum) or a south-facing window with 4+ hours of direct light
- ● Tools: 1 small trowel or spoon for planting
- ● 1 spray bottle (for gentle watering)
- ● 1 pair of scissors or pruning shears (for harvesting)
- ● Self-watering planters (for busy gardeners!)
- ● Humidity dome or plastic wrap (to retain moisture while sprouting)
- ● pH test kit (to monitor soil health, ideal pH: 6.0–7.0)
- ● Fertilizer (balanced 10-10-10 or organic options like fish emulsion)
- ● Decorative labels (to track plant varieties)
Step-by-step instructions for starting an indoor kitchen garden
Here’s how to turn any window into a thriving herb and greens garden—no black thumb required.
🌱 Step 1: Choose the Right Containers and Soil
Start with 4 small pots (6-8 inches deep) that have drainage holes—herbs and greens despise soggy roots. I like terra cotta because it breathes, but plastic works too if you add extra perlite to the mix. Fill each pot with 2 gallons of sterile potting mix (never garden soil—it’s too dense). Tap the pot gently to settle the soil, then moisten it until it’s damp but not dripping.
This ensures roots get air and water without suffocating. If your mix feels dry after a few days, add a sprinkle of water—just enough to keep the top inch slightly damp. Overwatering here is the fastest way to kill seedlings.
🌿 Step 2: Plant Your Seeds or Transplants
For seeds, follow the packet’s depth (usually ¼ inch deep for herbs, ⅛ inch for greens like lettuce). I like to plant 2-3 seeds per pot—once they sprout, thin to the strongest seedling to avoid crowding. If using transplants, dig a hole the same depth as the root ball, place the plant in, and firm the soil around it.
Label each pot immediately—herbs and greens look identical until they mature. I use toothpicks and a Sharpie. Water gently right after planting to settle the soil and encourage root contact. Avoid soaking the soil; you’re aiming for even moisture, not a swamp.
☀️ Step 3: Position for Maximum Light Without Scorching
Place your pots on a south- or west-facing windowsill where they’ll get 4-6 hours of direct sunlight daily. If your window is north-facing, supplement with a grow light (LED bulbs work best) positioned 4-6 inches above the plants for 12-14 hours a day. Rotate pots a quarter turn every few days so plants grow straight, not lopsided.
Watch for signs of too much light—leaves turning yellow or crispy at the edges means the sun is too intense. Move the pot back a few inches or shade it with a sheer curtain for a few hours. Leggy, pale stems? That’s a sign of insufficient light—time to bring in the grow light.
💧 Step 4: Water and Fertilize Like a Pro
Water when the top inch of soil feels dry to the touch—this keeps roots healthy without drowning them. I use a spray bottle for delicate greens like basil or parsley and a small watering can for heartier herbs. Water at the base, not overhead, to prevent fungal diseases. After watering, empty any excess from the saucer to avoid root rot.
Feed your plants with ½ teaspoon of balanced fertilizer (10-10-10) mixed into the soil every 4-6 weeks. You’ll see the difference in leafy growth and vibrant color. Over-fertilizing here is worse than under-fertilizing—it burns roots and leads to salty soil.
✂️ Step 5: Harvest and Maintain for Long-Term Growth
Start harvesting herbs when they’re 3-4 inches tall—this encourages bushier growth. Pinch off leaves just above a set of smaller leaves or a node. For greens like lettuce, harvest outer leaves first, leaving the inner ones to keep growing. Use clean scissors or fingers to avoid damaging stems.
Replace harvested pots with new plants every 8-12 weeks to keep your kitchen garden productive. If leaves yellow or wilt, it’s usually a sign of overwatering or nutrient depletion. Trim back leggy growth to encourage compact, bushy plants. With this routine, you’ll have fresh herbs and greens year-round—no grocery store needed.
Tips & tricks for perfect indoor kitchen gardens
A few simple tricks will help you avoid common mistakes and grow herbs and greens that rival your favorite farmers' market finds.
Container Selection Tip: Terra cotta pots are my go-to because they wick away excess moisture, but if you choose plastic, add a handful of perlite to the soil mix for better drainage. I've learned the hard way that skipping this step leads to root rot—especially with herbs like basil that hate soggy feet. The 6-8 inch depth is perfect because it gives roots room to spread without overwhelming the plant.
Lighting Strategy: That 4-6 hours of sunlight is non-negotiable for most herbs and greens. If your window doesn't get enough light, invest in a basic LED grow light—just position it 4-6 inches above your plants for those critical 12-14 hours. Pro tip: I rotate my pots a quarter turn every few days so they don't grow lopsided toward the light. You'll notice the difference in just a week!
Watering Wisdom: The "top inch dry" rule is your best friend here. I use my finger to check moisture—if it feels dry down to that depth, it's time to water. For delicate greens like parsley, I've found a spray bottle works best to avoid disturbing the soil. And here's what nobody tells you: always empty that saucer after watering. I've seen root rot ruin perfectly good plants because of ignored saucers.
Fertilizer Timing: That ½ teaspoon of balanced fertilizer every 4-6 weeks makes all the difference. I mix it right into the top inch of soil when I water—never more, never less. Too much fertilizer burns roots, and you'll see it in yellowing leaves. I've ruined three batches by overdoing it, so trust me on this: less is more with indoor gardening.
Pro Tips for Indoor Kitchen Gardens
- A few simple tricks will help you avoid common mistakes and grow herbs and greens that rival your favorite farmers' market finds.
- Container Selection Tip: Terra cotta pots are my go-to because they wick away excess moisture, but if you choose plastic, add a handful of perlite to the soil mix for better drainage.
- Lighting Strategy: That 4-6 hours of sunlight is non-negotiable for most herbs and greens.
Frequently asked questions
What’s the easiest way to start an indoor kitchen garden with limited sunlight?
Opt for low-light herbs like parsley, cilantro, or mint, and place them near a north-facing window (or under grow lights). If sunlight is scarce, try hydroponic kits or self-watering planters—they’re beginner-friendly and efficient!
How long does it take to see results (like fresh herbs or greens)?
Most herbs sprout in 1–2 weeks and can be harvested in 4–6 weeks, depending on the variety. Leafy greens like spinach or kale take slightly longer (6–8 weeks) but reward you with fresh, homegrown meals faster than store-bought!
Can I grow anything indoors, or are there plants I should avoid?
Stick to compact, fast-growing plants like basil, chives, or microgreens. Avoid root vegetables (carrots, potatoes) or large fruiting plants (tomatoes, peppers)—they need more space and light. Pro tip: Check seed packets for “indoor-friendly” labels!
My indoor plants look sad—what’s the fix for yellow leaves or wilting?
Yellow leaves often mean overwatering (let soil dry slightly between waterings) or nutrient deficiency (use a balanced liquid fertilizer every 4–6 weeks). Wilting? Check for underwatering or root rot (if soil smells funky, repot in fresh mix).
What’s the best setup for small apartments or kitchens with no extra space?
Use vertical gardens (wall-mounted planters), hanging pockets, or stackable tiered trays to maximize space. Even a windowsill herb garden with 6–8-inch pots works—just rotate plants weekly for even light exposure!
Still stumped? Drop your question below—we’re happy to help you grow!
Wrapping up and next steps
Indoor kitchen gardens are a bright, rewarding way to bring fresh flavors and greens into your home—no matter how much sunlight you have! 🌱 Whether you’re growing herbs in a sunny kitchen or leafy greens under grow lights, the key is starting small, staying consistent, and enjoying the process.
With the right setup, you’ll soon be harvesting homegrown goodness for meals, teas, and garnishes.
Ready to dive in? Pick one plant to start this week—maybe a resilient basil or crisp lettuce—and watch your green thumb grow! 🌿 Review the essentials or browse common questions to take your first step.