Container Gardens
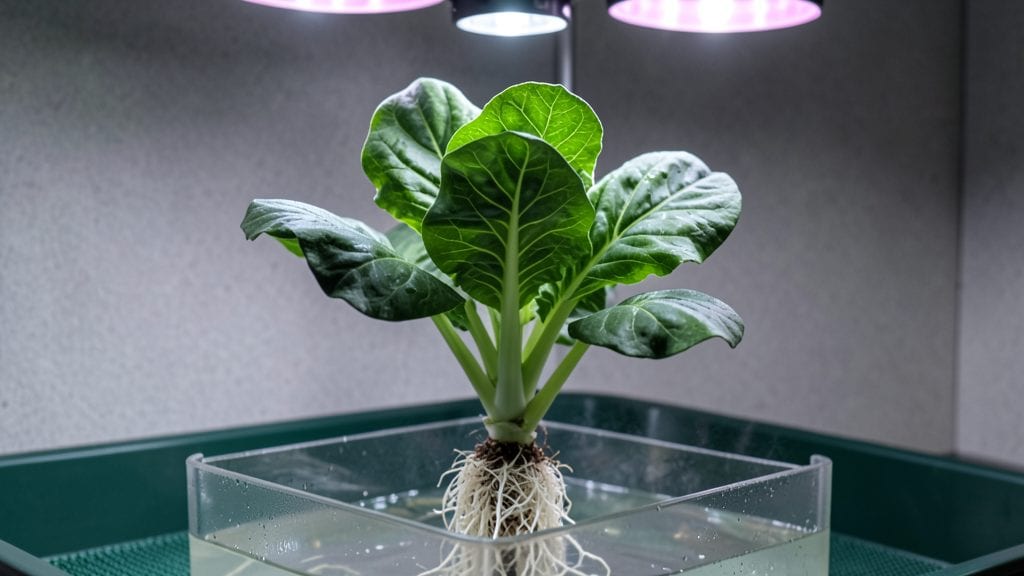
Indoor gardening hydroponics turns herbs into speedy superstars—my first basil plant sprouted roots in water and reached harvest size in just three weeks, beating any potted soil version I’d tried before. ✨ The secret lies in cutting out the guesswork about soil quality and moisture while giving plants exactly what they need: clean water, balanced nutrients, and perfect light.
You’ll need minimal gear: a clear container for roots, a basic nutrient solution (no mixing skills required), and a simple LED grow light that fits over your setup. The best beginner systems—like deep water culture or Kratky—use no pumps or timers, so they’re foolproof even for black thumbs.
Space-saving designs let you grow on countertops or windowsills, with no mess and zero weeds.
By week four, you’ll be snipping fresh cilantro, mint, and basil for meals—no store-bought herbs needed. The plants stay compact, productive, and pest-free, and you’ll avoid the heartbreak of wilted pots or fungal diseases that plague soil gardens.
Plus, the science behind it is simpler than you’d think once you see how roots thrive in water.
Works for apartments, offices, or even dorm rooms—just adjust your light and nutrient schedule. Here’s how to skip the trial-and-error and get results that’ll make your kitchen smell like a Mediterranean market in no time.
📚 In This Guide
- What you need
- Instructions
- Tips and common mistakes
- Wrapping up and next steps
What you need
- ● Hydroponic System: A pre-made kit (like the AeroGarden or Click & Grow) or a DIY setup (5-gallon bucket + net pots).
- ● Growing Medium: Hydroton (clay pebbles) or rockwool cubes (10-20 pieces, depending on plant count).
- ● Nutrient Solution: Hydroponic herb-specific nutrients (e.g., General Hydroponics Flora Series or pre-mixed like Masterblend 4-18-38).
- ● Water: pH-balanced (5.5–6.5) and room-temperature (1 gallon per plant).
- ● Herb Seedlings or Cuttings: Fast-growing options like basil, mint, or parsley (3–5 plants to start).
- ● Air Pump + Stone: For oxygenation (1 small pump + air stone).
- ● pH Test Kit: Digital or liquid drops (to monitor water pH).
- ● Timer: For automating lights (12–16 hours/day).
- ● Scissors/Pruners: For trimming herbs (sterilized!).
- ○ Spray Bottle: For misting plants (optional but helpful).
- ● LED Grow Lights: Full-spectrum (e.g., Samsung LM300) or sunlight if near a window.
- ● Trowel/Spoon: For planting seeds or adjusting medium.
- ● Food Storage Container: To repurpose as a DIY hydroponic reservoir (if building from scratch).
Step-by-step instructions for fast-growing herbs in hydroponics
Here’s how to grow lush herbs in water in just weeks—no soil, no mess, just vibrant green growth.
🪴 Step 1: Set Up Your Hydroponic System
Start by assembling your hydroponic kit, ensuring all components are clean and free of debris. Most systems use a reservoir, net pots, and a grow light—fill the reservoir with 4 gallons of water and add the hydroponic nutrient solution as directed (usually 1 teaspoon per gallon). I like to mix it gently with a spoon to dissolve completely before adding plants.
Place the net pots into the system’s holes, making sure they’re snug but not forced. The roots will grow downward, so proper spacing is key—crowding leads to weak stems and poor nutrient distribution. If your system uses a water pump, test it now to ensure steady circulation. You’ll know it’s working when you see a gentle flow without splashing.
🌱 Step 2: Plant Your Herb Starts
Choose healthy herb starts with firm stems and vibrant leaves—basil, mint, and parsley thrive in hydroponics. Remove the plants from their nursery pots and gently rinse off any soil clinging to the roots. This step is critical: leftover soil can clog the net pots and block oxygen flow to the roots.
Place each plant into a net pot, ensuring the roots dangle freely into the water. Press the pot lightly into the hole until it sits securely, but don’t force it—roots need room to expand. For 4 plants, use the 4 net pots provided. Once planted, let the system run for 24 hours without disturbing them. This gives roots time to adjust before you check for stability.
💧 Step 3: Monitor Water and Nutrients Daily
Hydroponics demands consistency—check the water level every 2 days and top off with plain water if it drops below the recommended line (usually marked on the reservoir). The nutrient solution should stay at the same strength, but if you notice cloudiness or algae, drain and replace half the water immediately. I’ve found that keeping the reservoir covered helps prevent debris buildup.
Watch for signs of nutrient burn (yellowing leaves) or deficiency (pale stems). If leaves darken or curl, the nutrient mix may be too strong—dilute it with fresh water. Herbs grow fastest when the water stays 65-75°F, so avoid placing the system near drafts or direct heat sources. You’ll see new growth within 7-10 days if everything is balanced.
☀️ Step 4: Provide Optimal Light for Fast Growth
Herbs need 12-16 hours of light daily for robust growth. If using a grow light, position it 6-12 inches above the plants and set a timer for 14 hours on, 10 hours off. I adjust the height weekly—lower it as stems grow taller to prevent legginess. Natural light works too, but a south-facing window rarely provides enough intensity, so supplement with a grow bulb if needed.
You’ll know the light is perfect when leaves stay dark green and compact. If stems stretch upward (leggy growth), the light is too far away or too weak. Rotate the plants quarter-turn daily so they grow evenly toward the light source. Within 3-4 weeks, you’ll harvest your first leaves—just pinch off what you need and watch the plant bush out even more.
✂️ Step 5: Harvest and Prune for Continuous Yield
Harvest herbs by snipping leaves just above a leaf node (where new growth emerges). This encourages bushier plants and prevents woody stems. Basil, for example, responds best to regular harvesting—pinch off the top sets of leaves when they reach 3 inches tall. Mint and parsley can handle heavier harvests, but never take more than one-third of the plant at once.
After harvesting, check the roots for any signs of stress (black or mushy areas). If you spot issues, remove the plant, trim the damaged roots, and replant it in fresh nutrient solution. With proper care, your hydroponic herbs will keep producing for months. The key is consistency—stick to the routine, and you’ll enjoy fresh, soil-free greens year-round.
Tips & tricks for perfect indoor hydroponic herbs
These game-changing insights will help you skip the trial-and-error phase and grow herbs faster than you thought possible.
System Setup: I can't stress enough how important it is to thoroughly clean your hydroponic kit before assembly. Residual soap or debris can introduce harmful bacteria to your nutrient solution. For that initial 4 gallons of water, use room-temperature water—cold water can shock the roots when you add your plants. Also, when mixing the nutrient solution, stir gently with a clean spoon to avoid creating bubbles that disrupt oxygen flow to the roots.
Root Stabilization: That 24-hour initial period after planting is your plants' critical adjustment phase. During this time, avoid any disturbances—no moving the system, no checking the roots, nothing. Think of it like a newborn baby; they need complete quiet to settle in. You'll know they're stable when you see new growth emerging after those 7-10 days mentioned in Step 3.
Light Optimization: The 12-16 hour light requirement might seem broad, but here's the secret: start with 14 hours and adjust based on your plants' response. If you notice leaves stretching toward the light (leggy growth), increase the duration by 30 minutes. If leaves appear burnt or crispy, reduce by 30 minutes. And that quarter-turn rotation? Do it religiously—it prevents uneven growth that can make your herbs look lopsided.
Nutrient Management: When checking water levels every 2 days, use a clean measuring cup to avoid cross-contamination. The 65-75°F range is ideal, but if your home tends to be cooler, consider using a small aquarium heater (set to 72°F) in the reservoir. For the nutrient solution, if you're seeing algae growth, it's not just about replacing half the water—also wipe down the reservoir walls with a vinegar solution (1:1 ratio) to kill any algae spores before refilling.
Pro Tips for Indoor Gardening Hydroponics
- These game-changing insights will help you skip the trial-and-error phase and grow herbs faster than you thought poss...
- System Setup: I can't stress enough how important it is to thoroughly clean your hydroponic kit before assembly. Resi...
- Root Stabilization: That 24-hour initial period after planting is your plants' critical adjustment phase. During this...
Frequently asked questions
Got questions about indoor hydroponics? You’re not alone! Here are answers to some of the most common concerns to help you grow herbs like a pro—soil-free and stress-free.
What herbs grow best in hydroponics?
Fast-growing, shallow-rooted herbs thrive in hydroponics! Start with basil, mint, parsley, cilantro, and chives. These love water-based systems and produce harvests in 2–4 weeks. Avoid heavy-rooted plants like rosemary or thyme—they need more support.
How long does it take to see results?
With the right setup, you’ll see visible growth within 7–10 days! Herbs like basil and cilantro can be harvested in as little as 3–4 weeks, while heartier plants (e.g., parsley) take 6–8 weeks. Patience pays off—consistent light and nutrients speed things up!
Do I need fancy equipment, or can I DIY?
No fancy gadgets required! A simple 5-gallon bucket, net pot, hydroponic nutrient solution, and a small water pump are all you need. For beginners, a Kratky method (no pump!) or a deep water culture (DWC) system works great with minimal setup.
What if my herbs look sad or stop growing?
Don’t panic—hydroponic hiccups are fixable! Yellow leaves? Check pH (5.5–6.5) or nutrient levels. Brown tips? Reduce humidity or adjust light (12–16 hours/day). Wilting? Ensure roots are submerged in water. Most issues stem from over/under-watering or light imbalance—adjust and observe!
Can I reuse hydroponic water?
Yes, but with caution! Drain and replace nutrient solution every 2–4 weeks to prevent algae or salt buildup. For the Kratky method, water is one-and-done—no reuse. Always rinse roots when repurposing containers to avoid contaminating new plants.
Wrapping up and next steps
Indoor hydroponics isn’t just a trend—it’s a game-changer for growing fresh herbs fast, with zero soil mess! 🌱 You’ve got the tools, the know-how, and the confidence to kickstart your own thriving garden in a matter of weeks.
Whether you’re a busy parent, a small-space dweller, or just someone who loves the idea of instant greens, this system makes it effortless.
Ready to take the next step? Start small—try one herb like basil or mint—then expand as you gain confidence. Before you know it, you’ll be harvesting crisp, flavorful herbs year-round. Your kitchen (and taste buds) will thank you! 🌿✨