
Container Gardens
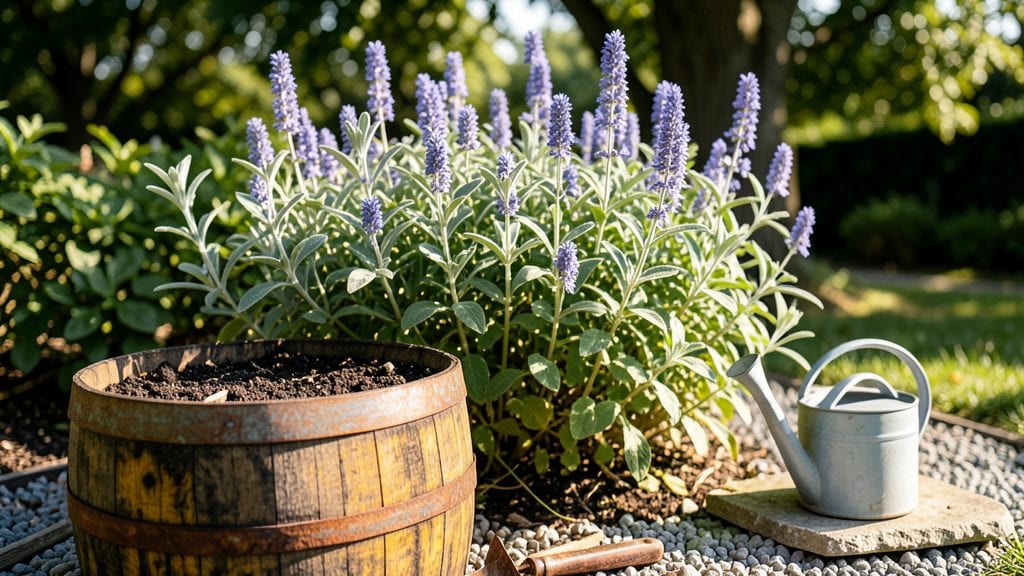
Transforming an old wine barrel into a thriving garden planter is one of the most satisfying ways to repurpose something with character. 🌱 I’ve turned rusty barrels into vertical herb gardens, raised beds for cherry tomatoes, and even whimsical flower displays—each one telling its own story while giving my garden a unique, rustic charm.
The best part? You don’t need fancy tools or deep pockets to make it work.
Start with a clean, dry barrel—sand any rough edges and drill drainage holes if it’s not already breathable. Fill the bottom with broken pottery or gravel for drainage, then layer in a high-quality potting mix.
Herbs like rosemary and thyme thrive in these shallow roots, while compact veggies like lettuce or peppers grow surprisingly well when given the right support. The key is choosing plants that match the barrel’s size and your space’s sunlight.
Once planted, your wine barrel garden becomes an instant conversation piece. The rich wood tones pair beautifully with climbing vines or trailing flowers, while the elevated design keeps pests at bay.
Within weeks, you’ll watch green shoots transform into lush foliage, and the barrel’s natural texture adds warmth to any patio or yard corner. It’s gardening with personality—and zero guilt about repurposing something that might otherwise end up in a landfill.
For extra flair, paint the barrel with non-toxic stain or wrap it in burlap for a farmhouse look. Just avoid sealing the wood too tightly—plants need to breathe!
Whether you’re a city dweller with limited space or a rural gardener looking for creative beds, wine barrels bring a touch of whimsy and functionality to any garden. Ready to give it a try?
📚 In This Guide
- What you need
- Instructions
- Tips and common mistakes
- Wrapping up and next steps
What you need
- ● Wine barrels (2-4+): Food-grade barrels (preferably oak) in good condition. Pro tip: Check for leaks or cracks—small holes can be sealed with waterproof silicone.
- ○ Drill & bits: 1"–2" bit for drainage holes (if not pre-drilled). Optional: Use a jigsaw for larger holes if needed.
- ● Potting soil: 1–2 bags of high-quality, well-draining mix (e.g., 60% topsoil, 30% compost, 10% perlite). For barrels: ~20–30 lbs per barrel (adjust for size).
- ● Drainage layer: Small gravel, pebbles, or broken pottery shards (~1–2 inches deep).
- ○ Liner (optional): Heavy-duty plastic sheeting or pond liner to prevent soil leakage (cut to fit barrel sides).
- ● Hardware: 4–6 heavy-duty brackets or straps to secure barrels to walls/rails.
- ● Screws or bolts (if mounting brackets).
- ● Watering can or hose: With a gentle spray nozzle for even moisture.
- ● Barrel handles or grips for easier moving.
- ● Decorative paint or stain (food-safe, non-toxic).
- ● Self-watering kit (wick system or reservoir bag).
- ● Herb or veggie starter plants (e.g., basil, tomatoes, or strawberries).
Step-by-Step instructions for creating a wine barrel garden
Here's how to turn a simple barrel into a rustic, space-saving garden that thrives all season.
🪴 Step 1: Clean and Prepare the Barrel
Start by thoroughly cleaning the barrel with warm, soapy water to remove any residue. I scrub the inside with a stiff brush, focusing on corners where dirt loves to hide. Rinse it out completely and let it dry in the sun for a few hours—this prevents mold from forming later.
Once dry, inspect the barrel for leaks or cracks. If you find any, seal them with waterproof silicone caulk designed for outdoor use. I like to add a layer of landscape fabric along the bottom before filling with soil—this keeps roots from escaping through the staves while still allowing water to drain.
💧 Step 2: Add Drainage and Soil Mix
Line the bottom of the barrel with 2-3 inches of gravel or small stones—this ensures proper drainage and prevents root rot. I use the 5 gallons of potting mix you’ve prepared, mixed with 1 part perlite to keep it light and airy. Fill the barrel to about 2 inches from the top, leaving room for plants to grow.
Press the soil down lightly with your hands to remove air pockets, but don’t pack it too tightly. You want roots to spread easily without struggling. If the soil feels dry, give it a light misting with water before planting—this helps it settle evenly.
☀️ Step 3: Plant Your Selections
For 4 plants, dig holes slightly larger than the root balls of your seedlings or young plants. Space them evenly around the barrel’s circumference, about 6-8 inches apart—this gives them room to grow without competing for space. I like to place taller plants toward the back and trailing varieties like nasturtiums or petunias along the edges.
Fill the holes with soil and press gently around the base of each plant to remove air gaps. Water deeply right after planting to help the roots settle. If you’re using herbs or vegetables, consider adding a slow-release fertilizer to the soil mix for steady growth.
🌱 Step 4: Water and Mulch for Retention
Water the barrel garden thoroughly until water drains out the bottom. This ensures the soil is evenly moist without becoming waterlogged. After watering, spread 2-3 inches of mulch (like straw or shredded bark) over the soil surface. Mulch keeps moisture in, regulates soil temperature, and suppresses weeds—critical for containers.
I like to water my barrel garden every 2-3 days during hot weather, checking the soil with my finger. If the top inch feels dry, it’s time to water again. Avoid letting the soil dry out completely, especially in the first few weeks while plants establish roots.
✂️ Step 5: Maintain and Enjoy Your Garden
Once planted, your barrel garden needs regular care to thrive. I check for pests weekly and remove any yellowing leaves or spent blooms to encourage new growth. If plants start to look leggy, they might need more sunlight—rotate the barrel occasionally to ensure even exposure.
Harvest herbs or vegetables as needed, but never take more than one-third of the plant at a time. This keeps your garden productive and healthy. With proper care, your wine barrel garden will give you lush, vibrant plants all season long—plus, it’s a stunning centerpiece for any outdoor space.
Tips & tricks for perfect wine barrel gardens
Here's what I've learned from turning ordinary barrels into thriving, space-saving gardens—tricks that'll make all the difference in your container's success.
Drainage is Non-Negotiable: In Step 2, that 2-3 inches of gravel isn't just a suggestion—it's your insurance against root rot. I've seen barrels turn into soggy messes when this step gets skipped. If your barrel has holes in the bottom, you can skip the gravel layer entirely, but still use the landscape fabric to prevent soil loss. For barrels without drainage holes, consider drilling a few small holes yourself if you're worried about waterlogging.
Soil Mix Matters More Than You Think: When mixing your 5 gallons of potting soil with perlite, aim for about 1 part perlite to 4 parts soil. This ratio keeps things light and airy while still providing enough nutrients. Pro tip: Add a handful of worm castings to the mix for an extra nutrient boost—your plants will thank you with stronger growth. I've found that pre-mixing the soil outside the barrel makes filling it much easier and less messy.
Plant Placement Strategy: In Step 3, when arranging your 4 plants, think vertically as well as horizontally. Place taller varieties like basil or rosemary toward the back (the side that will face away from you when viewing), and trailing plants like nasturtiums toward the front. This creates a beautiful cascading effect and ensures all plants get adequate sunlight. I like to arrange them in a slight spiral pattern rather than just placing them evenly around—it looks more natural and creates interesting visual lines.
Watering Wisdom: That 2-3 inch mulch layer in Step 4 isn't just for looks—it's your moisture regulator. Water thoroughly every 2-3 days during hot weather, but check the soil first. Stick your finger about an inch deep—if it feels dry, water. If it's still moist, wait another day. Overwatering is just as damaging as underwatering, especially in containers where drainage is limited. I've found that watering in the early morning gives plants all day to absorb moisture before evening heat causes evaporation.
Pro Tips for Wine Barrel Garden
- Here's what I've learned from turning ordinary barrels into thriving, space-saving gardens—tricks that'll make all the difference in your container's success.
- Drainage is Non-Negotiable: In Step 2, that 2-3 inches of gravel isn't just a suggestion—it's your insurance against root rot.
- Soil Mix Matters More Than You Think: When mixing your 5 gallons of potting soil with perlite, aim for about 1 part perlite to 4 parts soil.
Frequently asked questions
Got questions about turning old wine barrels into stylish, functional planters? Here are some of the most common ones—and their answers!
Can I use any wine barrel for gardening?
Not all barrels work! Look for food-grade barrels (stamped "FSSC 22000" or "USDA approved"). Avoid barrels that held industrial liquids, chemicals, or wine with preservatives. If unsure, give it a thorough vinegar soak and scrub—safety first!
How long does it take for a wine barrel garden to be ready for planting?
Prep time varies: 1-2 weeks for cleaning, drying, and sealing (if needed). If you’re repurposing a used barrel, add extra time for deep cleaning and sterilizing. Once ready, you can plant herbs or shallow-rooted veggies immediately—just keep soil moist for the first few weeks!
Are wine barrel gardens more expensive than regular planters?
Not necessarily! Barrels are often free or cheap (check local wineries, breweries, or Facebook Marketplace). Costs add up with soil, drainage, and tools—but they’re one-time investments that last years. DIY sealing (like linseed oil) cuts costs further.
What plants thrive (or struggle) in wine barrel gardens?
Best picks:
Herbs (basil, rosemary), tomatoes, peppers, and shallow-rooted flowers (marigolds, nasturtiums). Avoid: Deep-rooted plants like artichokes or large shrubs—they’ll outgrow the space. Use container-specific varieties for bigger yields!
How do I keep pests out of my wine barrel garden?
Pests love barrels too! Prevent them with:
- Copper tape around the rim (deters slugs/snails).
- Neem oil spray (natural pest repellent).
- Companion planting (e.g., marigolds near tomatoes).
- Elevate barrels off the ground (reduces burrowing pests).
What if my barrel leaks or drains poorly?
Leaks usually mean poor drainage. Fix it by:
- Drilling extra holes in the bottom (if not pre-drilled).
- Adding a gravel layer (2–3 inches) before soil.
- Using a waterproof liner (like pond liner) if the barrel is cracked.
Wrapping up and next steps
A wine barrel garden isn’t just a creative way to repurpose materials—it’s a game-changer for small spaces, urban gardens, or anyone craving that rustic charm. 🌱 With a little prep and care, you can turn a few barrels into a thriving, space-saving oasis for herbs, veggies, or flowers.
The best part? You’re not just growing plants—you’re crafting a statement piece that blends functionality with style.
Ready to dive in? Start small—pick one barrel, experiment with a few plants, and let your green thumb (or curiosity!) guide you. Soon, you’ll be expanding your setup, sharing tips with fellow gardeners, or even turning your barrels into a stunning centerpiece. Cheers to growing something amazing! 🍷✨