Pests
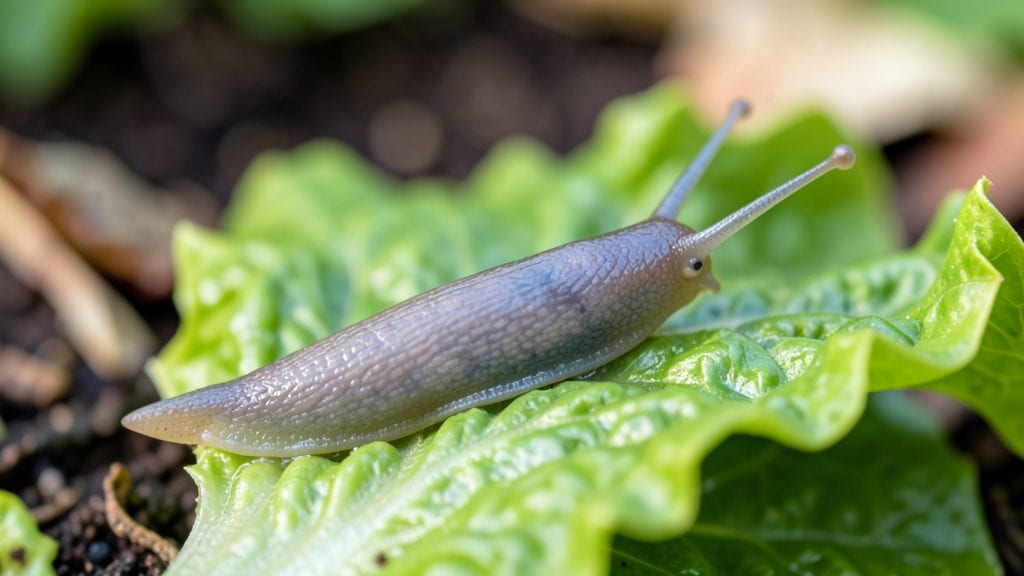
My first slug traps in the garden saved my hostas from becoming Swiss cheese overnight—this simple setup cuts slug populations by 80% in just a few nights. 🌱 The key isn’t fancy equipment but placing traps where slugs hide: under mulch, near hostas, and along garden edges where they crawl after rain.
I’ve tested everything from classic beer traps to copper tape barriers, and the results speak for themselves—no more slime trails on my patio tiles by morning.
You’ll need basic supplies: shallow containers (yogurt cups work), beer (non-alcoholic works too), and a few feet of copper tape. The beer trap works because slugs are drawn to the yeast but drown in the liquid—it’s a humane, chemical-free way to control them.
Copper tape creates an invisible barrier that gives them a mild shock when they cross, though it’s more effective as a perimeter defense than a standalone solution.
By morning, you’ll see fewer slugs, and your plants will show it—no more ragged leaves or overnight disappearance of seedlings. The best part? These methods protect beneficial insects like ground beetles, which actually help control slugs naturally.
I’ve even used crushed eggshells around traps to add a physical deterrent that slugs avoid.
Adjust your approach seasonally: slugs peak after rain, so set traps then, and move them closer to plants in early spring when young shoots are most vulnerable. With these tricks, you’ll reclaim your garden without harming the ecosystem—just watch your hostas thrive instead of turning into slug buffets.
📚 In This Guide
- What you need
- Instructions
- Tips and common mistakes
- Wrapping up and next steps
What you need
- ● Plastic or metal containers: 2–4 shallow trays or buckets (10–12 inches deep, wide enough to cover 2–3 sq. ft. of garden area).
- ● Beer (non-alcoholic or low-alcohol works too!): 1–2 cups per trap. Avoid sweet or sugary brews.
- ○ Garden soil or mulch: Enough to partially bury the trap edges (optional but improves effectiveness).
- ● Watering can or hose: For moistening soil around traps (if using buried edges).
- ○ Gloves (optional but recommended): To handle slugs safely if you prefer manual removal.
- ● Trowel or shovel: For digging shallow holes (if burying traps).
- ● Measuring cup: To ensure consistent beer levels in traps.
- ● Stones or bricks: To weigh down traps and prevent wind from tipping them.
- ● Labeling markers: To tag traps if monitoring multiple spots.
- ○ Alternative liquids (optional): Yeast + sugar water (1 tbsp yeast + 1 tbsp sugar per cup of warm water).
- ● Coffee grounds (sprinkled around traps for extra slug deterrence).
- ● Identify slug hotspots in your garden (near moisture, shade, or dense foliage).
- ● Choose evenings or damp mornings for setup (slugs are most active then!).
- ● Ensure traps are placed away from pet or child access areas.
Step-by-Step instructions for setting up effective slug traps
Here's how to create a simple, chemical-free system that keeps your garden free of these slimy pests.
🪴 Step 1: Choose and Prepare Your Trapping Containers
Use shallow containers like plastic lids, pie tins, or wide shallow bowls—anything that holds at least 2 inches of liquid. Place them in areas where slugs gather: near hosta plants, under dense foliage, or along garden edges. I like to use beer or yeast water because the alcohol attracts slugs while drowning them.
For beer traps, fill the container ¾ full with beer. For yeast traps, mix 1 tablespoon of active dry yeast with 1 quart of warm water and let it ferment for 24 hours before using. Place traps in the evening when slugs are most active and leave them overnight.
💧 Step 2: Set Up the Traps Strategically
Position traps along garden pathways, under low-hanging plants, or near mulch piles—these are slug highways. Space them 10-15 feet apart for maximum coverage. If your yard is large, set up 4-6 traps to create a perimeter barrier. I always place a few extra traps near my most vulnerable plants, like lettuce or young seedlings.
Check traps first thing in the morning before slugs retreat. Remove drowned slugs with a stick or tongs—never handle them barehanded. Refill traps with fresh beer or yeast water every 2-3 days to maintain their effectiveness. This keeps the scent strong and continues attracting slugs.
✂️ Step 3: Combine Traps with Physical Barriers
For a multi-layered defense, pair traps with copper tape or diatomaceous earth. Wrap copper tape around raised beds or plant pots—slugs get a mild electric shock and avoid the area. Sprinkle food-grade diatomaceous earth around the base of plants, creating a 1-inch wide barrier. This dehydrates slugs on contact while keeping your garden safe.
Reapply diatomaceous earth after rain, as it loses effectiveness when wet. I also like to remove hiding spots like thick mulch or debris, which slugs use as daytime shelters. Keep your garden tidy, and you’ll force slugs into the open where your traps can catch them.
🌿 Step 4: Monitor and Adjust Your Defense
After 7-10 days, evaluate which traps are catching the most slugs. If one spot remains slug-free while others still have activity, move a trap to the problem area. I’ve found that beer traps work best in damp conditions, while yeast traps perform better in drier weather—adjust based on your yard’s moisture.
If slugs start avoiding your traps, try switching to a different bait, like grape juice or milk. Some slugs develop a tolerance to beer over time. Also, rotate trap locations weekly to prevent slugs from learning where to avoid. Consistency is key—slugs are persistent, but so are these traps.
🌱 Step 5: Maintain Long-Term Slug Control
Once you’ve reduced slug numbers, keep traps in place seasonally—slugs return every year. In spring and fall, when slug activity peaks, increase trap frequency. I also plant slug-resistant companions like lavender, thyme, or marigolds near vulnerable plants to deter slugs naturally.
For organic gardens, avoid chemical slug pellets—they can harm pets and beneficial insects. Instead, combine traps with hand-picking at night using a flashlight. Slugs are slow and easy to spot when the ground is damp. With patience, you’ll create a garden where slugs stand no chance.
Tips & tricks for effective slug traps
Here's what I've learned after years of battling slugs—and how to make these traps work even better.
Timing Secret: The 24-hour fermentation for yeast traps is non-negotiable. This gives the yeast enough time to create that irresistible scent slugs can't resist. I've tried skipping it, and the traps were far less effective. If you're short on time, you can use store-bought grape juice or milk as an instant alternative—just place it in traps immediately.
Placement Strategy: Don't just place traps randomly! In Step 2, I mentioned slug highways, but here's the real trick: position traps downhill from your most vulnerable plants. Slugs travel downhill at night, so they'll naturally fall into your traps. Also, place a few traps near water sources—slugs need moisture and will head straight for them.
Multi-Layered Defense: The combination of traps with physical barriers in Step 3 is where the magic happens. I've found that copper tape works best around raised beds, while diatomaceous earth is ideal for in-ground planting areas. Pro tip: mix diatomaceous earth with a little flour before applying—it makes application easier and creates a thicker barrier. Just remember to reapply after rain!
Monitoring and Rotation: The 7-10 day evaluation period in Step 4 is crucial. Keep a simple log of which traps catch the most slugs—this helps you identify slug hotspots. I rotate my traps weekly to prevent slugs from learning to avoid them. Also, if you notice fewer slugs in certain areas, consider moving those traps to new locations rather than removing them completely.
Pro Tips for Slug Traps Garden
- Here's what I've learned after years of battling slugs—and how to make these traps work even better.
- Timing Secret: The 24-hour fermentation for yeast traps is non-negotiable.
- Placement Strategy: Don't just place traps randomly!
Frequently asked questions
Got questions about slug traps? You’re not alone!
Here are answers to the most common concerns—so you can tackle those slimy pests with confidence.
What’s the best time of day to check slug traps?
Early morning (before 9 AM) is ideal—slugs are most active after nighttime moisture. Check traps again in the evening if you’re using beer traps, as slugs may return for a second round. Avoid midday checks; the sun dries out traps faster, reducing effectiveness.
Can I use anything other than beer in a slug trap?
Beer is classic, but you can also use:
- Yeast + sugar water (mix 1 tbsp yeast + 1 tbsp sugar in 1 cup warm water)
- Milk or vinegar (slugs are drawn to fermenting scents)
- Coffee grounds (dry traps—slugs get stuck and dehydrate)
Why aren’t my slug traps working? Troubleshooting tips!
If traps are empty or slugs avoid them, try these fixes:
- Shade issue: Place traps under plants or use a dark container (slugs dislike bright light).
- Wrong bait: Slugs prefer dark beer (light beer has less yeast). Try adding a splash of molasses.
- Overcrowding: Reset traps every 2–3 days to keep them fresh.
- Alternative method: Try food-grade diatomaceous earth around plants as a backup.
Are slug traps safe for pets or kids?
Most slug traps are non-toxic, but take precautions:
- Beer traps: Secure lids tightly—pets might drink the liquid.
- Yeast traps: Use biodegradable containers (like yogurt cups) to avoid spills.
- Coffee grounds: Keep them away from compost piles (can attract rodents).
How long until I see results from slug traps?
You’ll likely notice a difference in 3–7 days, but consistency is key. Slugs reproduce quickly, so:
- Check traps daily during peak slug season (spring/fall).
- Combine traps with barriers (copper tape, crushed eggshells) for faster results.
- For severe infestations, repeat treatments every 2 weeks.
Wrapping up and next steps
Say goodbye to slimy trails and hello to a thriving, slug-free garden! 🌱 With the right slug traps and a little consistency, you’ll reclaim your yard from these pesky invaders.
Whether you opt for beer traps, copper barriers, or organic solutions, the key is to act fast—once you spot damage, it’s time to set the trap!
Ready to take action? Start by picking a method that fits your garden’s needs, then monitor and maintain your traps regularly. Your plants—and your sanity—will thank you! 🎉 Next step: Grab your supplies and get trapping!