
Tools
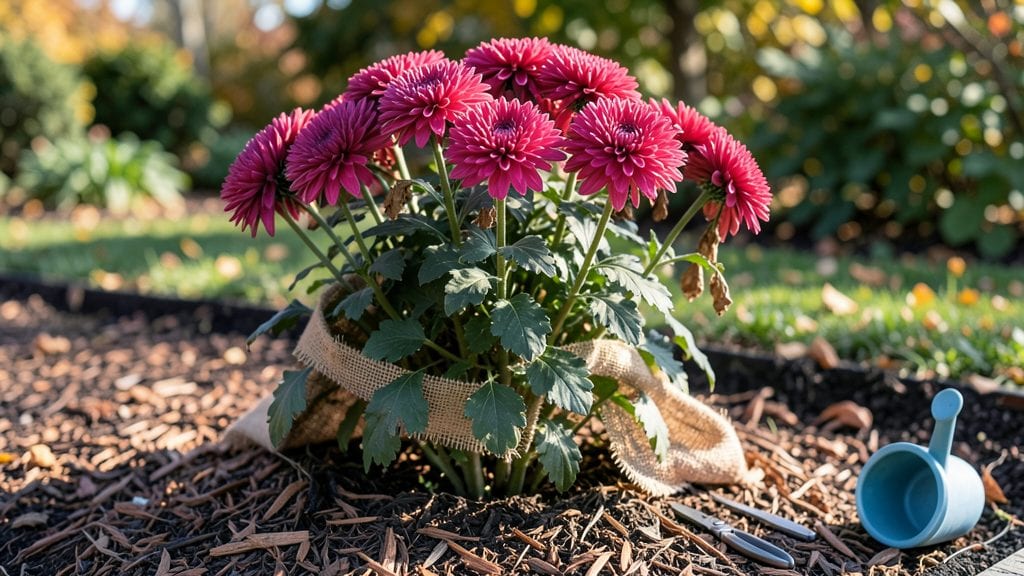
Overwintering garden mums means keeping those golden blooms coming back year after year—no matter how cold your winters get. ✨ I’ve brought back mums through three brutal winters by mastering just three key steps: cutting back, mulching right, and protecting the crown from deep freezes.
The payoff? A garden that bursts into color earlier than your neighbors’.
Most people assume mums die in frost, but the truth is they’re tougher than they look. You’ll need sharp shears, a thick layer of straw or leaves, and maybe a cloche for harsh zones.
The secret isn’t fancy—it’s timing. Cut back stems to 2-3 inches in fall, then blanket the roots before the ground freezes. In mild climates, a simple mulch layer does the trick.
By spring, you’ll spot fresh green shoots pushing through the soil—proof your mums survived. The first blooms arrive weeks ahead of store-bought plants, and the plants grow stronger each year. Even in Zone 5, my mums return reliably with the right care, turning winter’s dormancy into next summer’s showstopper.
Adapt this for your climate: add extra mulch in Zone 4, or skip heavy protection in Zone 8. The rules stay the same—just tweak the timing. Let’s get those mums ready for another season of color.
📚 In This Guide
- What you need
- Instructions
- Tips and common mistakes
- Wrapping up and next steps
What you need
- ● Garden mums (Chrysanthemum spp.) – Healthy, established plants (3+ years old) with strong stems and minimal disease.
- ● Organic mulch – 3–4 inches of straw, shredded leaves, or pine needles (avoid fresh wood chips—they can compact and suffocate roots).
- ● Burlap or landscape fabric – 1–2 layers (4' x 8' sheets) to protect against rodents and extreme cold.
- ● Garden twine or stakes – For securing mulch or fabric in windy areas.
- ● Gloves & pruners – Sharp, clean pruners (sterilized with rubbing alcohol) and durable gardening gloves.
- ● Watering can or hose with a gentle spray nozzle – For hydrating plants before winter.
- ○ Cold-hardy fertilizer (optional but helpful) – A slow-release, low-nitrogen formula (5-10-10 or similar) to nourish roots without encouraging late growth.
- ● Frost cloth or row covers – For extra insulation in Zone 5 or colder (use sparingly to avoid moisture buildup).
- ● Brass or copper tape – To deter slugs/snails from nibbling on overwintering plants.
- ● Soil thermometer – To monitor ground temps (ideal overwintering range: 20–40°F).
- ● Compost or aged manure – A handful mixed into the soil in early spring to boost nutrient recovery.
Step-by-step instructions for overwintering garden mums
Here's how to protect your mums through winter so they burst back with color next spring.
🪴 Step 1: Cut Back Foliage After First Frost
Wait until the first hard frost blackens the leaves before cutting back. This lets the plant store energy in its roots for next year. Use clean, sharp pruners to trim stems down to 2-3 inches above the soil line. I always sterilize my pruners with rubbing alcohol first—this prevents spreading disease between plants.
Remove all dead foliage and debris from the base. This keeps pests hidden in decaying leaves from overwintering and attacking your mums in spring. If your mums are in containers, move them to a sheltered spot like a garage or unheated basement before cutting back.
☀️ Step 2: Mulch Heavily for Insulation
Spread a 4-6 inch layer of organic mulch like straw or shredded leaves over the soil around the base. This acts like a blanket, protecting roots from freezing temperatures. I like to use straw because it breaks down slowly and adds nutrients as it decomposes.
Pile mulch higher around the plant's crown—the center where stems meet roots—since this is the most vulnerable spot. For container-grown mums, wrap the pots in bubble wrap or burlap for extra protection. Check mulch levels after heavy snowfall to ensure roots stay covered.
🌱 Step 3: Protect from Harsh Winter Conditions
In areas with extreme cold or wind, add a protective cover like a frost blanket or burlap sack. Secure it loosely with stakes or bricks so it doesn't crush the stems. I've seen mums survive winters with just mulch, but in zones with below 0°F temperatures, extra protection makes all the difference.
Remove snow buildup from mulch during winter—too much weight can compact the soil and suffocate roots. If you notice heaving (soil pushing up around the plant), gently press mulch back down. This prevents root damage and ensures a strong start in spring.
⏰ Step 4: Uncover and Fertilize in Early Spring
Wait until daytime temperatures consistently stay above 40°F before removing winter covers. This usually happens in late winter or early spring. Gradually uncover plants over a week to avoid shocking them with sudden warmth.
Once uncovered, remove old mulch and replace it with fresh. Add a balanced fertilizer (like 10-10-10) at half strength to encourage new growth. You'll see fresh green shoots within 2-3 weeks—that's your signal the plant is waking up from dormancy.
🌿 Step 5: Monitor for Early Growth and Pests
Keep an eye out for new shoots in spring. If you see green growth but the soil is still cold, hold off on fertilizing until temperatures stay above 50°F for a week. This prevents fertilizer burn on tender new roots.
Watch for overwintering pests like slugs or spider mites, which may appear as plants start growing. A light spray of neem oil or insecticidal soap keeps them at bay. Healthy mums will develop strong stems and buds by late spring—ready to bloom again by summer.
Tips & tricks for perfect overwintering garden mums
Here's what nobody tells you about keeping your garden mums thriving through winter.
The Timing Factor: Don't rush to cut back foliage after the first frost—wait until leaves are completely blackened. This ensures the plant has fully stored energy in its roots for spring growth. I've seen mums struggle when cut back too early, so patience here pays off big time. The 2-3 inch cut is crucial too—any shorter risks exposing the crown to cold damage.
Mulch Depth Matters: That 4-6 inch layer of mulch isn't just for show—it's the difference between frozen roots and a healthy rebloom. I've learned the hard way that skimping on mulch depth means roots freeze even in moderate winters. For extra protection, add a second layer after heavy snowfall. Remember, the crown (where stems meet roots) needs the most insulation.
Protective Cover Strategy: In zones with below 0°F temperatures, don't skip the protective cover. I've seen frost blankets work wonders—just make sure they're secured loosely so they don't crush stems. For container mums, wrapping pots in bubble wrap adds an extra layer of defense against freezing winds. Check covers regularly to prevent snow buildup that could suffocate roots.
Spring Uncovering Secret: When daytime temps finally stay above 40°F, uncover your mums gradually over a week. Sudden warmth shocks dormant plants. I've noticed the best results come when I remove covers in stages—first lifting completely, then leaving them off for a few hours each day before full removal. This mimics natural spring conditions and prevents stress.
Pro Tips for Overwintering Garden Mums
- Here's what nobody tells you about keeping your garden mums thriving through winter.
- The Timing Factor: Don't rush to cut back foliage after the first frost—wait until leaves are completely blackened.
- Mulch Depth Matters: That 4-6 inch layer of mulch isn't just for show—it's the difference between frozen roots and a healthy rebloom.
Frequently asked questions
Got questions about keeping your garden mums thriving through winter?
Here are some of the most common concerns—and expert answers—to help you overwinter like a pro!
When is the best time to start overwintering garden mums?
The ideal time to prep mums for winter is late fall, once nighttime temperatures consistently drop below 40°F (4°C). This usually means October or early November in most climates. If you wait too long, the plants may already be stressed, making them more vulnerable to cold damage.
Can garden mums survive winter without any protection?
It depends on your climate! In USDA Zones 5-7, hardy mums (like Chrysanthemum × grandiflorum) can often survive mild winters with minimal protection, such as a thick layer of mulch. However, in colder zones (Zone 4 or below) or harsh winters, they’ll need extra insulation like burlap wraps or row covers to prevent freeze damage.
What’s the easiest way to overwinter potted garden mums?
Move potted mums to a protected spot (like a garage or shed) before the first hard frost. If you can’t bring them indoors, bury the pots in 6+ inches of soil or mulch and cover with straw or burlap. Pro tip: Reduce watering in fall to prevent root rot, but keep soil slightly moist.
Why are my overwintered mums looking sad or dying in spring?
Common culprits include overwatering (which causes rot), poor drainage (leading to soggy roots), or late frosts damaging new growth. If your mums seem lifeless, check for soft, mushy stems (rot) or brown, crispy foliage (freeze damage). Trim dead growth in early spring and fertilize lightly to encourage rebound.
Are there cold-hardy alternatives to traditional garden mums?
Yes! If you love mums but want low-maintenance perennials, try hardy chrysanthemums (like ‘Dymphna’ or ‘Mum’s the Word’) or Russian sage—both thrive in colder climates. For even more resilience, consider sedum or heuchera, which handle winter beautifully with minimal fuss.
Need more help? Drop your overwintering challenges in the comments—we’re happy to troubleshoot!
Wrapping up and next steps
Overwintering garden mums is a rewarding way to enjoy vibrant blooms year after year—with just a little preparation!
By choosing cold-hardy varieties, protecting them from harsh winds, and giving them a cozy blanket of mulch, you’re setting the stage for a stunning spring comeback. Don’t let winter slow you down—grab your gloves and give these resilient perennials the care they deserve!
Ready to level up your garden game? Start by marking your calendar for early spring cleanup—when those first green shoots appear, you’ll be thrilled to see your mums thriving again. Happy gardening! 🌱✨