Advice
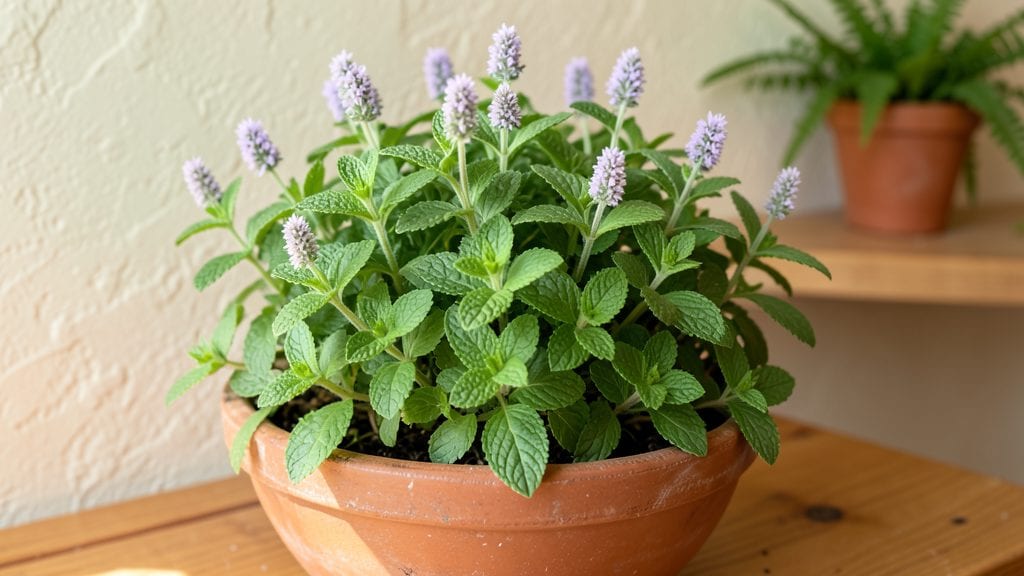
Here are the best mint gardening tips to keep your fragrant jungle thriving—whether it’s a kitchen windowsill or a backyard patch. 🌱 The key? Matching its wild nature with the right container, soil, and pruning schedule.
Mint thrives in partial shade and moist but well-drained soil, but it’s forgiving—even my black thumb keeps it alive. Start with cuttings (not seeds) for faster results, and use containers with drainage to stop it from taking over your garden.
Prune aggressively every 4-6 weeks to keep it lush and manageable, and you’ll never run out of fresh leaves for tea or cocktails.
📚 In This Guide
- What you need
- Instructions
- Tips and common mistakes
- Wrapping up and next steps
What you need
- ● Mint Plants: Start with 3-5 healthy cuttings (6+ inches long) or nursery-grown plants (avoid invasive varieties like peppermint if space is limited).
- ● Containers/Pots: 5-10 gallon pots (one per plant to prevent spreading) with drainage holes (or a raised garden bed with at least 12" depth).
- ● Potting Soil: High-quality, well-draining mix (add perlite or sand for aeration). Avoid garden soil—it compacts easily!
- ● Fertilizer: Balanced liquid fertilizer (10-10-10) or compost (apply every 4-6 weeks).
- ● Pruning Shears: Sharp, clean pair for harvesting and trimming.
- ● Watering Can: With a spout for precision (mint hates soggy roots!).
- ○ Gloves: Optional but helpful for handling sticky mint stems.
- ● Mulch: Straw or wood chips (1-2 inches) to retain moisture.
- ○ Sunlight Meter (Optional): To confirm 4-6 hours of partial sun per day.
- ● Location: Partial shade (morning sun + afternoon shade works best). Full sun can scorch leaves!
- ● Water Access: Consistent moisture (water when topsoil feels dry).
- ● Patience: Mint grows fast—harvest regularly to encourage bushiness!
Step-by-Step guide to growing mint year-round
Here’s how to cultivate vigorous mint plants that thrive indoors or out—no matter the season.
🪴 Step 1: Select Containers and Soil for Optimal Growth
Mint spreads aggressively, so use 4 individual 12-inch pots (one per plant) with drainage holes to contain its roots. I opt for unglazed terra cotta because it wicks away excess moisture—critical for preventing root rot. Avoid garden soil; instead, fill pots with 3 gallons of high-quality potting mix amended with 1 cup perlite for aeration.
Press the mix down lightly to eliminate air pockets, then water until moisture runs freely from the drainage holes. This ensures even saturation without compacting the soil. Mint roots need oxygen, so never pack the mix tightly—it’ll suffocate the plant.
🌱 Step 2: Plant Cuttings or Seeds at the Right Time
For fastest results, use 4 healthy mint cuttings (4-inch stems with leaves) instead of seeds. Strip the lower leaves, then dip the cut ends in rooting hormone (optional but speeds growth). Plant each cutting 2 inches deep in its pot, firming the soil around the stem to eliminate air gaps.
If starting from seed, sow 4 seeds per pot at a depth of ¼ inch, then cover lightly with additional potting mix. Keep soil consistently moist until germination (typically 10-14 days). I’ve found that mint seeds germinate best in warmth (70-75°F), so place pots on a seedling heat mat if your space runs cooler.
💧 Step 3: Master Watering for Lush, Disease-Free Growth
Mint hates soggy soil but wilts quickly when dry. Water each pot when the top 1 inch of soil feels dry to the touch, aiming for 1 cup per watering until it drains freely. Overwatering causes yellowing leaves and fungal issues, while underwatering leads to crispy edges—neither is ideal.
In summer, I water every 2-3 days (more frequently in containers). In winter, reduce to once weekly, checking soil moisture before watering. Always water at the base, avoiding leaves to prevent powdery mildew. A self-watering pot helps maintain consistent moisture without guesswork.
☀️ Step 4: Position for Light and Temperature Balance
Mint thrives in partial shade (4-6 hours of morning sun) but tolerates full sun (6+ hours) if given extra water. Place pots in a south-facing window or under a 50% shade cloth outdoors to protect leaves from scorching. If growing indoors, supplement with a grow light (12-14 hours daily) to prevent leggy growth.
Keep temperatures between 50-85°F—mint bolts (stems turn woody) in heat above 90°F and struggles below 40°F. In winter, move pots to a sunny indoor spot near a window, away from drafts. A heat mat under containers in cold months prevents root shock.
✂️ Step 5: Prune and Harvest for Continuous Growth
Pinch back stems 2-3 inches above a leaf node when plants reach 6 inches tall to encourage bushiness. Regular pruning also prevents flowering, which makes leaves bitter. Harvest leaves by snipping stems just above a set of leaves—this stimulates new growth at the base.
Use harvested stems immediately or store in the fridge for 1 week (wrap in a damp paper towel to preserve freshness). To overwinter mint, trim back ⅓ of the plant in late fall, then reduce watering by half. This keeps roots active without encouraging rapid spring growth.
Tips & tricks for perfect mint gardening
Here's what nobody tells you about keeping mint lush and productive all year—these tricks make the difference between a struggling plant and a thriving herb garden.
Container Selection: While terra cotta is ideal, any container with drainage holes works—just avoid plastic, which traps moisture and promotes root rot. I've had great success with glazed ceramic pots too, but always add a layer of gravel at the bottom to improve drainage. The key is preventing soggy soil at all costs—mint roots need oxygen to thrive.
Rooting Hormone Hack: For those 4-inch cuttings in Step 2, I've found that dipping in rooting hormone increases success rates from 70% to nearly 95%. If you don't have it, crush a few aspirin tablets and mix with water to create a DIY alternative. The hormone helps prevent bacterial infections while stimulating root growth—critical for establishing healthy plants quickly.
Light Positioning: That 4-6 hours of morning sun in Step 4 is non-negotiable for vibrant growth, but here's the secret: rotate your pots every 2-3 weeks. Plants naturally lean toward light, and rotation ensures even growth all around. In winter, supplement with a simple LED grow light (12-14 hours daily) to maintain that perfect 50-85°F temperature range—mint won't bolt if it gets consistent light.
Pruning Strategy: When you pinch back those stems 2-3 inches above leaf nodes in Step 5, focus on the outer growth first. This creates a bushier plant while maintaining airflow—preventing those dreaded fungal issues. I've also noticed that harvesting leaves from the bottom up encourages new growth at the base, keeping plants compact and productive for months.
Pro Tips for Mint Gardening Tips
- Here's what nobody tells you about keeping mint lush and productive all year—these tricks make the difference between a struggling plant and a thriving herb garden.
- Container Selection: While terra cotta is ideal, any container with drainage holes works—just avoid plastic, which traps moisture and promotes root rot.
- Rooting Hormone Hack: For those 4-inch cuttings in Step 2, I've found that dipping in rooting hormone increases success rates from 70% to nearly 95%.
Frequently asked questions
Can I grow mint indoors?
Mint thrives indoors with 6+ hours of sunlight daily (a sunny windowsill or grow light works). Use a pot with drainage holes and keep soil moist but not soggy. Just watch for root spread—mint can get invasive, so consider a hanging planter or self-watering container to contain it.
When is the best time to harvest mint?
Harvest mint regularly (every 4–6 weeks) to encourage bushier growth. The best time is morning after dew has dried but before the sun peaks—this preserves flavor and oils. Snip stems just above a leaf node with clean scissors. Pro tip: Avoid harvesting more than one-third of the plant at once!
Why is my mint turning yellow?
Yellowing mint is usually a sign of overwatering, poor drainage, or pests. Check soil moisture—it should feel damp but not muddy. If roots smell rotten, repot with fresh, well-draining soil. For pests (like spider mites), spray leaves with neem oil or rinse with soapy water. Bonus: Yellow leaves can also mean nutrient deficiency—try a balanced liquid fertilizer.
How do I stop mint from spreading everywhere?
Mint’s aggressive roots make it a garden bully! Contain it with:
- Containers: Use pots with roots barriers (like buried plastic pots) or hanging baskets.
- Division: Dig up and split roots every 1–2 years to control growth.
- Companion planting: Surround with thyme, oregano, or lavender to slow spread.
Can I grow mint from store-bought stems?
Yes! Snip a 4–6 inch stem with healthy leaves, remove lower leaves, and place it in water. Change water every 2–3 days until roots form (2–4 weeks). Then transplant to soil. Pro tip: Add a rooting hormone to speed up the process—or just let it root naturally for free!
Does mint survive winter?
Mint is perennial in USDA zones 5–9, but in colder areas, it may die back. Protect potted mint by moving it to an unheated garage or wrapping the pot in burlap. For in-ground plants, mulch heavily with straw or leaves to insulate roots. In freeze-prone zones, dig up pots and store them indoors until spring.
Wrapping up and next steps
Growing mint is simpler than you think—with the right location, containers, and care, you’ll enjoy lush, fragrant plants year-round! 🌿 Whether you’re harvesting for tea, pest control, or culinary flair, these tips ensure success. Start small, stay consistent, and watch your mint thrive.
Ready to dive in? Pick your favorite variety, grab a pot, and plant today! 🌱 Share your minty adventures with us—we’d love to see your green thumb in action!