Lawn
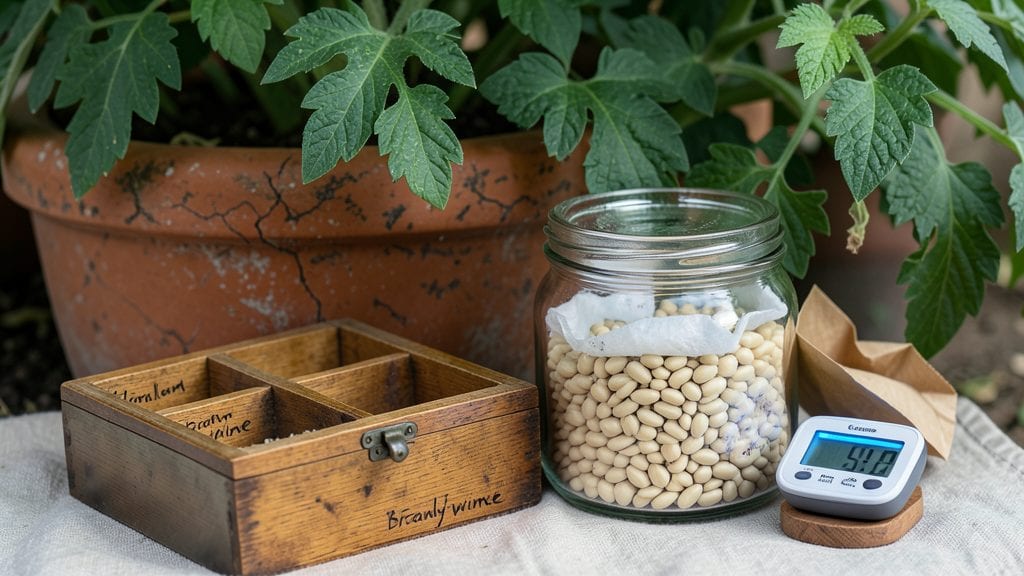
Preserving seeds year-round means never paying for store-bought plants again. 🌱 My first seed bank started with a shoebox and a handful of heirloom tomatoes, but now it’s a system that keeps my garden thriving decade after decade.
The real magic isn’t just storing seeds—it’s unlocking the ability to grow exactly what you love, even if it’s not sold at nurseries.
You’ll need airtight containers (mason jars work great), silica gel packets for moisture control, and labels with the seed name, variety, and date. The key to long-term storage is dropping the moisture content below 10%—that’s what keeps seeds viable for years.
I’ve saved beans, tomatoes, and flowers this way, and the savings add up fast when you’re not buying seeds every spring.
What you’ll get is a garden that adapts to your tastes, not the other way around. Imagine biting into a tomato so flavorful it makes store-bought ones taste bland—that’s the power of seed banks.
Plus, you’re preserving biodiversity one packet at a time, which matters more than ever as commercial varieties shrink.
For those who want to go bigger, public seed banks like Seed Savers Exchange or local library programs offer free access to rare varieties. Start small, but think long-term—this is gardening that pays dividends for generations.
📚 In This Guide
- What you need
- Instructions
- Tips and common mistakes
- Wrapping up and next steps
What you need
- ● Air-Tight Containers: Mason jars (pint or quart-sized) – 2-5 jars (depending on seed volume)
- ● Plastic or glass seed storage boxes – 1-2 boxes (with desiccant packs included)
- ● Ziploc bags (gallon-sized) – 5-10 bags (for smaller seed quantities)
- ● Desiccant Packs: Silica gel packets – 3-5 packets (to absorb moisture)
- ● Labeling Supplies: Acid-free labels or masking tape – 1 roll
- ● Permanent markers (alcohol-based for longevity) – 1-2 markers
- ○ Seed Drying Tools (Optional but Helpful): Paper towels or coffee filters – 1 pack (for drying freshly harvested seeds)
- ● Dehydrator or oven (set to 140°F or lower) – 1 unit (for speedy drying)
- ● Storage Environment Essentials: Cool, dark space (e.g., basement, fridge, or root cellar) – temperature: 32-41°F
- ○ Humidity monitor (optional) – 1 unit (to track moisture levels)
- ● 🔥 Use moisture absorbers: Skip the rice in your containers—silica gel is the gold standard for keeping seeds dry!
- ● 📊 Label like a pro: Include the seed name, variety, harvest date, and germination test results for future reference.
- ● ✨ Organize by seed type: Group seeds by family (e.g., tomatoes, beans) or planting season to streamline access.
How to create a reliable garden seed bank for long-term viability
Preserving seeds properly ensures you'll always have fresh, high-quality stock—here's my battle-tested method.
🪴 Step 1: Harvest Seeds at Peak Maturity
Collect seeds only when 90% of pods or flowers have fully matured—this means they've dried on the plant and turned their final color. For example, tomato seeds come from deep red fruit, while basil seeds form in tiny brown capsules. Harvest on a dry day to prevent moisture from sticking to seeds.
Use clean, sharp scissors to snip seed heads or pods. Lay them on a paper towel in a single layer to dry completely indoors for 1-2 weeks. Avoid plastic bags—condensation will ruin seeds. You'll know they're ready when the pods crumble easily between your fingers.
🌱 Step 2: Clean and Dry Seeds Thoroughly
Remove seeds from dried pods by gently rubbing them between your palms or using a clean, dry paper towel. For sticky seeds like tomatoes, ferment them in warm water for 24 hours to remove gelatinous coatings. Drain and rinse thoroughly, then spread seeds on a fresh paper towel to air-dry.
Place the towel in a cool, dark location> with good airflow (like a pantry) for 1-2 weeks. Stir seeds daily to prevent mold. They're ready when completely dry and brittle—you'll hear a crisp sound when you rub two seeds together.
⏰ Step 3: Store Seeds in Airtight Containers
Transfer dried seeds to airtight containers> like glass jars or vacuum-sealed bags. Label each with the seed type, harvest date, and storage location. I use small mason jars> because they seal tightly and block light—critical for long-term storage.
Add a desiccant packet> (like silica gel) to absorb any remaining moisture. Store containers in a cool, dark place> (ideally 32-41°F>) like a refrigerator or root cellar. For seeds stored at room temperature, aim for 50-60°F> or cooler.
💧 Step 4: Test Viability Before Planting
Germination rates drop over time, so test a few seeds every 1-2 years>. Place 10 seeds> between damp paper towels> in a sealed plastic bag. Keep them in a warm location (70-75°F)> and check daily. Count how many sprout within 7-14 days>—that's your germination percentage.
If fewer than 50% sprout>, replace those seeds. Store the rest in a freezer (-4°F)> for up to 20 years> to extend viability. Freezing halts aging and preserves genetic integrity, but only do this for seeds that pass the viability test first.
☀️ Step 5: Rotate and Refresh Your Collection
Use the oldest seeds first to maintain freshness. Replace any seeds that fail viability tests or show signs of mold. I keep a small inventory> of new seeds each year to refresh my collection. Store 5-10 extra seeds**> beyond what you need—you never know when you'll need a backup.
Review your seed bank annually. Discard any containers that don't seal properly or show moisture damage. A well-maintained seed bank ensures you'll always have access to healthy, heirloom-quality seeds for your garden.
Tips & tricks for perfect garden seed storage
A few key strategies will ensure your seeds stay viable and ready for planting whenever you need them.
Harvest Timing Matters: Don't rush to collect seeds—wait until 90% of pods have fully matured and turned their final color. For example, tomato seeds should come from deep red fruit, while basil seeds form in tiny brown capsules. Harvesting too early means seeds won't be fully developed, while waiting too long can cause them to shatter or lose viability. In Step 1, those 1-2 weeks of drying time are crucial for removing moisture that could lead to mold.
Fermentation Secret: For sticky seeds like tomatoes, the 24-hour warm water fermentation in Step 2 removes that gelatinous coating that can prevent proper germination. After fermenting, rinse seeds thoroughly and spread them on a fresh paper towel—this step is what separates good seed banks from great ones. I always use filtered water for fermentation to avoid introducing contaminants.
Storage Location is Critical: The ideal storage temperature of 32-41°F in Step 3 is non-negotiable for long-term viability. A refrigerator's crisper drawer (where humidity is controlled) works perfectly, or use a root cellar if available. If you must store at room temperature, keep it below 60°F and in a dark, cool pantry corner. I've seen seeds last 10+ years in these conditions, but they'll degrade much faster in warm, humid environments.
Viability Testing Strategy: The 1-2 year viability test in Step 4 is your early warning system. I recommend testing a small batch of seeds annually, even if they seem fine. Place 10 seeds between damp paper towels in a warm 70-75°F location—this mimics ideal germination conditions. If fewer than 50% sprout within 7-14 days, it's time to refresh that seed variety.
Pro Tips for Garden Seed Banks
- A few key strategies will ensure your seeds stay viable and ready for planting whenever you need them.
- Harvest Timing Matters: Don't rush to collect seeds—wait until 90% of pods have fully matured and turned their final color.
- Fermentation Secret: For sticky seeds like tomatoes, the 24-hour warm water fermentation in Step 2 removes that gelatinous coating that can prevent proper germination.
Frequently asked questions
What’s the best way to store seeds long-term without losing viability?
Store seeds in a cool (35–40°F), dry environment—like a refrigerator or root cellar—inside airtight containers (mason jars or vacuum-sealed bags work great). Add a desiccant packet to absorb moisture. Label everything with the seed type and date! Most seeds stay viable for 2–5 years (some, like onions, last just 1 year).
How do I know if my stored seeds are still good?
Test germination by planting a small sample in moist paper towels or soil. If 70–80% sprout within 7–14 days, your seeds are still strong. For quick checks, try the “float test”: Drop seeds in water—if they sink, they’re likely viable (though not foolproof!).
Can I use last year’s seed packets from the store for my seed bank?
Yes! Just empty the packet into a labeled container and store it properly. But skip seeds from packets marked “treat-packed” (they may have chemical coatings that break down). For heirloom or organic seeds, store them separately to avoid cross-contamination.
What’s the deal with freezing seeds—is it better than refrigeration?
Freezing (0°F or below) can extend seed life even longer (up to 20+ years for some types), but it’s overkill for most home gardeners. Refrigeration is simpler and works well for short-term storage. Only freeze seeds if you’re saving rare or slow-to-germinate varieties (like some herbs or flowers).
My seeds sprouted in storage—what went wrong?
This usually means too much moisture or warmth got in. Check your containers for leaks or condensation, and avoid storing seeds near the fridge’s crisper drawer (humidity hotspot!). Move them to a drier, cooler spot immediately. Discard any damp or moldy seeds—never replant them.
Pro tip: Rotate your seed bank! Use the oldest seeds first to avoid wasting viable stock. Label with “use by” dates (based on seed type) to stay organized.
Wrapping up and next steps
Garden seed banks are your secret weapon for year-round gardening success—keeping seeds viable, diverse, and ready to grow whenever inspiration (or the weather!) strikes. 🌱 By mastering proper storage techniques, you’ll save money, reduce waste, and unlock the joy of fresh harvests no matter the season.
Ready to take the next step? Start small—audit your seed collection, label those packets, and test a few stored seeds this spring. Every gardener’s journey begins with a single seed (or a well-organized jar!).