
Tools
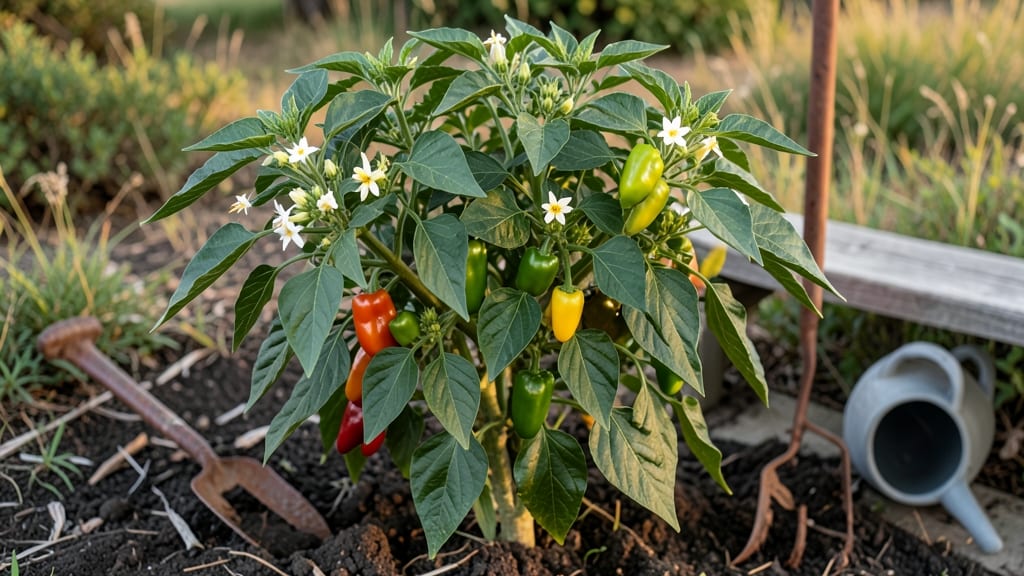
Growing garden hot peppers from seed delivers the kind of fiery payoff that turns neighbors into jealous admirers. 🌿 I’ve grown everything from mild jalapeños to jaw-droppingly hot Carolina Reapers, and the secret isn’t just patience—it’s knowing when to push the heat and when to let the plants breathe.
The first time I tasted a pepper I’d nurtured from seed, I understood why gardeners obsess over varieties like "Ghost Pepper" or "Blazing Arrow."
You’ll need just a few basics: a sunny spot with at least 6-8 hours of direct light, well-draining soil mixed with compost, and containers or beds that give roots room to stretch.
Most hot peppers thrive in 70-85°F soil, so wait until after your last frost to plant—unless you’re using transplants, which jumpstart the season by 2-3 weeks. The real magic happens in the details: consistent moisture (but never soggy soil) and a balanced fertilizer to keep the heat building.
By midsummer, you’ll be harvesting glossy, waxy peppers that pack serious heat—some so intense they’ll make your hands tingle just picking them. The first few peppers might be small, but with proper care, your plants will reward you with pounds of harvest by fall.
And the best part? You control the heat level from seed selection, so whether you want a mild kick or a full-on fire alarm, the choice is yours.
This method works for containers, raised beds, or in-ground gardens, and even beginners can master it with a little attention. Let’s get those seeds started—and prepare for the spiciest season of your gardening life.
📚 In This Guide
- What you need
- Instructions
- Tips and common mistakes
- Wrapping up and next steps
What you need
- ● Hot pepper seeds: Choose your favorite varieties (e.g., Cayenne, Habanero, Jalapeño, or Carolina Reaper)—start with 5–10 seeds per type for a diverse harvest.
- ● Seed-starting trays or pots: 2–4" deep with drainage holes (10–20 trays/pots, depending on seed quantity).
- ● Seed-starting mix: Lightweight, sterile potting soil (1 bag, ~1–2 cubic feet).
- ● Grow lights or sunny windowsill: 12–16 hours of light daily (LED grow lights work great for indoor starts).
- ● Transplant containers: 4–6" pots or biodegradable seedling cups (10–20 units).
- ● Balanced fertilizer: 10-10-10 or organic option (e.g., fish emulsion) for transplanting and growth.
- ● Garden soil or raised beds: Well-draining, amended with compost (1–2 cubic yards for outdoor planting).
- ● Watering can or hose with gentle nozzle: Keep soil moist but not soggy.
- ● Pruning shears or scissors: For trimming plants and harvesting.
- ○ Gloves (optional but recommended): Hot peppers can cause skin irritation—nitrile gloves are ideal.
- ● Heat mat: Speeds up germination for slower varieties (e.g., Habaneros).
- ● Trellis or cages: Supports tall varieties like Cayenne or Ghost Pepper.
- ● Mulch: Straw or black plastic to retain moisture and suppress weeds.
- ● pH test kit: Ensures soil pH is 6.0–6.8 (peppers love slightly acidic soil!).
- ● Pest control: Neem oil or insecticidal soap for aphids/spider mites.
- ● Harvesting basket or mesh bag: Prevents bruising and keeps peppers contained.
Step-by-step instructions for growing garden hot peppers
Here's how to cultivate fiery plants from seed that'll reward you with bold, homegrown heat.
🌱 Step 1: Start Seeds Indoors with Warmth and Patience
Fill 2-3 inch deep seed trays with sterile seed-starting mix, keeping it moist but not soggy. Plant seeds ¼ inch deep, spacing them ½ inch apart—they germinate best in warmth. I place trays on a seedling heat mat set to 75-85°F to ensure strong, rapid germination within 7-14 days.
Cover the trays with plastic wrap to retain humidity, but remove it immediately after germination to prevent damping-off. Keep the soil consistently moist by bottom-watering—place the tray in ½ inch of water for 10-15 minutes daily. You'll know it's right when the soil surface looks slightly damp but not glistening.
☀️ Step 2: Provide Bright Light and Prevent Leggy Growth
Once seedlings emerge, move them under 14-16 hours of grow light daily—a south-facing window rarely provides enough intensity. I use a full-spectrum LED grow light positioned 2-4 inches above the plants, raising it as they grow. Without sufficient light, seedlings stretch desperately, producing thin, pale stems with leaves spaced far apart.
Rotate the trays a quarter turn daily so plants grow upright instead of leaning. Strong seedlings develop thick stems, deep green color, and compact spacing between leaves. When seedlings reach 2-3 inches tall with 4-6 true leaves, they're ready for transplanting.
🪴 Step 3: Transplant to Larger Pots or Garden Beds
Choose a location with full sun exposure (6+ hours daily) and well-draining soil. If planting in containers, use 5-gallon pots with drainage holes—hot peppers thrive in individual spaces. Fill with a mix of potting soil and compost (70/30 ratio), ensuring it's loose and fertile.
Transplant seedlings carefully, burying them up to their first set of true leaves. Water deeply at the base to settle the soil and encourage root growth. Mulch around the base with 2-3 inches of straw or shredded leaves to retain moisture and suppress weeds. Avoid overhead watering to prevent fungal diseases like early blight.
💧 Step 4: Maintain Consistent Moisture and Fertility
Water peppers at the base 1-2 inches deep weekly, allowing the top 1-2 inches of soil to dry between waterings. Overwatering leads to blossom-end rot, while underwatering causes fruit to shrivel. I use a balanced liquid fertilizer (10-10-10) every 2-3 weeks once flowers appear to encourage robust fruit production.
Prune suckers (the small shoots that form in the joint between the stem and branches) to direct energy toward fruit development. Remove any yellow or diseased leaves immediately to maintain plant health. You'll see flowers appear in 6-8 weeks after transplanting, followed by fruit in 70-90 days depending on the variety.
✂️ Step 5: Harvest and Encourage Continuous Production
Harvest peppers when they reach their mature color and size—some varieties like jalapeños are ready in 75 days, while others like habaneros take 120 days. Use pruning shears to cut stems ¼ inch above the fruit to avoid damaging the plant. Regular harvesting stimulates more production, so check plants every 2-3 days during peak season.
Save seeds from your favorite varieties by allowing a few peppers to fully ripen and dry on the plant. Once the peppers turn brown and papery, remove the seeds, rinse them, and dry them in a cool, dark place for 1-2 weeks. Store in an airtight container for next year's planting. With proper care, a single plant can yield 10-20 pounds of peppers per season!
Tips & tricks for growing bold garden hot peppers
These essential insights will help you cultivate fiery, productive hot pepper plants that thrive from seed to harvest.
Germination Strategy: The 75-85°F heat mat temperature is non-negotiable for germination—hot peppers need consistent warmth to break dormancy. If your home stays cooler, consider using a seedling heat mat with a built-in thermostat to maintain this precise range. I've found that seeds planted at ¼ inch depth in 2-3 inch deep trays germinate most reliably, so don't plant them too shallow or deep.
Lighting Technique: Those 14-16 hours of grow light are crucial for preventing leggy seedlings. If you're using a south-facing window, supplement with a full-spectrum LED grow light—natural light alone rarely provides enough intensity. Position the light 2-4 inches above the seedlings and raise it gradually as they grow. Look for seedlings with thick stems and leaves spaced closely together; if you see pale, stretched plants, they need more light immediately.
Transplanting Secret: When transplanting, bury seedlings up to their first set of true leaves to encourage strong root development. I've found that using 5-gallon pots with a 70/30 potting soil and compost mix creates the ideal loose, fertile environment. The 2-3 inches of mulch around the base helps retain moisture while preventing weeds—just be sure to keep it away from the stems to avoid rot.
Watering Wisdom: The 1-2 inches deep weekly watering should be done at the base to prevent fungal diseases. I've learned the hard way that overhead watering creates perfect conditions for early blight. Let the top 1-2 inches of soil dry between waterings—this balance prevents both blossom-end rot and shriveling fruit. A moisture meter can help you track soil moisture accurately if you're unsure.
Pro Tips for Garden Hot Peppers
- These essential insights will help you cultivate fiery, productive hot pepper plants that thrive from seed to harvest.
- Germination Strategy: The 75-85°F heat mat temperature is non-negotiable for germination—hot peppers need consistent warmth to break dormancy.
- Lighting Technique: Those 14-16 hours of grow light are crucial for preventing leggy seedlings.
Frequently asked questions
Got questions about growing your own fiery garden hot peppers? You're not alone! Here are some of the most common queries—plus quick, practical answers to help you cultivate a thriving pepper patch.
How long does it take for hot peppers to grow from seed?
Hot peppers are patient plants! From seed, expect 60–90 days to harvest, depending on the variety. Start seeds indoors 8–12 weeks before your last frost for a head start. Some varieties (like habaneros) may take longer—check the seed packet for specifics. Pro tip: Use a heat mat to speed up germination if your home is chilly!
Why are my hot pepper plants turning yellow or dropping leaves?
Yellowing leaves or leaf drop usually signal overwatering, underwatering, or nutrient issues. Check the soil—it should be damp but not soggy. If leaves curl or wilt, reduce watering. For yellowing between veins, your plants may need more magnesium (Epsom salt spray) or iron. Pro tip: Mulch to retain moisture and prevent root stress!
Can I grow hot peppers in containers? What’s the best setup?
Hot peppers thrive in containers as long as they get 5+ gallons of space and full sun (6+ hours/day). Use well-draining soil with compost, and ensure pots have drainage holes. Dwarf varieties (like ‘Apache’ or ‘Jalapeño M’) are ideal for small spaces. Pro tip: Place containers near a sunny wall to boost heat and growth!
What’s the difference between hot peppers and regular peppers?
Hot peppers pack capsaicin, the compound that creates heat, while regular peppers (like bell peppers) are mild and sweet. Hot peppers come in all shapes, sizes, and heat levels—from mild jalapeños to blazing ghost peppers. Choose based on your tolerance and culinary needs! Pro tip: Wear gloves when handling hot peppers to avoid skin irritation.
When is the best time to harvest hot peppers?
Harvest when peppers reach their full size and vibrant color, but before they soften or turn wrinkled. For maximum heat, pick when firm. Use pruning shears to avoid damaging the plant. Pro tip: Harvest regularly to encourage more production—peppers won’t ripen further once picked!
Wrapping up and next steps
Growing your own garden hot peppers is a rewarding journey that brings bold flavors and fiery excitement to your kitchen! From selecting the right varieties to mastering care techniques, every step is an opportunity to connect with nature and elevate your culinary creations.
Whether you're a seasoned gardener or just starting out, the heat and satisfaction of homegrown peppers are well worth the effort.
Now that you’re armed with knowledge, why not take the next step? Grab those seeds, prep your garden, and let the spicy adventure begin—your taste buds (and dinner guests) will thank you! 🌶️🔥