
Container Gardens
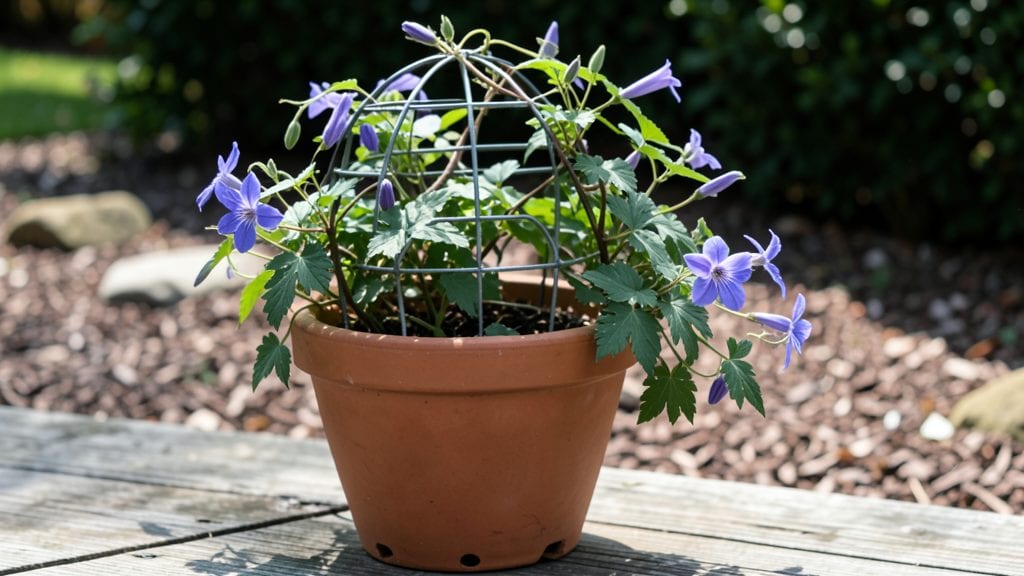
Clematis in containers isn't just possible—it's a game-changer for small spaces. 🌿 I've grown these dramatic vines in pots for years, and the right variety plus a sturdy support system turns even a balcony into a vertical garden showstopper.
The key? Matching the vine's needs to the container's limitations without sacrificing those lush, repeat-blooming flowers.
Start with compact varieties like 'Jackmanii' or 'Niobe' that thrive in containers, then pair them with a 15-gallon pot (minimum) and well-draining soil mix. Most people overlook the trellis—opt for a 5-foot tall obelisk or sturdy wire frame to give those heavy blooms proper support.
Watering's the trickiest part: containers dry out fast, so check soil moisture daily during heatwaves and never let it fully dry between waterings.
You'll see the first blooms within 8-10 weeks of planting, with continuous flowers if you deadhead spent blooms regularly. The vines stay manageable (3-6 feet tall in containers) and produce those signature bell-shaped flowers all season long.
The secret to year-round blooming? Pruning at the right time—cut back last year's growth in early spring and trim leggy stems after each flush of flowers.
This works for patios, rooftops, or even sunny windowsills with proper light. The only real challenge is winter care—move containers to a sheltered spot or wrap them in burlap to protect from freezing temps. Once you master these basics, you'll have clematis blooms that outshine any in-ground garden.
📚 In This Guide
- What you need
- Instructions
- Tips and common mistakes
- Wrapping up and next steps
What you need
- ● Container: A large, sturdy pot (18–24" in diameter) with drainage holes. Pro tip: Terracotta or ceramic retains moisture well, but ensure it’s deep enough (12–18" minimum) for root growth! 🌡️
- ● Potting Mix: High-quality, well-draining container mix (avoid garden soil—it compacts!). Aim for 3–5 gallons per container.
- ● Clematis Vine: Choose a container-friendly variety (e.g., Clematis montana or Clematis ‘Jackmanii’). Buy 1–2 mature plants or 3–5 bare-root cuttings for fuller coverage.
- ● Support Structure: Trellis, obelisk, or cage: Height: 4–6 feet (clematis loves to climb!). Ensure it’s heavy-duty—vines can weigh 20+ lbs when blooming! 💪
- ● Stakes or twine: For temporary support while young vines establish.
- ● Fertilizer: Slow-release granular fertilizer (10-10-10 or 5-10-10, 2–3 tbsp per container).
- ● Balanced liquid fertilizer (e.g., fish emulsion or compost tea) for feeding.
- ● Mulch: 2–3 inches of organic mulch (e.g., shredded bark or pine needles) to retain moisture.
- ● Pruners: Sharp, sterilized bypass pruners for trimming.
- ● Self-watering pot: Reduces maintenance for busy gardeners! 💧
- ● Slow-release moisture beads: Helps retain water in hot climates.
- ● Epsom salt: A 1 tbsp monthly boost for magnesium (encourages blooms!). ✨
- ● Decorative accents: Solar lights, hanging planters, or colorful pebbles for a polished look.
- ● Garden gloves: Protects hands from thorns (some clematis varieties have sharp ones!). ⚠️
Step-by-step instructions for clematis container gardening
Here’s how to grow thriving clematis in containers—blooms that climb, year after year.
🪴 Step 1: Choose the Right Containers and Drainage
Clematis roots need 10+ gallons of space per plant—I recommend 18-24 inch deep containers with multiple drainage holes (at least 3). The larger the pot, the more stable the vine and the longer it will bloom. I use unglazed terra cotta because it breathes and prevents root rot, but any sturdy material works.
Line the bottom with 2-3 inches of gravel or broken pottery to create an air pocket. This prevents waterlogging, which is clematis’ biggest enemy. If your pot lacks drainage, drill holes yourself—roots will rot if they sit in soggy soil. Place a mesh screen over the holes to keep soil from washing out.
🌱 Step 2: Layer Soil for Optimal Root Health
Fill the pot with 3 parts potting mix, 1 part perlite, and 1 part compost—this ensures well-draining, nutrient-rich soil. Clematis roots are shallow but sprawling, so avoid garden soil (it compacts). I mix in a slow-release fertilizer (like 10-10-10) at planting to fuel early growth.
Leave 2-3 inches of space at the top for watering. Press the soil lightly but don’t compact it—roots need air. If using multiple containers, space them 6-12 inches apart to allow for future growth. This setup mimics clematis’ natural woodland habitat, where roots spread in loose, fertile soil.
☀️ Step 3: Plant and Provide Support
Dig a hole twice as wide as the root ball but only as deep as the top of the root crown (the swelling where stems meet roots). Planting too deep suffocates the crown. Place the clematis in the center and backfill with soil, pressing gently to remove air pockets.
Immediately install a trellis, obelisk, or sturdy wire frame—clematis vines grow 6-10 feet per season and need support. I use powder-coated metal trellises for durability. Water deeply after planting to settle the soil, but avoid soaking the crown. Mulch with 2-3 inches of shredded bark to retain moisture and regulate temperature.
💧 Step 4: Water and Light for Year-Round Blooms
Keep soil consistently moist but never soggy—water when the top 1-2 inches feel dry. Clematis is drought-tolerant once established, but containers dry out fast. I water deeply 2-3 times per week in summer, reducing to once weekly in winter. Overwatering causes root rot, while underwatering stresses the plant.
Place containers in full sun (6+ hours daily)—partial shade works for cooler climates, but fewer blooms result. Watch for yellowing leaves, a sign of too much shade or overwatering. If leaves scorch in afternoon sun, move to morning sun only. Fertilize monthly in spring/summer with a balanced liquid fertilizer to encourage continuous blooming.
✂️ Step 5: Prune and Maintain for Longevity
Prune annually in late winter before new growth starts. Remove dead or crossing stems first, then cut back Group 1 clematis (early bloomers) to 2-3 buds from the base. For Group 2/3 (late bloomers), trim to 12-18 inches tall—this encourages bushier growth. Never prune after mid-summer; you’ll lose next year’s blooms.
Deadhead spent flowers regularly to redirect energy to new blooms. In fall, reduce watering but keep soil slightly moist—dormant roots need hydration. If winter temps drop below 10°F, wrap containers in burlap and move to a sheltered spot. With proper care, your clematis will climb, bloom, and thrive for decades in containers.
Tips & tricks for perfect clematis container gardening
These insider strategies will help you avoid common pitfalls and maximize your clematis' climbing potential in containers.
Container Size Matters: The 18-24 inch depth recommendation isn't arbitrary—clematis roots spread horizontally while growing vertically. I've seen containers that look big but are only 12 inches deep fail to support vigorous growth. For larger varieties, consider two connected 10-gallon containers rather than one oversized but shallow pot. This mimics the natural woodland environment where clematis thrives, with room for sprawling roots.
Soil Composition Secrets: That 3:1:1 ratio of potting mix to perlite to compost isn't just about drainage—it's about creating an airy, nutrient-rich environment. I always add a handful of worm castings to the mix for extra microbial activity. The perlite prevents compaction while the compost provides slow-release nutrients. If your soil feels too dense after mixing, add another 10% perlite—roots need oxygen as much as water.
Winter Protection Strategy: When temperatures drop below 10°F, don't just wrap your containers—create a microclimate. I place mine against a south-facing wall where they benefit from reflected sunlight. The burlap wrapping should extend below the soil line to protect the root zone. For extreme winters, consider moving containers to an unheated garage or sheltered porch where temperatures stay above freezing. The key is maintaining consistent moisture without freezing the roots.
Pruning Precision: That 2-3 buds recommendation for Group 1 clematis isn't about counting—it's about identifying the strongest growth points. Look for buds that are plump and facing outward rather than inward. For late bloomers, cutting to 12-18 inches encourages bushier growth by stimulating multiple side shoots. I always make cuts at a 45-degree angle just above a bud, using clean pruners to prevent disease transmission.
Pro Tips for Clematis Container Gardening
- These insider strategies will help you avoid common pitfalls and maximize your clematis' climbing potential in containers.
- Container Size Matters: The 18-24 inch depth recommendation isn't arbitrary—clematis roots spread horizontally while growing vertically.
- Soil Composition Secrets: That 3:1:1 ratio of potting mix to perlite to compost isn't just about drainage—it's about creating an airy, nutrient-rich environment.
Frequently asked questions
Got questions about growing clematis in containers? You’re not alone! Here are some of the most common concerns—and their solutions—to help you cultivate stunning vertical vines with ease.
What’s the best container size for clematis?
For most clematis varieties, aim for a container at least 12–18 inches deep and wide. Dwarf varieties (like Clematis montana) thrive in smaller pots (10–12 inches), while larger vines need deeper roots—15–20 gallons is ideal. Ensure drainage holes are present to prevent soggy roots. Pro tip: Wider containers = more stability for heavy blooms!
When is the best time to plant clematis in containers?
Plant in early spring or fall for optimal root establishment. Avoid extreme heat or frost, which stress young plants. If planting in summer, water deeply daily and provide afternoon shade until roots adjust. Bareroot clematis can be planted in late winter (before buds swell) for an early start.
How do I keep clematis blooming all season?
Prune strategically! Group 1 (early bloomers): Prune right after flowering. Group 2 & 3 (late bloomers): Prune in early spring to encourage new growth. Feed with balanced fertilizer (10-10-10) in spring and phosphorus-rich food (5-10-5) when buds form. Deadhead spent blooms to redirect energy.
Why are my container-grown clematis leaves yellowing?
Yellow leaves often signal overwatering, nutrient deficiency, or root rot. Check drainage first—containers should never sit in saucers of water. If roots smell foul, repot with fresh, well-draining soil. Yellowing on older leaves? Likely nitrogen deficiency—feed with a balanced fertilizer. New leaves yellow? Could be chlorosis (iron deficiency); amend soil with chelated iron.
Can I grow clematis in containers without a trellis?
While clematis loves to climb, you can grow them sprawling in wide, shallow containers if space is tight. Use low trellises, obelisks, or even a sturdy wire frame to guide vines upward. For ground-hugging varieties (like Clematis recta), let them trail—just ensure the container is wider than deep to accommodate their spread.
How often should I water potted clematis?
Water when the top 1–2 inches of soil are dry. Containers dry out faster than garden beds, so expect daily watering in hot weather (or mulch with bark to retain moisture). Avoid wetting foliage to prevent fungal diseases. In winter, reduce watering—let soil dry slightly between drinks.
Wrapping up and next steps
Clematis container gardening is a fantastic way to bring vibrant, vertical beauty to small spaces—no yard required! 🌿 With the right container, support, and care, these versatile vines will reward you with stunning blooms season after season.
Whether you’re a beginner or a seasoned gardener, the key is patience and consistency—watch your little corner transform into a lush, eye-catching display.
Ready to get started? Pick your favorite clematis variety, grab your supplies, and plant with confidence! For extra inspiration, explore clematis color combinations or container styling ideas to make your garden truly one-of-a-kind. Happy gardening—your future blooms are waiting! 🌸✨