Tools
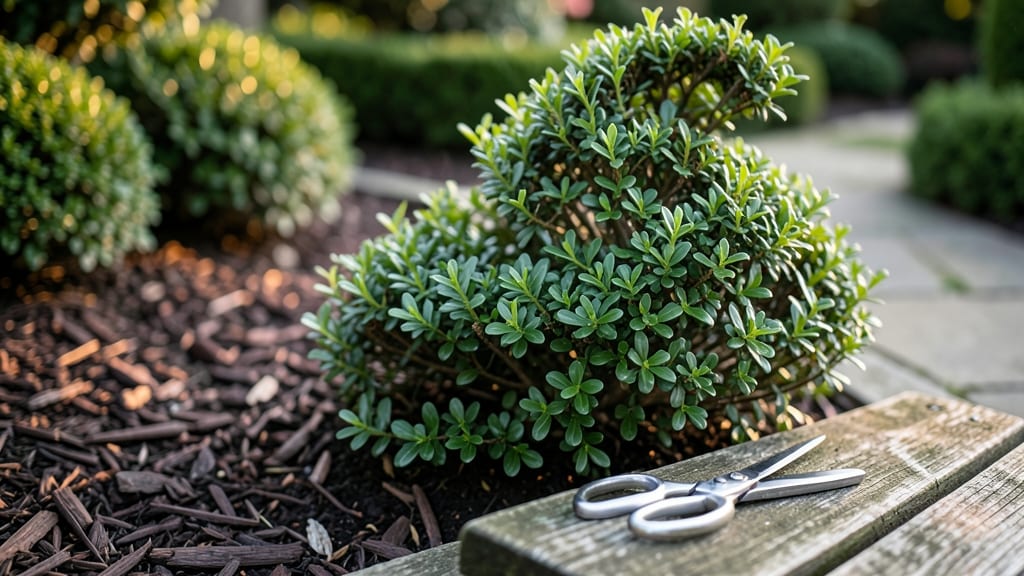
A boxwood topiary garden adds timeless elegance to any landscape with its clean lines and evergreen presence. 🌿 I’ve designed these gardens for clients who want structure without the high-maintenance fuss, and the secret lies in the right boxwood varieties and pruning rhythm.
The key isn’t constant trimming—it’s strategic shaping that keeps plants healthy while creating stunning forms.
Start with compact boxwood cultivars like ‘Green Velvet’ or ‘Winter Gem,’ which hold shape well and recover fast from pruning. For formal gardens, use geometric shapes like cubes or spirals, while informal designs thrive with flowing curves and layered heights.
Pair boxwoods with complementary plants like lavender for texture or dwarf conifers for contrast—both add depth without stealing the spotlight.
With proper spacing and seasonal pruning, your topiary stays lush year-round, even in winter. The payoff? A garden that looks polished with minimal effort, where every season reveals fresh growth and refined structure.
You’ll spend less time pruning and more time admiring the results—especially when neighbors ask how you keep it so perfect.
This approach works for small urban yards or grand estate entrances, adapting to any style. Whether you’re starting fresh or refreshing an existing garden, the principles stay the same: choose the right plants, shape with intention, and let nature do the rest. Ready to create your own living sculpture?
📚 In This Guide
- What you need
- Instructions
- Tips and common mistakes
- Wrapping up and next steps
What you need
- ● Boxwood plants – Choose hardy varieties like Buxus sempervirens or Buxus microphylla. Quantity: 10–50 plants, depending on design size (e.g., 3–5 plants per small topiary, 10+ for larger shapes).
- ● Potting soil – Well-draining, high-quality mix (e.g., 50% peat moss, 30% perlite, 20% compost). Quantity: 1–3 cubic yards for in-ground planting.
- ● Mulch – Organic mulch (e.g., pine bark or shredded leaves) to retain moisture and suppress weeds. Quantity: 2–4 bags (2–3 cubic feet each).
- ● Slow-release fertilizer – Balanced 10-10-10 or organic options like fish emulsion or composted manure.
- ● Hand pruners – Bypass pruners (sharp, 2–4-inch blades) for clean cuts.
- ● Hedge shears – 8–12-inch blades for shaping larger topiaries.
- ○ Topiary shears – Curved or serrated blades for intricate designs (optional but helpful).
- ● Measuring tape – 25-foot tape for precise spacing and sizing.
- ● Garden stakes & twine – 4–6-foot stakes to support young plants during training.
- ● Gloves – Garden or leather gloves to protect hands from thorns and sap.
- ● Watering can or hose – Adjustable nozzle for gentle watering.
- ● Wheelbarrow – For transporting soil, mulch, and plants.
- ● Topiary wire frames – Pre-made or DIY (e.g., copper wire) for sculpting complex shapes.
- ● Plant markers – Bamboo stakes or metal tags to label varieties.
- ● Edging tools – For clean borders around your garden beds.
- ● Sprinkler system – Automated watering for consistent moisture.
- ● Pruning sealant – To prevent disease on cut edges (e.g., tree wound pruning paste).
How to create a boxwood topiary garden with year-round appeal
Boxwoods are the backbone of any structured garden—here's how to shape them into elegant topiaries that stay lush all year.
🪴 Step 1: Select and Prepare Your Boxwood Plants
Choose 4 boxwood plants (one for each topiary shape you want) that are already 2-3 feet tall and healthy. I recommend Buxus sempervirens for classic topiaries—it handles pruning like a pro. Plant them in well-draining soil with full sun to partial shade (at least 4-6 hours of sunlight daily). Space them 3-4 feet apart so they have room to grow without crowding.
Dig a hole twice as wide as the root ball but only as deep as the container it came in. This prevents burying the trunk too deep, which can cause rot. Water each plant deeply right after planting to settle the soil around the roots. Here's the thing—boxwoods hate soggy feet, so if your soil drains poorly, mix in a 50/50 blend of potting mix and native soil to improve aeration.
✂️ Step 2: Establish the Basic Shape Early On
Wait 6-8 weeks after planting before pruning—this gives roots time to establish. Start by shaping the outer silhouette first. For example, if you're going for a formal hedge, use a hand pruner to trim the outer edges into clean lines. For rounded topiaries, follow the natural curve of the plant and trim just outside it to encourage fullness.
I like to prune in early spring (just as new growth begins) because the plant is full of energy. Cut back no more than 1/3 of the new growth at a time—this keeps the plant healthy and prevents shock. Always prune just above a leaf node (the bump where leaves grow) so the plant has a clean spot to regrow. If you see yellowing leaves, that’s a sign you’re over-pruning—cut back immediately and reduce watering slightly.
☀️ Step 3: Refine and Maintain Through the Seasons
In late spring, give your topiaries a light trim to clean up any uneven growth. This is also when you can start training more intricate shapes—like spirals or geometric forms—by gradually guiding the growth with soft wire supports if needed. For summer maintenance, prune only as needed to remove dead or damaged branches. Boxwoods grow slowly, so one light trim every 4-6 weeks keeps them tidy without stressing the plant.
Here’s the trick to winter prep: Avoid heavy pruning in fall—it stimulates tender new growth that won’t survive frost. Instead, give your topiaries a light dusting of mulch (2-3 inches) around the base to protect roots. If you notice brown, crispy leaves in winter, they’re likely dead and can be trimmed off in early spring. Never prune into old, woody growth—it won’t regrow.
🌿 Step 4: Encourage Fullness and Prevent Common Issues
To keep your topiaries dense and bushy, pinch back the tips of new growth in early summer. This encourages the plant to branch out instead of growing tall and leggy. If you see bare spots, it’s usually a sign of over-pruning or underwatering. Water deeply once a week (more in extreme heat) and check soil moisture—it should feel damp but not soggy an inch below the surface.
Pests like boxwood leafminers or aphids can be a problem, but I’ve found that a strong spray of water (early in the morning) usually knocks them off. For stubborn infestations, use neem oil (follow label instructions) as a natural remedy. If your boxwoods start drooping in heat, they’re thirsty—water at the base (not overhead) to avoid fungal issues.
Tips & tricks for perfect boxwood topiary shapes
Creating stunning boxwood topiaries takes patience and precision—but these insider tips will help you avoid common pitfalls and achieve professional results.
Selection Tip: When choosing your 4 boxwood plants, look for ones with naturally dense growth patterns. Avoid leggy plants—they'll take longer to fill out, and you'll end up over-pruning to compensate. I always check for uniform growth patterns around the entire plant, not just the top. The 2-3 feet tall size recommendation is perfect for starting topiaries because it gives you enough height to work with while still being manageable.
The 6-8 Week Rule: That initial waiting period after planting might feel long, but it's absolutely critical. During these weeks, roots establish a strong foundation that can handle pruning. I've seen many gardeners rush this step and end up with stressed plants that never recover. After 6-8 weeks, gently tug on the plant—if it resists, roots are ready. Also, avoid fertilizing during this time; you want roots to focus on establishing, not growing foliage.
Pruning Precision: When shaping your topiaries in Step 2, use a hand pruner with sharp blades to make clean cuts. The key is to always cut just above a leaf node—this is where new growth emerges. I like to visualize the plant's natural shape first, then make gradual adjustments. For rounded topiaries, trim just outside the natural curve to encourage fullness. Remember, you can always remove more later, but you can't put back what you've cut away.
Seasonal Strategy: The 4-6 weeks maintenance schedule in summer works perfectly because boxwoods grow slowly. During extreme heat, increase watering to twice a week and check soil moisture daily. In winter, that 2-3 inch mulch layer acts like a blanket—it insulates roots while allowing moisture to penetrate. I've found that mulching also helps prevent soil compaction, which can suffocate roots over time.
Pro Tips for Boxwood Topiary Garden
- Creating stunning boxwood topiaries takes patience and precision—but these insider tips will help you avoid common pi...
- Selection Tip: When choosing your 4 boxwood plants, look for ones with naturally dense growth patterns. Avoid leggy p...
- The 6-8 Week Rule: That initial waiting period after planting might feel long, but it's absolutely critical. During t...
Frequently asked questions
How often should I prune boxwood topiaries?
Prune boxwood topiaries twice a year: once in late spring (after the last frost) to shape for the growing season, and again lightly in early fall to tidy up before winter. Avoid heavy pruning in fall—it can stress plants before dormancy. Pro tip: Use sharp, clean shears and prune just outside the leaf buds for a cleaner look.
Do boxwood topiaries need winter protection?
Most boxwoods tolerate light frost, but in harsh winters (below 0°F/-18°C), protect young plants or newly pruned topiaries with a thin layer of mulch (2–3 inches) around the base. Avoid piling mulch against the stems to prevent rot. For extra safety, wrap young plants in burlap or use frost cloth.
Can I use other plants besides boxwood for topiaries?
While boxwood is classic, try holly, yew, or privet for dense, evergreen options. For color, consider rosemary, lavender, or dwarf conifers. Just match the plant’s growth rate and hardiness to your climate. Fun fact: Boxwood’s slow growth makes it ideal for intricate designs, but faster growers (like privet) need more frequent pruning.
Why are my boxwood leaves turning brown or yellow?
Brown/yellow leaves usually signal overwatering, underwatering, or pests. Check soil moisture (it should stay evenly damp but not soggy). Look for boxwood leafminers (tiny white larvae) or spider mites (webbed undersides). Treat with neem oil or insecticidal soap if needed. Prevent tip: Water at the base, not overhead, to reduce fungal issues.
How long does it take to shape a boxwood topiary from scratch?
Basic shapes (like spirals or cones) take 1–2 years with regular pruning, while intricate designs (animals, geometric patterns) can require 3–5 years of patience and precision. Start with a wire framework for complex designs to guide growth. Remember: Boxwood grows about 6–12 inches per year, so consistency is key!
| Quick Troubleshooting Guide |
|---|
| Problem: Leggy growth |
| Fix: Trim back overlong stems by 1/3 in spring to encourage bushier growth. |
| Problem: Fungal spots |
| Fix: Remove infected leaves, improve airflow, and apply fungicide if needed. |
| Problem: Slow growth |
| Fix: Ensure 6+ hours of sunlight daily and fertilize with slow-release, acid-loving plant food in early spring. |
Wrapping up and next steps
A boxwood topiary garden is your ticket to year-round elegance with minimal effort—just a little creativity, sharp tools, and patience! Whether you’re shaping classic hedges or whimsical designs, these evergreens deliver structure, texture, and charm without the fuss.
Start small, experiment with shapes, and watch your garden transform into a living masterpiece.
Ready to dive in? Sketch your design, gather your tools, and begin pruning! 🌿✂️ Your future topiary awaits—what will you create first?