
Tools
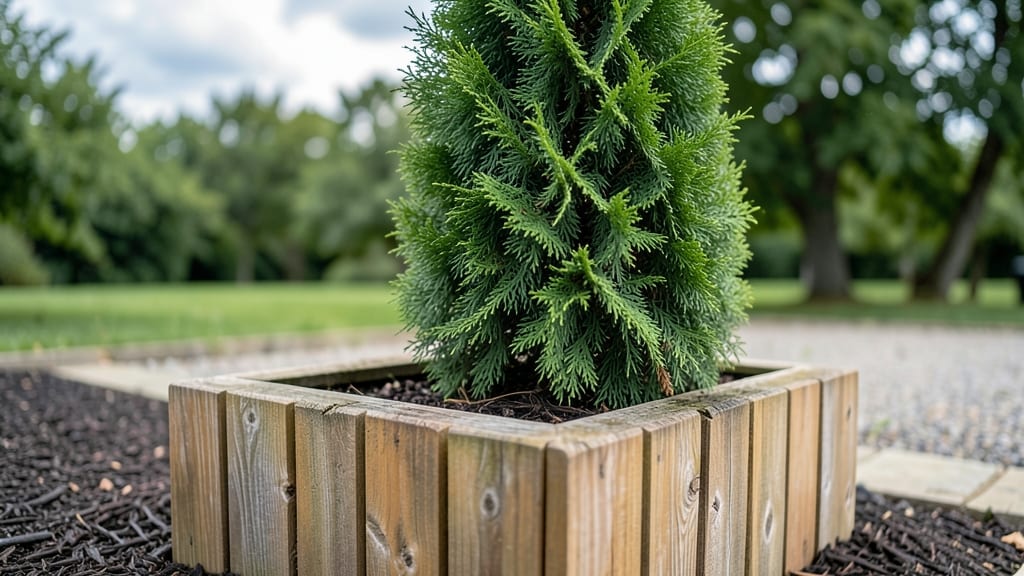
Crafting cedar garden planters transforms any outdoor space into a timeless retreat. ✨ The natural grain and warm tones of cedar create a rustic charm that only gets better with age, weathering into a patina that feels intentional.
I've used these planters for years—they resist rot, repel insects, and pair beautifully with both modern and cottage-style gardens.
The key to their longevity lies in proper sealing and placement. Start with kiln-dried cedar boards cut to your desired dimensions, then apply a water-based polyurethane to protect against moisture while keeping the wood's natural character.
Position them where they'll catch dappled sunlight—their color shifts beautifully from morning to afternoon, adding depth to your garden's aesthetic.
Style them with drought-tolerant plants like lavender, rosemary, or sedum to highlight the wood's texture without competing for attention. The contrast of silvery foliage against cedar's rich tones creates a striking visual that feels effortlessly elegant. Over time, the planters develop a soft silver-gray patina that enhances their rustic appeal.
For maintenance, a quick wipe with a damp cloth and occasional reapplication of sealant keeps them looking fresh. These planters aren't just functional—they become heirloom pieces that evolve with your garden. Ready to build yours?
📚 In This Guide
- What you need
- Instructions
- Tips and common mistakes
- Wrapping up and next steps
What you need
- ● Cedar wood: 1–2 pieces (depending on planter size), preferably 1"–2" thick, weather-resistant (e.g., western red cedar).
- ● Wood glue: Waterproof, outdoor-grade (e.g., Titebond III).
- ● Exterior wood screws: 1.5"–2" long, galvanized or stainless steel (10–15 screws per planter).
- ● Drill & drill bits: 1/8" for pilot holes, 3/16" for screws.
- ● Saw: Hand saw or power saw (jigsaw/circular) for cutting cedar.
- ● Sandpaper: 80-grit (coarse) and 120-grit (fine) for smoothing edges.
- ● Measuring tape & pencil: For precise cuts and markings.
- ○ Clamps (optional): 2–4 clamps to hold pieces steady while gluing.
- ● Wood stain or sealant: Outdoor-rated (e.g., spar urethane) for added protection.
- ● Decorative hardware: Brass corner brackets or rope accents for a refined touch.
- ● Drainage holes: Drill bit (1/4") if you want built-in drainage.
- ● Liner fabric: Landscape fabric or burlap to protect cedar from soil.
Step-by-step guide to building cedar garden planters
Here's how to craft durable, weather-resistant planters that'll enhance your garden for years.
🪴 Step 1: Select and Prepare Cedar Wood
Start with cedar boards—their natural oils resist rot and insects perfectly. Cut your boards to the desired planter dimensions, typically 12-18 inches wide and 10-14 inches deep for standard planters. Sand all edges and surfaces with 80-grit sandpaper first to remove rough spots, then switch to 120-grit for a smooth finish. This step prevents splinters and ensures a polished look.
I like to pre-drill holes for screws or nails at ¼-inch depth to prevent wood splitting. Use a pencil to mark screw locations before drilling—cedar's grain can vary, so marking keeps everything aligned. For a rustic look, leave the wood natural, but if you prefer a stained finish, apply it now before assembly.
✂️ Step 2: Assemble the Planter Frame
Lay out your cedar boards to form a rectangular base. Use galvanized screws (at least 2 inches long) to secure the corners, pre-drilling pilot holes to avoid cracking. For extra stability, add a center screw along each board's length. If building multiple planters, use the same screw pattern for uniformity.
For deeper planters (over 12 inches), reinforce the corners with wooden corner braces screwed into place. This prevents warping over time. Double-check that all edges are flush—uneven seams will collect moisture and accelerate rot. Once assembled, flip the planter over and sand any rough spots where screws meet the wood.
💧 Step 3: Seal for Longevity
Apply a water-based polyurethane sealant in thin, even coats to protect the cedar from moisture and UV damage. Let each coat dry for 4-6 hours before adding another—rushing leads to streaks and uneven coverage. Two coats are standard, but three will extend the planter’s lifespan in harsh climates.
I avoid oil-based sealants here—they darken cedar’s natural color and take longer to dry. After sealing, let the planters cure for 24 hours before planting. This ensures the sealant fully bonds to the wood. If you skipped staining earlier, now’s the time to add a cedar-safe stain for color while keeping the wood breathable.
☀️ Step 4: Add Drainage and Plant
Drill ½-inch drainage holes along the bottom of each planter, spacing them 2-3 inches apart. Line the base with landscape fabric to prevent soil from washing out while allowing water to drain. Fill the planter with well-draining potting mix, leaving 1-2 inches at the top for plants and watering.
Choose plants suited to your climate—cedar planters work beautifully with herbs, succulents, or annuals like petunias. Water thoroughly after planting, then maintain moisture by watering at the soil’s surface (not from above) to avoid washing out the mix. Place planters in partial shade for the first week to help roots establish before moving to full sun.
Tips & tricks for perfect cedar garden planters
Between us, building these planters is easier than you think—but a few key moves will keep your project looking professional and lasting for years. Here's what nobody tells you about working with cedar and ensuring your planters stand the test of time.
Wood Selection Wisdom: Not all cedar is created equal. Look for boards with straight grains and minimal knots—these will sand smoother and hold screws better. If you find boards with natural bark edges, leave them on for a rustic look, but sand them thoroughly to prevent splinters. I've learned the hard way that cheap, knotty cedar can split when you drill, so invest in quality boards if you want planters that'll last. The 12-18 inch width recommendation in Step 1 gives you flexibility for both small herbs and larger plants.
Screw Placement Strategy: The center screw along each board's length in Step 2 is non-negotiable for stability, but here's the thing: use a level to ensure your boards are perfectly square before securing. Uneven corners will show when you fill them with soil. For extra strength, I like to add a third screw about halfway along each long board—this prevents sagging over time, especially for deeper planters. And trust me on this: always use galvanized screws, even if they cost a bit more. Regular screws will rust and stain your cedar.
Sealing Secrets: That 4-6 hour drying time between polyurethane coats isn't just arbitrary—it's when the sealant properly bonds to the wood fibers. I've ruined three batches by rushing this step, so set a timer and resist the urge to add that second coat early. For planters in particularly harsh climates, consider adding a third coat after the 24-hour cure—it's worth the extra effort for longevity. And here's what nobody tells you: lightly sand with 220-grit sandpaper between coats to create a better adhesion surface.
Drainage Design: The ½-inch drainage holes in Step 4 should be your top priority. Too small, and water won't drain properly; too large, and soil will wash out. I like to make them slightly larger at the bottom center (up to ¾-inch) for better drainage while keeping the sides at ½-inch. For extra protection, add a layer of landscape fabric over the drainage holes before adding soil—this prevents clogging while still allowing water through. This small detail makes all the difference in preventing root rot over time.
Pro Tips for Cedar Garden Planters
- Between us, building these planters is easier than you think—but a few key moves will keep your project looking professional and lasting for years.
- Wood Selection Wisdom: Not all cedar is created equal.
- Screw Placement Strategy: The center screw along each board's length in Step 2 is non-negotiable for stability, but here's the thing: use a level to ensure your boards are perfectly square before securing.
Frequently asked questions
Got questions about your cedar garden planters? You’re not alone! Here are answers to the most common queries—from setup to long-term care—to help you craft planters that last for years.
What’s the best way to prep cedar wood for outdoor planters?
Sand the wood thoroughly with 80-120 grit sandpaper to smooth rough edges and remove splinters. Apply a water-based polyurethane (for eco-friendliness) or a cedar-safe sealant to protect against moisture and pests. Let it dry fully before planting—this step keeps your planters sturdy and rot-resistant!
How long do cedar planters last before needing maintenance?
With proper sealing, cedar planters can last 5–10 years outdoors. Reapply sealant every 1–2 years (or sooner if exposed to heavy rain/sun). Check for cracks or warping annually—sand and reseal damaged areas to extend their life. Think of it like a good pair of boots: a little TLC goes a long way!
Can I use cedar planters for vegetables or herbs?
Cedar’s natural resistance to rot and pests makes it ideal for edible gardens. Just avoid treating the wood with toxic chemicals (like oil-based stains). Opt for food-safe sealants, and your herbs or veggies will thrive—no funny flavors!
What should I do if my cedar planter starts to warp or crack?
Minor warping is normal, but deep cracks can compromise structure. Fill gaps with wood filler (cedar-compatible), sand smooth, and reseal. For severe warping, reinforce with corner braces or rebuild sections. Pro tip: Store planters in a covered, dry area during winter to minimize stress!
Are cedar planters more expensive than plastic or metal?
Upfront, cedar costs more than plastic but pays off long-term. While plastic planters may run $10–$30, handcrafted cedar planters average $50–$150—but they’re durable, eco-friendly, and customizable. Think of it as an investment in low-maintenance beauty that outshines disposable options!
Wrapping up and next steps
Crafting your own cedar garden planters is a rewarding project that blends rustic charm with functional beauty—plus, they’ll only get more stunning with time! 🌿 Whether you’re a seasoned woodworker or a beginner eager to try, these planters add a timeless touch to any outdoor space.
Now that you’ve got the materials, tips, and answers to common questions, it’s time to roll up your sleeves and create.
Your next step? Gather your tools, pick your cedar planks, and start building! Share your progress with fellow gardeners or even sell your creations—your green thumb (and craftsmanship) will shine. Happy building! ✨