Landscaping
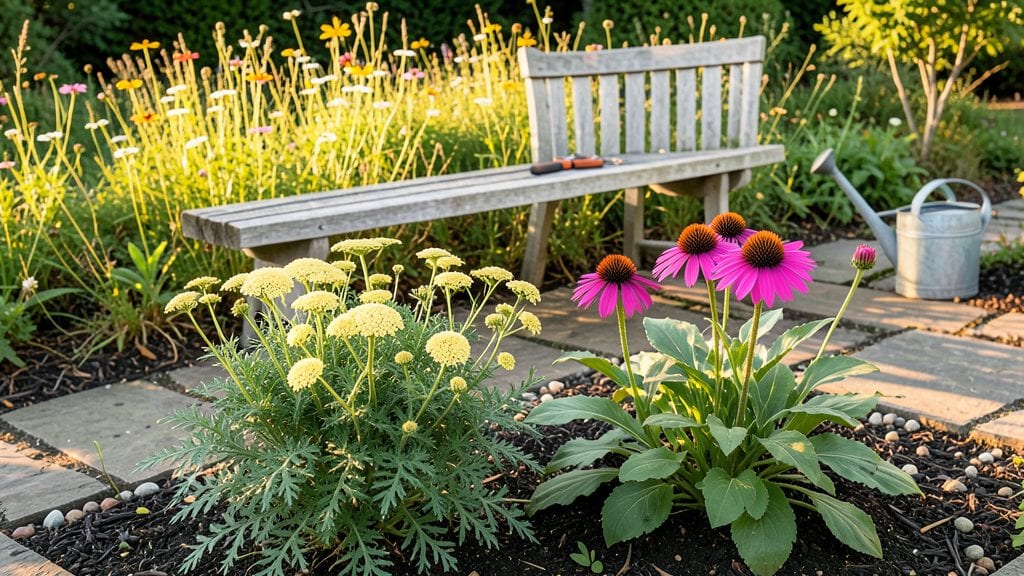
This clever biodiversity garden design isn’t just pretty—it’s a lifeline for bees, butterflies, and birds struggling to find food and shelter. I designed my first one after watching hummingbirds abandon my yard for the neighbor’s wildflower meadow, and within a year, my garden became their summer home.
The secret lies in stacking plants vertically and horizontally, just like a forest does naturally.
You’ll need native perennials for structure, annuals for quick color, and a mix of textures—think velvety lamb’s ear, spiky coneflowers, and airy milkweed. Most people overlook the soil layer, but healthy microbes in the ground are just as critical as the plants above.
My pollinator population exploded after adding a 1-inch layer of compost and mulching with leaf litter to mimic a forest floor.
By summer’s end, you’ll have a garden that hums with activity—not just bees, but birds nesting in the shrubs and frogs thriving in the damp ground layer. The best part?
It requires less watering once established, and the flowers keep coming back year after year. Here’s how to layer it like a pro, without sacrificing beauty for ecology.
This design works in small urban yards or sprawling rural plots—just adjust the scale. The key is starting small and expanding over time, so even beginners can see results in their first season. Let’s turn your yard into a thriving ecosystem where every plant has a purpose.
📚 In This Guide
- What you need
- Instructions
- Tips and common mistakes
- Wrapping up and next steps
What you need
- ● Native plants: 15–30 species (mix of trees, shrubs, perennials, annuals, and ground covers). Aim for at least 30% native wildflowers to attract pollinators.
- ● Soil amendments: Compost (2–3 cubic yards, depending on garden size)
- ● Organic mulch (straw, wood chips, or leaf mold—5–10 bags or cubic yards)
- ● Perlite or vermiculite (1–2 bags for drainage in containers)
- ○ Water features (optional but impactful): Small pond liner (if digging a pond, size varies—start with 10–20 sq. ft.)
- ● Solar-powered fountain or bubbler (for movement and oxygenation)
- ● Digging & planting: Shovel (heavy-duty, 18–24 inches)
- ● Garden fork (for aerating soil)
- ● Hand trowel (for precision planting)
- ● Pruners (bypass pruners for clean cuts)
- ● Measuring & layout: Measuring tape (25–50 ft.)
- ● Stakes & string (for marking plant placements)
- ● Graph paper or digital garden planner (to sketch your design)
- ● Watering: Hose with adjustable nozzle
- ● Watering can (for seedlings)
- ○ Drip irrigation kit (optional but efficient for larger gardens)
- ● Location: Full sun (6+ hours/day) to partial shade (3–6 hours). Test your site’s sunlight with a sunlight tracker app for 1–2 weeks.
- ● Soil test: Kit from your local extension office ($15–$25) to check pH and nutrient levels. Amend based on results!
- ● Permits (if applicable): Check local regulations for water features or large-scale planting projects.
- ● Time commitment: 1–2 weekends for setup, plus ongoing maintenance (weeding, pruning, seasonal planting).
Instructions for designing a thriving four-layered biodiversity garden
This approach mimics nature's own structure—simple layers that create habitat while boosting pollinator populations.
Plan Your Garden Layout Based on Vertical Layers
Start by sketching your space divided into four distinct vertical zones. The top layer should be trees and large shrubs (6-12 feet tall) for canopy structure, while the next layer holds small shrubs and perennials (3-6 feet tall). Below them, bulbs and ground covers (1-3 feet tall) form the third layer, and the bottom layer is reserved for low-growing annuals and grasses (under 1 foot). This vertical arrangement creates microclimates that attract different pollinators at various heights.
I always begin with the tallest elements first—this ensures they won’t shade out smaller plants later. Place your trees and shrubs along property lines or fences to maximize their support structure. Use native species whenever possible, as they’ve evolved alongside local pollinators and require less maintenance. For example, serviceberry trees and elderberry shrubs provide both food and shelter for bees, butterflies, and birds.
Incorporate Year-Round Food Sources for Pollinators
Pollinators need consistent nutrition, so design each layer to offer blooms from early spring through late fall. Start with early spring bloomers like crocus and bleeding heart in the ground cover layer, followed by mid-season perennials such as coneflowers and black-eyed Susans in the shrub layer. Top it off with late-season bloomers like asters and goldenrod in the annual layer.
I like to include three types of flowers per layer: early, mid, and late-season varieties. This ensures pollinators always have access to nectar and pollen, even when some plants finish blooming. For instance, plant bee balm (mid-season) alongside salvia (late-season) and heather (early-season) in the same shrub layer. Grouping plants by bloom time also creates visual interest as the garden transitions through seasons.
Add Structural Diversity with Natural Materials
Pollinators thrive in gardens with textural variety, so incorporate elements like dead wood, rocks, and leaf litter. Leave some fallen branches in the garden—they provide nesting sites for solitary bees and shelter for beneficial insects. Scatter flat stones among perennials to create microhabitats for ground-nesting bees. Even a simple log pile in a corner can become a bustling ecosystem for beetles, spiders, and other pollinator allies.
I avoid removing all leaf litter in autumn, as it offers winter shelter for overwintering insects. Instead, I rake leaves into thick layers around the base of shrubs and perennials. This practice also improves soil health over time. For added structure, I weave wildflower-filled logs horizontally between layers. These logs not only support climbing plants but also create tunnels for pollinators to move safely between layers.
Integrate Water Sources and Native Plants
A shallow birdbath or small pond (even a saucer filled with water) is essential for pollinators to drink and bathe. Place it in the ground cover layer where smaller insects can access it safely. Add pebbles or flat stones to the edges so bees and butterflies can perch while drinking. Change the water every 3-4 days to prevent mosquito breeding, but leave it available year-round.
Fill at least 70% of your garden with native plants, as they’ve co-evolved with local pollinators. For example, milkweed (for monarchs) and lupine (for bumblebees) are powerhouse plants that attract specific pollinators. I also interplant native grasses like little bluestem in the annual layer—their seed heads provide food for birds and shelter for insects during winter. These grasses also reduce water needs compared to traditional lawns.
Maintain a Low-Maintenance Pollinator-Friendly Routine
Once established, your biodiversity garden requires minimal upkeep. Mulch annually with 2-3 inches of organic matter (like shredded leaves or wood chips) to retain moisture and suppress weeds. Avoid synthetic fertilizers, as they can harm pollinators and disrupt the natural soil ecosystem. Instead, top-dress with compost in early spring to nourish plants without chemicals.
I schedule two seasonal maintenance tasks: a light pruning in late winter to remove dead growth and a deep mulch refresh in early autumn. This keeps the garden tidy while preserving habitat. Leave some "messy" areas—like uncut flower stems and seed heads—through winter. These provide food and shelter for overwintering pollinators. Even a small patch of untouched soil encourages ground-nesting bees to establish colonies.
Tips & tricks for perfect biodiversity garden design
Creating a thriving pollinator haven takes thoughtful planning—here's how to maximize your garden's impact from the start.
Layering Strategy: When designing your vertical layers, consider the sun exposure each zone receives. The top layer of trees and shrubs should get full sun to support their growth, while the bottom layer of annuals and grasses can tolerate partial shade. I always place taller plants on the north side of the garden to prevent shading smaller plants on the south side. This simple adjustment ensures all layers thrive simultaneously.
Native Plant Selection: Research which native plants thrive in your specific climate zone, as regional adaptations matter more than general recommendations. For example, if you're in the eastern U.S., consider adding purple coneflower and butterfly weed to your shrub layer—they're magnets for native bees. I recommend visiting local native plant nurseries to see which species grow best in your area before purchasing.
Water Feature Placement: Position your water source strategically between the ground cover and annual layers, where smaller pollinators can access it easily. I've found that placing it near a cluster of flat stones creates perfect perching spots for bees and butterflies. Remember to keep the water shallow—no deeper than 2 inches—to prevent drowning smaller insects while still providing hydration.
Seasonal Transition Planning: As you select plants for each layer, think about how the garden will look throughout the year. Include evergreen shrubs in your upper layers to provide winter structure, while adding late-season bloomers like asters ensures food sources remain available when other flowers fade. I like to create a simple seasonal calendar noting which plants bloom at each time of year to ensure continuous pollinator support.
Pro Tips for Biodiversity Garden Design
- Creating a thriving pollinator haven takes thoughtful planning—here's how to maximize your garden's impact from the start.
- Layering Strategy: When designing your vertical layers, consider the sun exposure each zone receives.
- Native Plant Selection: Research which native plants thrive in your specific climate zone, as regional adaptations matter more than general recommendations.
Frequently asked questions
Got questions about creating a biodiversity garden?
You’re not alone! Here are answers to some of the most common queries to help you design a thriving, pollinator-friendly space with confidence.
What’s the easiest way to start a biodiversity garden on a budget?
Begin with native plants—they’re low-maintenance and support local wildlife. Check seed swaps, local nurseries, or even your yard for wildflower seeds or cuttings. Use recycled materials (like pallets or bricks) for borders, and focus on one key layer (e.g., ground cover or shrubs) first. Even a small patch makes a difference!
How long does it take to see results in a biodiversity garden?
You’ll notice changes immediately—bees and butterflies may visit within weeks! However, a fully balanced ecosystem (with soil health, diverse plants, and wildlife) can take 1–3 years. Patience pays off: deeper roots, more pollinators, and resilient plants emerge over time. Track progress with a simple journal or photos!
Can I design a biodiversity garden in a small space, like a balcony or patio?
Use containers, vertical planters, or window boxes to create layers. Choose compact natives (e.g., lobelia or fennel), add a tiny water feature (like a saucer with pebbles), and include pollinator-friendly flowers in varying heights. Even a 6-inch pot can host bees—just ensure it’s sunny and well-drained!
What do I do if pests (like aphids) start overrunning my garden?
First, don’t panic—pests are part of the ecosystem! Introduce natural predators (e.g., ladybugs, lacewings) or encourage birds with perches. Avoid chemicals; instead, blast aphids off leaves with water or prune heavily infested plants. Diversity is your best defense—healthy, varied plants resist pests better than monocultures.
How do I adapt my design for my local climate (e.g., dry, wet, or cold regions)?
Research region-specific native plants—they’re adapted to your climate! For dry areas, use drought-tolerant species like yarrow or lavender; for wet zones, opt for cattails or sedges. In cold climates, focus on hardy perennials (e.g., coneflowers) and mulch heavily. Layering (e.g., evergreens for winter shelter) also helps. Check your local cooperative extension for tailored tips!
Still stumped? Drop your question in the comments—we’re happy to help you troubleshoot your unique space!
Wrapping up and next steps
Creating a biodiversity garden isn’t just about beauty—it’s a powerful way to support pollinators, boost local ecosystems, and foster a thriving, resilient landscape. 🌿 By embracing the four-layered ecosystem approach, you’ve taken the first step toward designing a space that’s both functional and vibrant.
Whether you’re a seasoned gardener or just starting out, every plant and feature you add contributes to a healthier planet.
Ready to bring your vision to life? Start small—plant a few native species, observe what thrives, and gradually expand. Your garden will become a sanctuary, one layer at a time! 🌱