
Watering
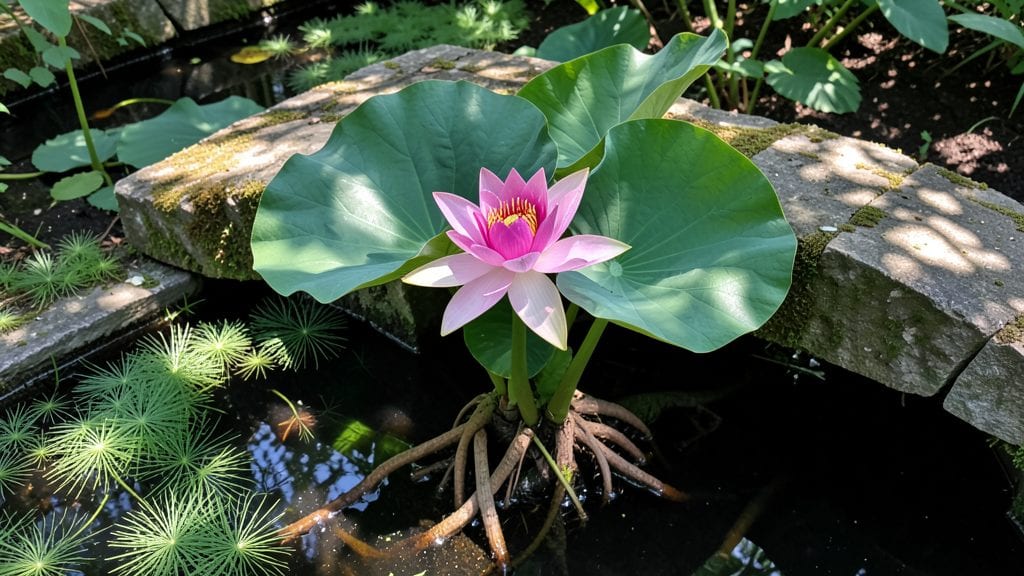
A water garden park transforms any backyard into a serene escape where the sound of moving water becomes your garden’s heartbeat.
I still remember the first time I walked into a friend’s backyard and saw their tiny pond teeming with life—koi gliding beneath water lilies, dragonflies darting just above the surface. That moment made me realize how much a simple water feature could elevate a space from ordinary to magical.
The best part? You don’t need a sprawling landscape to create one. Start small with a preformed pond liner or a simple container setup, then add plants like water hyacinths or cattails for natural beauty and wildlife appeal.
Even a small bubbling rock feature can draw in birds and butterflies while adding that soothing water sound. The key is balancing movement—whether it’s a gentle fountain or a winding stream—with stillness, where plants and reflections create a peaceful focal point.
By the time you’re done, you’ll have a space that thrives all year, even in winter when hardy plants like water irises stay vibrant under ice.
The maintenance is surprisingly simple: a net for debris, occasional top-offs for evaporation, and a few minutes each week to check on your aquatic friends. It’s not just a garden feature—it’s a living, breathing centerpiece that keeps giving back in joy and beauty.
Works for urban patios, suburban backyards, or even a corner of your balcony. Let’s bring that watery magic to life—your garden (and your soul) will thank you.
📚 In This Guide
- What you need
- Instructions
- Tips and common mistakes
- Wrapping up and next steps
What you need
- ● Water Feature Base: Preformed pond liner (EPDM or PVC, 10–20 mil thickness) – size depends on your design (e.g., 4’x6’ for a small pond).
- ● Underlayment fabric (to protect the liner from roots/rocks).
- ● Water Circulation: Submersible pump (1,200–2,500 GPH for small ponds, variable speed recommended).
- ● Waterfall kit (if desired) with tubing (½”–¾” diameter).
- ● Structural Elements: Rocks or stones (smooth, flat, and water-safe; 10–20 lbs each for stability).
- ● PVC pipes or flexible tubing (½”–1” diameter, 10–20 ft length).
- ● Safety & Functionality: UV stabilizer (for liner longevity).
- ● Fish-safe algae control (if stocking with aquatic life).
- ○ Solar-powered lights (optional but enchanting).
- ● Shovel and garden spade (for digging).
- ● Level and measuring tape (precision is key!).
- ● Utility knife (for cutting liners).
- ● Garden hose (with spray nozzle for rinsing).
- ● Wheelbarrow (for hauling rocks/soil).
- ● Gloves and knee pads (protect yourself!).
- ● Water plants (lilies, lotus, or marginals for natural filtration).
- ● Decorative bridges, statues, or fountains (adds whimsy!).
- ● Automatic fish feeder (if adding koi or goldfish).
- ● Moss or aquatic plants for a lush, wild look.
Instructions for designing a year-round water garden park
Here's how to craft a functional yet enchanting water feature that stays vibrant through every season.
Select and Prepare the Foundation
Choose a location with at least 6 hours of sunlight daily and natural shade in afternoon—this balance prevents algae blooms while keeping water warm enough for aquatic plants. I always test drainage by digging a 12-inch deep hole and filling it with water; if it drains within 30 minutes, the spot is ideal. For a 4-project setup, mark a 10-foot diameter area with stakes and string to outline your water garden's footprint.
Clear all debris and level the ground, then lay down 2 inches of coarse sand as a base layer. This prevents soil from mixing with water and clogging pumps later. Compact the sand lightly with a tamper to create a stable foundation before adding any waterproofing materials. Skipping this prep step leads to uneven surfaces and poor water circulation.
Install the Waterproof Liner and Structural Elements
Unroll the waterproof pond liner over the prepared area, ensuring it extends 6 inches up the sides of any containment walls or edging. Smooth out wrinkles carefully—sharp edges can puncture the liner over time. For a 4-project water garden, I use 20 feet of flexible plastic edging to create defined borders while allowing easy access for maintenance.
Place pre-formed pond shelves at varying depths—6 inches, 12 inches, and 18 inches—to create terraced planting zones. These shelves support aquatic plants while preventing root competition. Anchor them securely with landscape staples to prevent shifting during water filling. The deepest section should accommodate fish or larger plants, while shallower areas suit marginal species like cattails or water lilies.
Install Circulation and Filtration Systems
Position the submersible pump near the deepest point, ensuring it's placed on a stable base of small rocks to prevent sinking into soft liner. Connect it to the flexible tubing and route it to the fountain or waterfall feature, which should have a minimum 12-inch drop for proper aeration. For a 4-project setup, I use 30 feet of tubing to create gentle cascades between planting zones.
Install the biological filter media in the filtration chamber, filling it to 80% capacity with the provided ceramic rings. These rings maximize surface area for beneficial bacteria to colonize, breaking down waste naturally. Prime the pump by filling it with water before plugging it in—this prevents air locks that could damage the motor. Run the system for 24 hours before adding plants to establish proper water flow.
Add Water and Introduce Plants
Fill the water garden slowly using a garden hose with a gentle spray nozzle to minimize soil disturbance. Maintain the water level 6 inches below the liner's top edge to prevent overflow during rain. For a 4-project setup, you'll need approximately 300 gallons of water—this volume maintains stability in temperature fluctuations. Add the barley straw to the water; it releases natural compounds that inhibit algae growth over time.
Begin planting with oxygenating plants like hornwort or waterweed in the deepest sections—they'll help maintain water quality. Add marginal plants like sweet flag or blue flag iris to the 6-inch shelf, where their roots can stay moist but foliage remains above water. Place floating plants like water hyacinth or water lettuce last; they'll spread naturally and provide shade to prevent algae. Avoid overcrowding—each plant type should have at least 12 inches of space to thrive.
Seasonal Maintenance and Winterization
During spring and summer, check water levels weekly and top off as needed—evaporation is the biggest challenge in hot months. Trim marginal plants in early summer to maintain their shape and prevent them from shading out deeper water species. I always keep a small net nearby to remove fallen leaves or debris before they decompose and cloud the water.
For winter care, reduce water levels by 25% to prevent freezing damage. Add aeration stones to keep a small area of water moving—this prevents complete ice cover, which can suffocate aquatic life. Drain and store pumps, filters, and tubing according to manufacturer instructions, but leave hardy plants like water lilies or cattails in place; they'll survive winter dormancy. In early spring, refill the garden and restart the pump before new growth begins.
Tips & tricks for perfect year-round water garden design
Creating a water garden that thrives through every season requires attention to detail—here are the key strategies that make all the difference between a temporary feature and a lasting landscape centerpiece.
The Foundation Matters: In Step 1, that 12-inch deep drainage test isn't just about checking if water drains—it's about ensuring your garden won't become a swamp during heavy rains. I've seen too many water features fail because the soil couldn't handle the water load. For clay-heavy soils, consider adding a layer of gravel beneath the sand to improve drainage further. The 2-inch sand base isn't just for aesthetics; it creates a barrier that prevents soil particles from clogging your pump system over time.
Liner Installation Secrets: When unrolling your waterproof pond liner in Step 2, pay special attention to those 6 inches extending up the sides—this extra height gives you a safety margin against overflow during sudden rainstorms. I recommend using pond sealant along the liner edges before securing with edging. This creates a watertight seal that prevents leaks, especially important if you're using a flexible plastic edging system. The terraced shelves at 6, 12, and 18 inches create microclimates that allow different plant species to thrive in their ideal water depths.
Circulation System Optimization: The 24-hour priming period in Step 3 is crucial for establishing proper water flow and preventing air locks in your pump. During this time, I recommend checking all connections for leaks—particularly where the flexible tubing meets the fountain feature. That minimum 12-inch drop for your waterfall isn't just decorative; it creates the necessary pressure for proper aeration, which keeps your water oxygenated and prevents stagnation. The 30 feet of tubing creates gentle cascades that double as natural filtration by allowing debris to settle before re-entering the water.
Planting Strategy for Balance: In Step 4, the 12-inch spacing between plants might seem generous, but it's essential for preventing overcrowding that leads to poor water quality. I've found that oxygenating plants in the deepest sections create a natural filtration system that works alongside your biological filter media. The barley straw isn't just an algae preventative—it releases compounds that create a natural barrier against unwanted plant growth while being completely safe for aquatic life. When adding floating plants, start with just 2-3 specimens to allow them room to spread naturally without smothering other plant types.
Pro Tips for Water Garden Park
- Creating a water garden that thrives through every season requires attention to detail—here are the key strategies that make all the difference between a temporary feature and a lasting landscape centerpiece.
- The Foundation Matters: In Step 1, that 12-inch deep drainage test isn't just about checking if water drains—it's about ensuring your garden won't become a swamp during heavy rains.
- I recommend using pond sealant along the liner edges before securing with edging.
Frequently asked questions
Got questions about creating or maintaining a water garden park? You’re not alone! Here are some of the most common queries—plus straightforward answers to help you dive in with confidence.
What’s the best time of year to install a water garden?
For most climates, spring or early fall is ideal—temperatures are mild, and plants can establish roots before extreme heat or cold. Avoid winter installation unless you’re in a frost-free zone, as freezing can damage new structures. Pro tip: If you’re in a hot region, start in late summer to give plants a head start before winter dormancy.
How often should I refill or clean the water features?
Refill water features weekly or bi-weekly, depending on evaporation rates and local humidity. Clean filters, skimmers, and pumps monthly to prevent algae buildup. For ponds, partial water changes (10-20%) every 2-4 weeks keep ecosystems balanced. Use a dechlorinator if your water comes from a municipal source to protect aquatic life.
Will a water garden attract unwanted pests like mosquitoes?
Not if designed right! Mosquitoes thrive in stagnant water, so incorporate fountains, waterfalls, or aerators to keep water moving. Add mosquito fish (gambusia) or dragonfly larvae to naturally control populations. Avoid deep, still containers—opt for shallow, flowing designs instead.
Can I keep a water garden in a cold climate?
Use hardy plants like water lilies, cattails, or marsh marigolds, which survive winter. Install a pond aerator or de-icer to prevent freezing. In extreme cold, drain and store delicate equipment (like pumps) indoors. A partial-depth pond (less than 18 inches deep) is easier to manage in freezing temps.
What’s a budget-friendly alternative to a full pond?
Start small with a bog garden (shallow, moist soil with marginal plants) or a preformed liner basin (under $100). Container water gardens in half barrels or ceramic planters are also low-cost and portable. Repurpose items like old bathtubs or kiddie pools with a pond liner for a DIY touch!
Wrapping up and next steps
A water garden park isn’t just a dream—it’s a serene, year-round oasis waiting to be created! 🌿 With the right materials, a splash of creativity, and a little patience, you can transform any space into a tranquil retreat that delights the senses.
The key is to start small, stay consistent, and let nature do the rest.
Ready to dive in? Pick a spot, gather your supplies, and begin designing the water feature that will bring joy to your garden for seasons to come. Your future self—and your local wildlife—will thank you!