
Landscaping
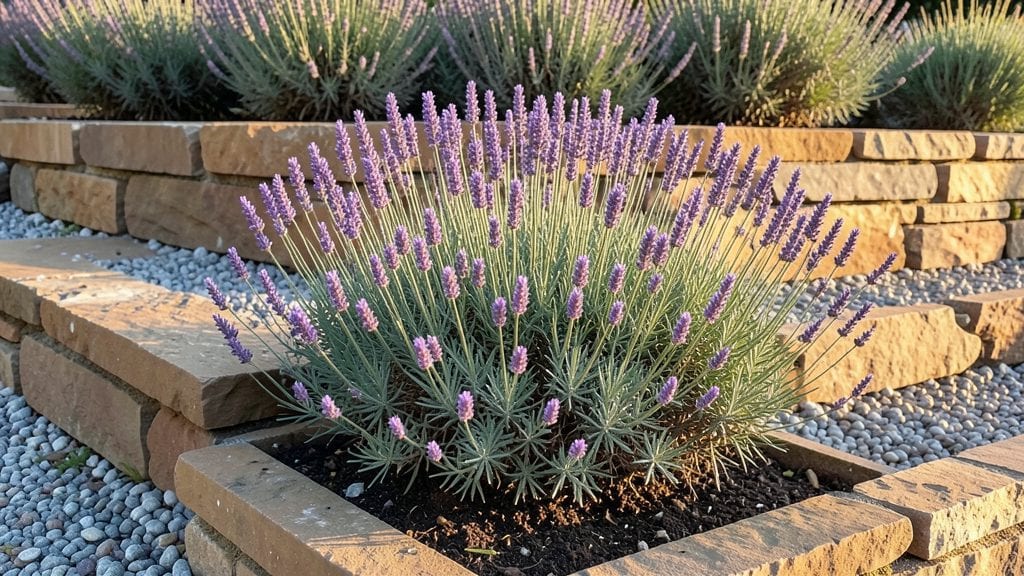
Terraced garden designs turned my sloped backyard into a lush, usable paradise—and they can do the same for your space, no matter how steep or small. The key isn’t just the steps or walls; it’s how each level works together to create a garden that feels intentional, not cramped.
I started with a 12-foot slope that looked like wasted space, and now it’s a thriving series of planting zones, each with its own character. The secret? Treating every tier like a separate garden with its own purpose, whether it’s for herbs, flowers, or even a cozy seating nook.
You’ll need retaining walls or sturdy edging to keep soil in place, but don’t let that intimidate you—there are simple, affordable options like stacked stone, wooden planters, or even repurposed bricks.
The most important part is drainage: slope each tier slightly forward so water runs off, and use gravel or landscape fabric at the base to prevent erosion.
For plants, think vertically: drought-tolerant succulents on upper levels (where soil dries faster) and moisture-loving ferns or hostas on the lower tiers where water collects. It’s all about matching the plant to its spot.
What you’ll end up with is a garden that feels expansive, not confined—layers of color, texture, and function that make every inch count. Picture lavender spilling over stone edges, tomatoes climbing trellises on mid-level terraces, and shade-loving impatiens brightening the lowest step.
The best part? You control the layout: wide, shallow steps for casual strolling or narrow, deep tiers for dramatic height. It’s gardening that works with your space, not against it.
Whether you’re going for a Mediterranean stone look, a modern minimalist vibe, or a tropical jungle feel, terraced gardens adapt to any style. The only rule?
Start small—one tier at a time—and let each level tell its own story. Ready to transform that tricky slope into your garden’s star feature?
📚 In This Guide
- What you need
- Instructions
- Tips and common mistakes
- Wrapping up and next steps
What you need
- ● Retaining Walls: Concrete blocks (e.g., Allsteel or Versa-Lok) – 20–50 blocks per tier (depends on height/width)
- ● Timber sleepers (cedar or pressure-treated) – 4–8 per tier, sized 6"–8" thick
- ● Natural stone (e.g., bluestone or flagstone) – 10–20 slabs per tier, 1"–2" thick
- ● Soil & Drainage: Topsoil – 1–2 cubic yards (1" depth per tier)
- ● Gravel (¾"–1" crushed) – ½ cubic yard for drainage layer
- ● Landscape fabric – 1 roll (10' x 50') to prevent erosion
- ● Hardware & Extras: Galvanized screws/stakes – 50+ pieces
- ● Landscape edging (plastic or metal) – 10–20 ft per tier
- ● Mulch (cedar or rubber) – 2–3 bags
- ● Wheelbarrow – for hauling soil/gravel
- ● Shovel & spade – essential for digging/excavating
- ● Level & string line – to ensure even tiers
- ● Circular saw or reciprocating saw – for cutting timber/sleepers
- ○ Post-hole digger (optional) – for securing corner stakes
- ● Safety gear: gloves, knee pads, dust mask
- ● Drip irrigation kit – for low-maintenance watering
- ● Stepping stones – to add pathways between tiers
- ● Outdoor lighting (solar or LED) – for ambiance
- ● Trellises or planters – to elevate greenery
Instructions for designing functional terraced gardens
Here's how to create a tiered layout that transforms steep slopes into lush, usable garden space.
Analyze Your Slope and Mark Levels
Begin by examining the slope's angle and length. Use a 4-foot level to determine the natural grade, marking horizontal reference points every 2-3 feet vertically. I recommend using spray paint to mark these spots—it's easy to see and won't damage the soil. The width of each terrace should be 3-4 feet to allow comfortable access and prevent erosion.
Measure the distance between each mark to calculate the depth of soil needed for each tier. If your slope is steep, wider terraces (up to 5 feet) may be necessary for stability. I always sketch a rough layout first—this helps visualize how the tiers will interact with pathways and planting areas.
Build Retaining Structures for Each Terrace
Choose between stone, wood, or brick for your retaining walls, depending on your budget and aesthetic. For stone walls, stack coursed fieldstone or concrete blocks in a staggered pattern, ensuring each layer overhangs slightly for strength. Wooden retaining walls require pressure-treated lumber (at least 2x6 inches) and should be anchored with galvanized screws to prevent shifting.
Each wall should extend 6-12 inches below the finished grade to prevent soil from washing out. For slopes over 3 feet tall, consider stepped terraces with drainage pipes behind the walls to channel excess water away. I always leave a 1-inch gap between the wall and the soil to allow for minor settling.
Excavate and Install Drainage Layers
Dig out the marked area to create a flat base for each terrace, sloping the soil slightly (1-2 degrees) toward the center for drainage. Lay down a 4-inch layer of gravel or crushed stone to promote water runoff. If your climate is wet, add a perforated drain pipe buried in the gravel, angled downward to direct water away from the terrace.
Compact the gravel with a hand tamper to prevent future settling. Avoid compacting the topsoil too heavily—you want it loose enough for roots to penetrate easily. I like to add a landscape fabric layer over the gravel before backfilling with soil to keep it from mixing in.
Backfill with Soil and Plant Strategically
Fill each terrace with a mix of topsoil and compost (about 6-8 inches deep) to ensure good drainage while retaining moisture. For the 4 terraces in this design, you’ll need roughly 1 cubic yard of soil per tier, depending on the width. Plant deep-rooted perennials like lavender or shrubs like boxwood at the back of each terrace to anchor the soil and add structure.
In the front of each tier, add shallow-rooted plants like ferns, hostas, or annuals for color. I always stagger plant heights so the design feels layered and dynamic. Mulch the surface with 2-3 inches of organic mulch to suppress weeds and retain moisture—just avoid piling it against plant stems.
Add Pathways and Finishing Touches
Connect the terraces with stepping stones, gravel paths, or wooden boardwalks to create accessible walkways. For a natural look, use flagstone or stepping stones embedded in sand. If you prefer a more rustic feel, wooden planks or gravel paths work well—just ensure they’re wide enough (2-3 feet) for comfortable passage.
Finally, add lighting if the terraces will be used in the evening. Solar-powered pathway lights or low-voltage LED strips highlight the layers beautifully without overwhelming the space. I always test the drainage after a heavy rain to ensure water isn’t pooling—adjust the slope slightly if needed.
Tips & tricks for perfect terraced garden designs
Transforming a steep slope into functional terraces requires precision and planning—here are the essential tips to ensure your design is both beautiful and structurally sound.
Precision in Level Marking: When using your 4-foot level to mark horizontal reference points every 2-3 feet vertically, double-check each measurement against the natural grade of the slope. I’ve found that using a laser level can save time and reduce errors, especially on longer slopes. The key is to maintain consistent spacing between terraces—this prevents uneven settling and ensures stability over time.
Retaining Wall Stability: For slopes over 3 feet tall, consider using a combination of stone and concrete blocks for your retaining walls. The stone provides aesthetic appeal while the blocks offer structural reinforcement. Always extend the wall 6-12 inches below the finished grade, and leave that 1-inch gap between the wall and soil to accommodate minor settling. This small detail can prevent costly repairs down the road.
Drainage is Non-Negotiable: The 4-inch layer of gravel you lay down in Step 3 isn’t just for show—it’s the foundation of your terraces’ longevity. If your climate is particularly wet, invest in a perforated drain pipe angled downward to redirect water away from the terraces. I’ve seen terraces fail within months because water pooled behind the walls, so don’t skip this step. Compact the gravel thoroughly with a hand tamper to prevent future shifting.
Plant Selection Strategy: When backfilling with your 6-8 inches of topsoil and compost, place deep-rooted perennials like lavender or boxwood at the back of each terrace to anchor the soil. These plants act as natural stabilizers, preventing erosion while adding structure. In the front tiers, opt for shallow-rooted plants like ferns or hostas—they’ll thrive in the shallower soil and create a cascading visual effect that enhances the layered look.
Pro Tips for Terraced Garden Designs
- Transforming a steep slope into functional terraces requires precision and planning—here are the essential tips to ensure your design is both beautiful and structurally sound.
- Precision in Level Marking: When using your 4-foot level to mark horizontal reference points every 2-3 feet vertically, double-check each measurement against the natural grade of the slope.
- Retaining Wall Stability: For slopes over 3 feet tall, consider using a combination of stone and concrete blocks for your retaining walls.
Frequently asked questions
Got questions about creating your dream terraced garden?
Here are answers to some of the most common queries to help you plan with confidence!
What’s the best time of year to start building terraced gardens?
The ideal time depends on your climate, but spring or early fall are typically best. Spring allows you to plant immediately, while fall gives roots time to establish before winter. Avoid freezing temperatures or peak summer heat, which can stress plants and materials.
Are terraced gardens more expensive than flat gardens?
Yes, terraced gardens often cost more upfront due to materials (retention walls, soil, edging) and labor. However, they maximize space and can reduce long-term costs by minimizing water runoff and improving drainage. Start small if budget is tight—focus on one tier at a time!
How do I prevent erosion on my terraced garden?
Use stable materials like retaining walls (stone, brick, or concrete) and reinforce slopes with geotextile fabric or gravel layers. Plant deep-rooted ground covers (e.g., creeping thyme or ivy) to bind soil naturally. Avoid overwatering, and redirect rainwater with swales or French drains.
Can I use terraced gardens for vegetables or just ornamentals?
Terraces are perfect for veggies—just ensure each tier has well-draining soil (add compost or sand if needed). Raised beds work well for root crops (carrots, potatoes), while shallower tiers suit leafy greens. Just avoid heavy feeders like corn, which need deep soil.
What’s the biggest mistake beginners make with terraced gardens?
Skipping proper drainage planning or using cheap, unstable materials (like loose rocks without mortar). Another pitfall? Overcrowding plants—leave 12–18 inches of space between tiers for maintenance. Start with a simple, single-tier design to test your skills!
What are some low-maintenance alternatives to traditional terraces?
Consider stepped stone pathways with planters (e.g., stacked pots or built-in benches) or natural stone terraces that blend into the landscape. For minimal effort, use mulch or gravel between tiers to suppress weeds and retain moisture.
Wrapping up and next steps
Transforming your small outdoor space into a stunning terraced garden is all about creativity, functionality, and a little vision. Whether you’re growing lush plants, adding cozy seating, or blending aesthetics with utility, these tiered designs prove that small spaces can yield big rewards. 🌿✨
Ready to turn your vision into reality? Start by sketching a rough layout, gathering your materials, and taking it one step at a time. Your dream terraced garden is just a shovel’s throw away!