Planting
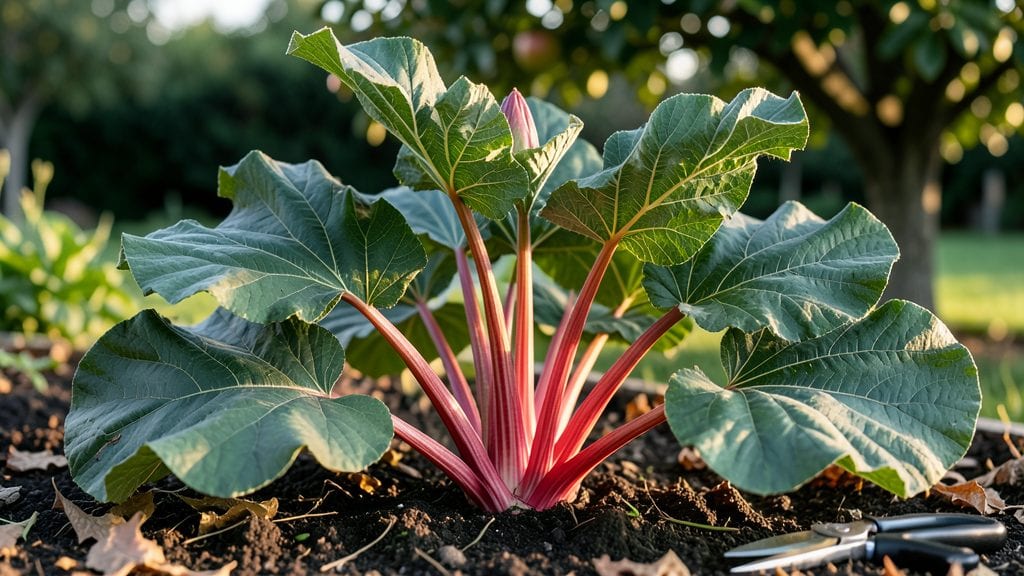
Here are some rhubarb gardening tips to help you master this rewarding crop—cold-hardy, low-maintenance, and productive for decades—so you’ll soon have more stalks than you know what to do with. 🌱 I planted my first crown in early spring, and by year two... to do with.
The secret isn’t complicated: rhubarb thrives in cool climates, hates soggy soil, and rewards patience with harvests that start in their third year.
Here’s the thing—most beginners overwater or plant in too much shade, which stunts growth. You need well-draining soil, full sun to partial shade, and a spot where it won’t be disturbed for years.
Once established, rhubarb needs 1-2 inches of water per week—no more, no less—and a light mulch to keep roots cool. The first harvest comes in late spring, but forcing (covering with buckets) can push it up by weeks.
📚 In This Guide
- What you need
- Instructions
- Tips and common mistakes
- Wrapping up and next steps
What you need
- ● Rhubarb crowns: 1–3 healthy, dormant crowns (choose varieties like Victoria or Strawberry for beginners).
- ● Well-draining soil: A mix of compost (2–3 parts) and native soil (1 part) to improve fertility and drainage.
- ● Organic matter: Aged manure or leaf mold (1–2 inches mixed into the topsoil) for nutrient-rich soil.
- ● Balanced fertilizer: A 10-10-10 or 5-10-10 formula (apply sparingly—rhubarb is low-maintenance!).
- ● Mulch: Straw or wood chips (2–3 inches) to retain moisture and suppress weeds.
- ● Garden fork or tiller: To loosen soil to a depth of 12–18 inches (rhubarb loves deep roots!).
- ● Garden spade or shovel: For digging planting holes (12–18 inches deep and wide).
- ● Gloves and knee pads: Because gardening is way more comfortable with these!
- ● Watering can or hose: With a gentle spray nozzle for even moisture distribution.
- ● Measuring tape or ruler: To ensure proper spacing (2–3 feet apart for crowns).
- ● Soil pH test kit: Rhubarb thrives in slightly acidic to neutral soil (pH 6.0–7.0)—adjust with lime or sulfur if needed.
- ● Row covers or frost blankets: For early spring/fall protection in colder climates.
- ● Drip irrigation system: For consistent moisture (especially in hot, dry climates).
- ● Pruning shears: To remove dead leaves or stray stalks post-harvest.
Step-by-Step guide to planting and maintaining rhubarb
Here's how to cultivate this resilient perennial like a pro—no fancy tools or greenhouses needed.
🌱 Step 1: Choose the Perfect Planting Site
Rhubarb thrives in full sun to partial shade with at least 6 hours of direct sunlight daily. I always pick the sunniest spot in my garden because rhubarb's growth depends on warmth. The soil should be well-draining but rich in organic matter—think loamy, not sandy or clay-heavy.
Test your soil by digging a 6-inch hole. If the dirt feels compacted or stays clumped when wet, amend it with 2-3 inches of compost mixed into the top 12 inches of soil. Rhubarb roots run deep, so they need room to spread without hitting hardpan. A slightly acidic to neutral pH (6.0-7.0) works best.
🪴 Step 2: Plant Crowns at the Right Depth and Spacing
Plant rhubarb crowns in early spring, as soon as the soil is workable but before new growth starts. Space them 3 feet apart in all directions—rhubarb forms large clumps over time, and crowding leads to weak stalks and disease. Dig a hole 12 inches deep and place the crown so the top of the root sits 2 inches below soil level.
Spread the roots gently outward and backfill with soil, tamping lightly to remove air pockets. Water deeply right after planting to settle the soil and encourage root contact. I like to add a 1-inch layer of mulch around the base to retain moisture and suppress weeds—rhubarb hates competition.
☀️ Step 3: Water and Fertilize for Strong Early Growth
Keep the soil consistently moist but never soggy during the first growing season. Water 1-2 inches per week, more if your area experiences high heat. You'll know it's right when the top 2 inches of soil feel damp but not waterlogged. Overwatering causes rot, especially in heavy clay soils.
In early spring, apply a balanced fertilizer (10-10-10) at half-strength to encourage leafy growth. Skip heavy nitrogen after the first year—too much leaf growth weakens stalks. Instead, side-dress with compost or aged manure in late winter to feed roots without burning foliage.
✂️ Step 4: Harvest Strategically for Long-Term Productivity
Wait at least 2 years before harvesting to let the plant establish a strong root system. In early spring, cut stalks at the base when they're 8-10 inches tall and at least ½ inch in diameter. Never pull stalks—they regrow from the base. Leave the leaves intact; they photosynthesize to fuel next year's growth.
Harvest no more than ⅓ of the stalks the first year, increasing to half the plant by year three. If you take too many, the crown weakens and produces fewer stalks. I mark harvested stalks with a toothpick to avoid over-picking—rhubarb is patient, but it won't reward reckless harvesting.
⏰ Step 5: Protect and Prepare for Winter Dormancy
Rhubarb is cold-hardy down to -30°F, but young plants benefit from a 3-inch layer of mulch in late fall to insulate roots. Remove old leaves in early spring before new growth appears, but leave the crown undisturbed. This prevents disease and lets sunlight warm the soil faster.
Divide mature clumps every 4-5 years in early spring to rejuvenate growth. Dig up the crown, separate into sections with 3-5 buds each, and replant immediately. This prevents stalks from becoming thin and woody. I always replant divisions in fresh soil—old beds can harbor pests over time.
Tips & tricks for perfect rhubarb cultivation
These cold-hardy perennials reward patience with years of harvests—here's how to maximize your rhubarb's potential from day one.
Soil Preparation Secret: In Step 1, when testing your 6-inch hole, pay special attention to the soil's texture after adding 2-3 inches of compost. The ideal mix should crumble easily between your fingers like a damp sponge—this indicates perfect aeration for those deep rhubarb roots. If your soil feels gritty, blend in an extra ½ inch of coconut coir to improve moisture retention without compacting. Rhubarb roots need both drainage and moisture retention to thrive, especially during dry spells.
Planting Depth Matters: The 2 inches below soil level placement in Step 2 isn't just arbitrary—it positions the crown where soil temperatures remain stable year-round. If your climate experiences -30°F winters, this depth prevents crown heave (when roots freeze and thaw, pushing the crown above soil level). For extra protection in harsh winters, mound soil 1 inch higher around the crown after planting to create natural insulation.
Watering Wisdom: The 1-2 inches per week guideline in Step 3 assumes average rainfall—adjust for your microclimate. In containers, water every 2-3 days since pots dry out faster, while in-ground plants may need supplemental watering during 6 hours of direct sunlight when temperatures exceed 80°F. The key is maintaining that 2 inches of damp soil—use a moisture meter if you're unsure. Overwatering is the #1 killer of rhubarb crowns.
Harvesting Hack: When checking stalk readiness in Step 4, look for a ½ inch diameter and vibrant pink-red color—these indicate peak sweetness. I've found that harvesting in early spring (March-April) yields the most tender stalks. To prevent disease, always use clean, sharp pruners and sterilize them with rubbing alcohol between cuts. The toothpick marking system works, but I prefer using colored flags for visual clarity when harvesting from multiple plants.
Pro Tips for Rhubarb Gardening Tips
- These cold-hardy perennials reward patience with years of harvests—here's how to maximize your rhubarb's potential fr...
- Soil Preparation Secret: In Step 1, when testing your 6-inch hole, pay special attention to the soil's texture after ...
- Planting Depth Matters: The 2 inches below soil level placement in Step 2 isn't just arbitrary—it positions the crown...
Frequently asked questions
about rhubarb gardening—because even the cold-hardiest plants need a little extra love! Here are answers to the questions we hear most often.When is the best time to plant rhubarb?
Plant rhubarb crowns in early spring (as soon as the soil is workable) or in fall (6–8 weeks before the first frost). Avoid planting in summer heat, which stresses young roots. For best results, choose a spot with full sun to partial shade and well-draining soil. Patience pays off—rhubarb can take 2–3 years to reach full harvest potential!
Can rhubarb survive harsh winters?
Rhubarb is extremely cold-hardy (zones 3–9) and thrives in winter. Mulch heavily with straw or leaves (4–6 inches) after the first frost to protect the crown. In extreme cold (below -20°F), add extra insulation. The plant goes dormant naturally, so don’t worry—it’ll bounce back in spring like a resilient champ!
Is rhubarb safe to eat raw?
Nope! Rhubarb leaves are toxic (they contain oxalic acid), but the stalks are delicious when cooked. Always harvest only the pink, red, or green stalks and discard the leaves. For beginners, start with rhubarb pie or compote—the tart flavor pairs perfectly with sweet ingredients like strawberries or honey.
What pests or diseases should I watch for?
Rhubarb is generally low-maintenance, but keep an eye out for:
- Japanese beetles: Handpick them or use neem oil.
- Crown rot: Caused by overwatering or poor drainage—improve soil and space plants 3 feet apart.
- Curly top virus: Spread by aphids; remove infected plants immediately.
Rotate crops every few years to prevent soil-borne issues. A healthy rhubarb plant is disease-resistant, so focus on well-draining soil and proper spacing!
Can I grow rhubarb in containers?
Yes, but it’s tricky! Rhubarb needs deep roots (at least 18 inches of soil depth) and space to spread. Choose a large container (20+ gallons) with drainage holes and use a high-quality potting mix. Containers dry out faster, so water consistently. While possible, in-ground planting is ideal for long-term success.
Wrapping up and next steps
Growing rhubarb is a rewarding journey that blends patience with delicious results! With the right location, soil prep, and care tips, you’ll soon enjoy a cold-hardy perennial that thrives year after year.
Whether you’re a beginner or a seasoned gardener, these secrets will help you cultivate a bountiful harvest—so get ready to savor homemade pies, compotes, and more!
Now that you’re armed with knowledge, take the next step—mark your calendar, grab your gloves, and start planting! Your future rhubarb patch (and taste buds) will thank you. 🌱✨