Container Gardens
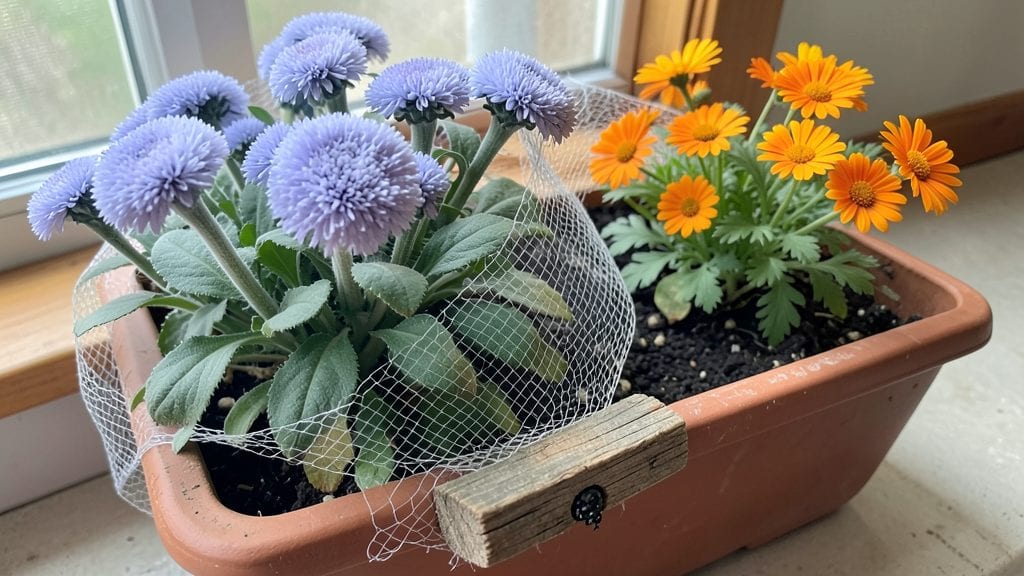
Creating a ladybug indoor garden transforms your balcony into a tiny, buzzing ecosystem where every plant and decor piece tells a story. 🌿 I’ve designed these spaces to blend playful aesthetics with real pollinator support, using bold reds, sunny yellows, and deep blacks to mimic ladybug habitats while keeping maintenance simple.
The key is balancing ornamental plants that attract ladybugs—like cosmos, marigolds, or dill—with whimsical touches like miniature ladybug statues or painted pebbles that double as mulch.
The magic happens in the details: a shallow water dish with pebbles for ladybugs to drink, tiny wooden houses for shelter, and a mix of herbs (basil, fennel) that they adore. You don’t need a green thumb—just a sunny spot, well-draining soil, and a little creativity.
Even small spaces can become vibrant hubs where ladybugs thrive, and your neighbors get jealous of your neighborhood’s tiniest pollinator party.
By summer’s end, your balcony will hum with activity, and your plants will flourish from the natural pest control these beneficial insects provide. The air smells like sunshine and herbs, while the sight of ladybugs darting between blooms turns every watering session into a joyful ritual.
This isn’t just decor—it’s a living, breathing garden that works as hard as it plays.
Works for any balcony size, from cozy city patios to sprawling rooftop gardens. The best part? You’ll watch ladybugs move in naturally, turning your space into a real pollinator haven without a single chemical spray. Let’s get those ladybugs landing!
📚 In This Guide
- What you need
- Instructions
- Tips and common mistakes
- Wrapping up and next steps
What you need
- ● Ladybugs: 10–20 adult ladybugs (preferably Hippodamia convergens or Adalia bipunctata—check local suppliers for native species).
- ○ Container: 1–2 mesh cages (12"–18" tall, with fine netting to prevent escapes). Optional: A repurposed terrarium or glass jar with ventilation holes.
- ● Alternative: A hanging basket (10"–12" diameter) with a secure lid for temporary housing.
- ● Substrate: 1 cup potting soil (lightweight, well-draining mix—avoid peat-heavy blends).
- ● 1 tbsp perlite or vermiculite (for aeration).
- ● Food Sources: 1 small aphid farm (grow aphid-attracting plants like nasturtiums or dandelions, or use commercial aphid cultures from garden stores).
- ● Nectar source: A sugar water spray (1 tsp sugar + 1 cup water, lightly misted 2–3x/week).
- ● Water: Spray bottle (for misting—never soak the substrate!).
- ○ Safety: Gloves (optional, for handling ladybugs if you’re squeamish!).
- ● Plants: Add ladybug-friendly foliage like basil, mint, or marigolds (place outside the cage for foraging).
- ● Humidity tray: A shallow dish with pebbles and water (to increase moisture without drowning roots).
- ● LED grow light: If your balcony lacks sunlight, a 12-hour daily light cycle (6–8" above the cage) mimics natural conditions.
- ● Decor: Twigs, moss, or miniature "hotels" (toy logs or hollow stems) for ladybugs to explore.
- ● Release tools: A soft paintbrush (for gently guiding ladybugs to plants) or a net (for transferring them outdoors).
How to create a ladybug indoor garden for your balcony
Here's the simple, rewarding way to turn your balcony into a tiny pollinator paradise.
🌱 Step 1: Choose and Prepare Containers for Ladybugs
Ladybugs thrive in shallow, well-drained containers with small entry points—think 4-6 inch diameter pots or even repurposed teacups with drainage holes. I like to use unglazed terra cotta because it breathes and mimics their natural habitat. Drill extra holes if needed, then line the bottom with ½ inch of pebbles to prevent waterlogging.
Fill the remaining space with a mix of ½ potting mix and ½ coconut coir—this keeps moisture without becoming soggy. Avoid garden soil; it compacts too much and suffocates roots. Place containers where they'll get 4-6 hours of morning sun—just enough to keep plants happy without overheating.
🌿 Step 2: Plant Ladybug-Friendly Flora
For 4 containers, plant a mix of marigolds, cosmos, and alyssum—these are ladybug magnets. Use 1-2 plants per pot to avoid overcrowding. Ladybugs love small, flat flowers like cosmos and tiny blooms like alyssum, which provide easy landing spots. Avoid pesticides entirely—even natural ones can harm ladybugs.
Water lightly after planting, just enough to settle the soil. Let the top inch dry between waterings—ladybugs prefer slightly drier conditions than most houseplants. You'll know you're doing it right when you see tiny green ladybug larvae crawling on leaves within 2-3 weeks of planting.
💧 Step 3: Introduce Ladybugs Safely
Purchase native ladybugs from a reputable supplier—they're gentler on your plants than imported species. Release them in the early morning when temperatures are cool (below 75°F). Gently place them on leaves or flowers using a soft paintbrush—never drop them directly into soil.
Watch for 2-3 days to ensure they stay. If they disappear, they might be flying away—try a shaded spot next time. Avoid releasing them on windy days; ladybugs are delicate fliers. Within a week, you'll see tiny eggs on the undersides of leaves—this means they're settling in!
☀️ Step 4: Maintain the Habitat Year-Round
Keep your balcony garden pest-free by regularly inspecting leaves for aphids—ladybugs' favorite snack. If you notice yellowing leaves, it might mean overwatering; ladybugs avoid soggy conditions. In winter, move containers indoors near a bright window and reduce watering to every 10-14 days.
Deadhead spent flowers to encourage new blooms, but leave some seed heads—ladybugs use them for shelter. If your ladybug population dwindles, add a few more plants or introduce aphid-infested leaves as a food source. A thriving garden will attract new ladybugs naturally.
⏰ Step 5: Expand and Enjoy Your Pollinator Haven
Once your 4 containers are flourishing, expand with additional pots or a small balcony garden bed. Mix in dill, fennel, or parsley—their flat leaves attract ladybugs too. Place a shallow dish of water with pebbles for hydration, and you'll have a self-sustaining ecosystem.
Sit back and watch as your balcony becomes a living, buzzing sanctuary. Kids love spotting ladybugs, and you'll feel proud knowing you're supporting pollinators. The best part? Your garden will stay pest-free naturally—no chemicals needed!
Tips & tricks for perfect ladybug indoor gardens
Here's what nobody tells you about creating a thriving ladybug habitat that actually works.
Container Selection Tip: Repurposed teacups might look charming, but they can dry out quickly. If you choose them, place them in a tray with a little water to maintain humidity. For the 4-6 inch pots, opt for ones with built-in saucers—this makes watering easier and prevents messes. I've found that containers with slightly raised edges help ladybugs feel more secure, so they're more likely to stay put.
Planting Strategy: When planting your 4 containers, stagger the flower types—place marigolds in two pots and cosmos/alyssum in the others. This creates visual interest while ensuring ladybugs have varied food sources. The key is to avoid overcrowding with just 1-2 plants per pot; this mimics their natural habitat where they can easily find shelter and food.
Timing Secret: The 2-3 week window for seeing larvae is perfect timing—don't rush it! If you don't spot them by then, check for aphids first. Ladybugs need these tiny pests as their main food source. I've seen some gardeners impatiently add more ladybugs too soon, but this disrupts the natural cycle. Give them time to establish their colony first.
Temperature Matters: That 75°F release temperature is critical—it's when ladybugs are most active and least stressed. If your morning temps consistently run warmer, try releasing them in the late evening instead. I've learned this the hard way: releasing them on a hot afternoon can cause them to fly away immediately. Also, keep containers out of direct midday sun to maintain stable temperatures.
Pro Tips for Ladybug Indoor Gardens
- Here's what nobody tells you about creating a thriving ladybug habitat that actually works.
- Container Selection Tip: Repurposed teacups might look charming, but they can dry out quickly.
- Planting Strategy: When planting your 4 containers, stagger the flower types—place marigolds in two pots and cosmos/alyssum in the others.
Frequently asked questions
How do I attract ladybugs to my indoor garden?
Ladybugs love nepetalactone (found in catnip or basil) and small, flowering plants like marigolds or dill. Place a shallow dish of water with a few drops of dish soap nearby—they’ll drink it but won’t drown. Release them in the evening when they’re less active, and avoid pesticides!
How long does it take to see ladybugs in my garden?
If you’re releasing store-bought ladybugs, you might spot them within hours! For natural attraction, it can take 1–2 weeks, depending on your location and plant choices. Pro tip: Check plants for tiny eggs (yellow-orange clusters) as a sign they’ve arrived and are breeding.
Can I use ladybugs in a small balcony garden?
Ladybugs thrive in small spaces as long as they have:
- Shelter (potted plants, leaf litter, or a ladybug house)
- Food (aphids, pollen, or nectar-rich flowers)
- Water (a damp sponge works too!)
What should I do if my ladybugs disappear?
Ladybugs may leave for food, weather, or lack of shelter. Troubleshoot:
- Check for predators (ants, spiders, or birds). Add fine mesh over pots if needed.
- Adjust temperature—they prefer 60–80°F. Move plants indoors if it’s too hot/cold.
- Add more plants or release a few more ladybugs to boost their population.
Are there ladybug-friendly alternatives if I can’t get them?
If ladybugs aren’t an option, try:
- Lacewings (eat aphids like ladybugs but are less social)
- Parasitic wasps (target specific pests—order online)
- Hand-picking pests (drop aphids into soapy water)
- Companion plants like garlic or chives to repel pests naturally.
Wrapping up and next steps
Creating a ladybug indoor garden is a delightful way to invite nature’s tiny guardians into your space while supporting pollinators and adding a touch of charm to your balcony.
These whimsical gardens are easy to set up, require minimal maintenance, and offer a rewarding experience for both beginners and seasoned gardeners. Whether you’re drawn to their aesthetic appeal or their ecological benefits, your ladybug haven is now ready to thrive! 🌿
Ready to watch your garden buzz with activity? Take the next step by monitoring your ladybugs’ behavior, adjusting care as needed, and sharing your progress with fellow plant enthusiasts. Happy gardening—your balcony ecosystem will thank you! 🐞✨