
How To
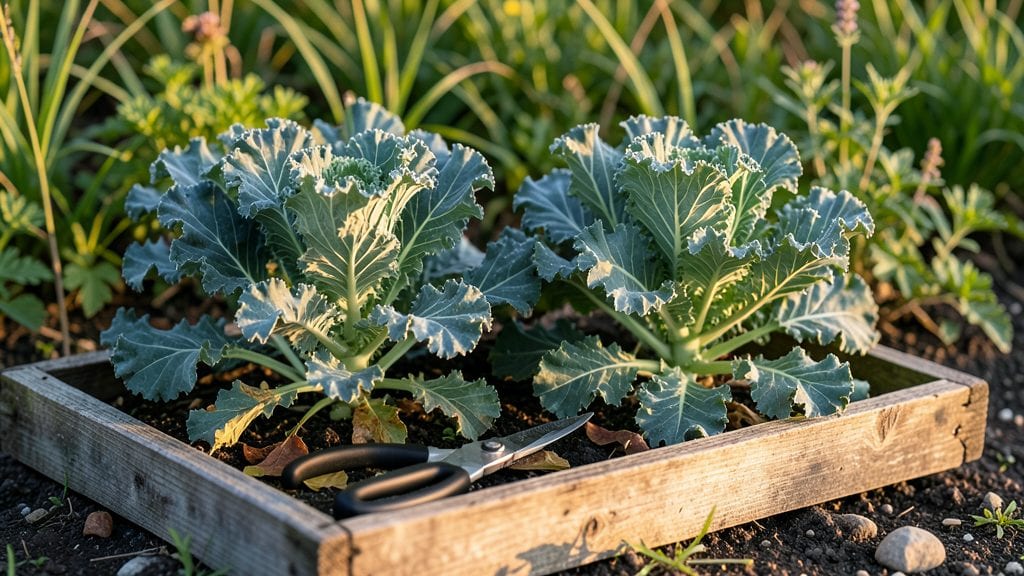
Picking kale from your garden the right way keeps those 🥬 leaves tender, your plants thriving, and your harvests coming back bigger than ever.
Harvesting kale at the wrong time—or with the wrong technique—can turn your crisp, flavorful greens into bitter, tough scraps. I’ve seen gardeners pull leaves too early, leaving their plants stunted, or cut too close to the stem, inviting disease. The solution? A few simple steps that make all the difference.
You don’t need fancy tools, just a sharp pair of scissors or clean pruners and a little know-how. Whether you’re harvesting outer leaves for baby kale or letting the plant mature for heartier cuts, timing and technique are everything.
Skip the guesswork and learn how to pick kale so your plants keep producing through the season.
In this guide, I’ll walk you through when to harvest for the best flavor, how to cut without damaging the plant, and post-harvest tips to store your kale like a pro. Ready to turn your garden into a leafy green machine?
When and how to harvest kale leaves for maximum yield
Harvesting kale at the right time is key to enjoying tender, flavorful leaves while keeping your plants productive. Unlike many vegetables, kale rewards you with continuous harvests—you can pick leaves throughout the growing season without sacrificing the plant.
The secret lies in understanding maturity signs and harvesting techniques that encourage regrowth. Whether you're growing curly kale, lacinato (Dinosaur) kale, or red Russian kale, the principles remain the same.
Kale thrives in cool weather, which means timing your harvests around seasonal shifts is crucial. Harvest too early, and you’ll get small, underdeveloped leaves. Wait too long, and the leaves may become bitter, tough, or bolt (send up flowering stems).
By following these guidelines, you’ll maximize your yield while keeping your plants healthy and productive for months. The best part? A single plant can provide harvests for 60-90 days or longer with proper care.
| Harvest Stage | Leaf Size | Ideal Time to Harvest | Regrowth Potential | Seasonal Notes |
|---|---|---|---|---|
| Early Growth | 4-6 inches | Avoid harvesting | Low (plant needs energy) | Focus on soil health |
| Mature Leaves | 6-12 inches | Spring/Fall: Weekly | High (outer leaves) | Best flavor, crisp texture |
| Overmature | 12+ inches | Only if bitter | Low (tough stems) | Risk of bolting |
| Winter Hardiness | 8-10 inches | Every 2-3 weeks | Moderate (slow growth) | Use row covers |
| Bolting Stage | Any size | Harvest immediately | None (plant dies) | Save seeds if desired |
The best time to harvest kale is when the outer leaves reach 6-8 inches long and are fully unfurled. Look for deep green, purple, or red hues (depending on your variety) and avoid leaves that are yellowing, wilted, or showing signs of pests.
For continuous harvests, always pick the outer leaves first, leaving the inner leaves to mature. This method ensures your plant keeps producing while you enjoy fresh greens.
Seasonal timing matters too. In spring and fall, when temperatures are mild (between 40°F and 75°F), kale grows fastest and tastes sweetest. During summer heat, growth slows, and leaves may bolt (send up flower stems).
If this happens, harvest the remaining leaves immediately and save seeds if you want to replant. In winter, cold-hardy varieties like Winterbor kale can continue producing with protection from frost, but avoid harvesting in freezing temperatures to prevent damage.
One common mistake is harvesting too much at once. Never remove more than one-third of the plant in a single session, or you’ll stress the kale and reduce future yields.
Another key tip: use a sharp pair of pruning shears or a knife to cut leaves 1 inch above the stem. This prevents tearing and encourages new growth. If you’re harvesting for storage, leave the smaller, inner leaves to mature while using the larger outer leaves first.
For maximum yield, fertilize your kale plants lightly with a balanced fertilizer (5-10-10) every 4-6 weeks during the growing season. Focus on nitrogen-rich feeds in spring to promote leafy growth, but avoid over-fertilizing in fall, which can lead to bitter flavors.
Mulch around the base of your plants to retain moisture and regulate soil temperature, especially in hot or cold climates. With the right care, a single kale plant can provide harvests for months, making it one of the most rewarding vegetables to grow.
If you notice your kale leaves becoming tough or bitter,
Step-by-step leaf-cutting techniques for kale harvesting
Harvesting kale correctly ensures your plants keep producing tender leaves while avoiding stress or damage. The right technique preserves the plant’s health and maximizes your yield. Whether you're picking individual leaves or harvesting entire plants, precision matters—especially when using the right tools and timing.
Kale thrives when you harvest outer leaves first, allowing the center to regrow. This method also prevents overcrowding and bolting, especially in warm weather. Using clean, sharp tools reduces the risk of disease and makes the process smoother.
Let’s break down the best ways to harvest kale without harming your plants.
How to Pick Kale From Garden: Step-by-Step Guide
- Step 1: Choose the Right Tools
- Use clean, sharp pruning shears or a sharp knife to avoid tearing leaves.
- Avoid dull tools—they crush stems and invite pests.
- Step 2: Identify Mature Leaves
- Pick leaves that are 6-8 inches long and fully unfurled.
- Look for deep green or purple hues and crisp texture.
- Step 3: Cut Outer Leaves First
- Hold the leaf near the base of the stem and cut at a 45-degree angle.
- Leave 1-2 inches of stem attached to encourage regrowth.
- Step 4: Harvest Whole Plants (If Needed)
- For bolting plants, cut the entire plant 1-2 inches above the soil.
- Use a clean knife to avoid damaging nearby plants.
- Step 5: Store or Use Immediately
- Rinse leaves in cool water to remove dirt.
- Store in a paper towel-lined container in the fridge for up to 5 days.
Never cut into the center stem or remove more than 1/3 of the plant at once. This ensures your kale keeps producing for weeks. For winter varieties, harvesting can continue until the first hard frost, as cold weather actually sweetens the leaves.
If your kale starts to bolt (send up a flower stalk), harvest the entire plant immediately. Bolting makes leaves bitter and tough, so don’t wait. With the right technique, you’ll enjoy a steady supply of fresh, crisp kale all season long.
Pro tip: Wear gardening gloves to protect your hands from thorns on curly kale varieties. Happy harvesting!