
Landscaping
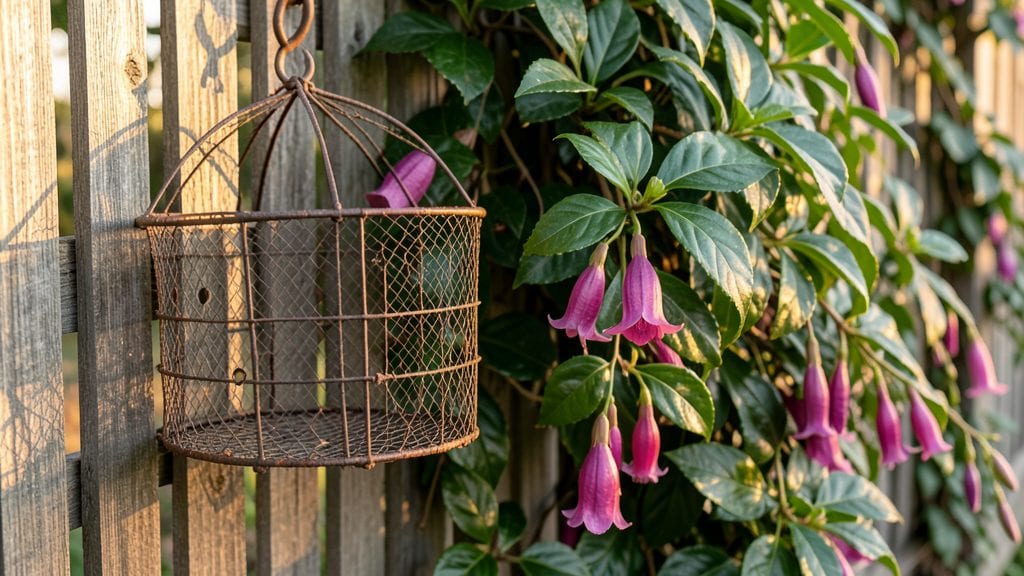
A hanging fence garden turns an eyesore into a lush, living privacy screen that actually produces greenery year-round. I was skeptical until I saw how these cascading planters softened my neighbor's chain-link fence—now it's the envy of the block.
The best part? You don’t need fancy materials or a green thumb to make it work.
Start with sturdy hooks or brackets spaced every 12-18 inches along your fence, then choose planters that match your style—macramé for boho charm, terracotta for classic looks, or even repurposed colanders for a budget-friendly twist.
Fast-growing vines like ivy or morning glories will give you quick coverage, while succulents and ferns add texture without needing much water.
By summer, your fence will be a vibrant curtain of foliage, blocking noise and eyes while adding value to your home. The maintenance is minimal—just a weekly water check and occasional trimming to keep things tidy.
Even in small yards or urban spaces, this hack maximizes every inch of vertical real estate.
Works for any fence material, from wood to metal, and adapts to different climates—just swap out plants for drought-tolerant varieties if needed. Let’s turn that fence into a green masterpiece without breaking the bank or the rules.
📚 In This Guide
- What you need
- Instructions
- Tips and common mistakes
- Wrapping up and next steps
What you need
- ● Fence panels or slats: Pre-existing wooden, vinyl, or metal fence (or new panels if replacing). Ensure they’re sturdy and spaced at least 4–6 inches apart for root and plant growth.
- ● Coco coir or landscape fabric: 1–2 rolls (for moisture retention and weed suppression). Opt for breathable, UV-stabilized fabric.
- ● Potting soil: 5–10 bags (lightweight, well-draining mix like cactus/succulent soil or peat-based potting mix). Avoid garden soil—it’s too heavy!
- ● Plants: Choose trailing, compact, or vine varieties like: Succulents (e.g., Sedum, String of Pearls)
- ● Herbs (e.g., Thyme, Oregano, Creeping Thyme)
- ● Flowers (e.g., Petunias, Nasturtiums, Fuchsias)
- ● Vines (e.g., Ivy, Sweet Potato Vine, Boston Fern)
- ● Fertilizer: Slow-release granular fertilizer (e.g., 10-10-10) or organic options like fish emulsion.
- ○ Mulch (optional): Pine bark or shredded leaves to retain moisture and deter weeds.
- ● Drill or screwdriver: For securing fabric or adding hooks (if modifying the fence).
- ● Scissors or utility knife: To cut fabric or trim plants.
- ● Measuring tape: For spacing plants evenly (aim for 6–12 inches apart, depending on plant size).
- ● Gloves: Heavy-duty work gloves to protect your hands.
- ● Watering can or hose with a gentle spray nozzle: For even moisture distribution.
- ○ Level (optional): Ensures your fence panels are straight before planting.
- ● Sunlight assessment: Check your fence’s sun exposure (full sun, partial shade, or full shade). Choose plants accordingly!
- ● Drainage check: Ensure your fence isn’t prone to water pooling behind it (add landscape fabric if needed).
- ● Permits (if applicable): Verify local regulations if modifying an existing fence (e.g., adding hooks or panels).
- ● Patience: Some plants (like vines) take time to fill in—plan for 3–6 months for full coverage!
Step-by-step instructions for creating a hanging fence garden
Transform your fence into a lush vertical garden that adds privacy while maximizing small spaces.
Select and Prepare the Fence and Hanging System
Choose a fence that can support the weight of your plants and containers. For lightweight options, I recommend using a polymer-coated wire fence or wooden lattice panels—both provide sturdy anchor points. Measure the fence length and plan your hanging system using the heavy-duty nylon webbing straps or metal hooks included in your kit. Space the straps or hooks 12-18 inches apart to distribute weight evenly and allow room for larger plants.
If your fence is made of smooth material like vinyl or metal, attach adhesive hook strips along the top edge to create secure mounting points. Test each hook by hanging a small weight—if it holds without slipping, you're ready to proceed. This step ensures your garden stays secure even after heavy rain or wind.
Choose and Arrange Containers and Plants
Select containers based on plant size and drainage needs. For trailing plants like ivy or nasturtiums, use 6-8 inch wide hanging baskets with pre-formed drainage holes. For upright plants such as fuchsias or coleus, opt for 4-6 inch deep pockets with built-in drainage trays. Fill each container with 2-3 gallons of lightweight potting mix, amended with 1 cup of perlite to improve aeration.
Arrange containers in descending order of height from top to bottom. Place taller, more upright plants at the top and trailing varieties at the bottom. This creates visual balance and ensures all plants receive adequate light. For example, I start with 6-inch tall fuchsias at the top, followed by medium-height impatiens, and finish with trailing creeping jenny at the bottom. This layout maximizes both aesthetics and growth potential.
Plant and Water for Immediate Establishment
Fill each container with plants, spacing them according to their mature size. For example, fuchsias should be planted 4-6 inches apart, while nasturtiums can be spaced 3-4 inches apart. Gently press the soil around the roots to secure the plants without compacting it. Water each container thoroughly until water drains freely from the bottom. This initial soaking helps settle the soil and eliminates air pockets that could stress new roots.
After planting, place the containers in a shaded area for 24-48 hours to allow the soil to stabilize. During this time, check the moisture level daily—if the top inch feels dry, give the plants a light misting. This precaution prevents overwatering while ensuring the roots establish quickly. Once the soil is settled, hang the containers at your planned intervals.
Maintain Light, Water, and Fertility for Year-Round Growth
Position your hanging garden to receive at least 4-6 hours of direct sunlight daily, though most plants thrive with morning sun and afternoon shade to prevent leaf scorch. If your fence is in full sun, opt for heat-tolerant varieties like lantana or verbena. For shadier spots, choose heuchera or begonia. Monitor plant health weekly—yellowing leaves often signal overwatering, while crispy edges indicate underwatering.
Water the garden every 2-3 days during warm weather, adjusting for rainfall. Use a watering can with a long spout to reach all containers evenly. Fertilize monthly with a balanced liquid fertilizer (10-10-10) diluted to half strength. In cooler months, reduce watering to once a week and switch to a low-nitrogen fertilizer to encourage lush foliage rather than rapid growth.
Prune and Refresh for Continuous Bloom and Privacy
Trim back leggy or overgrown plants every 6-8 weeks to encourage bushier growth and prevent containers from becoming top-heavy. Use clean, sharp pruning shears to snip just above a leaf node, which promotes new branching. For trailing plants, gently weave stems through adjacent containers to create a cohesive, dense curtain. This step not only maintains appearance but also improves air circulation, reducing disease risk.
Replace spent annuals with new varieties every 2-3 years or as needed to refresh the garden's look. For example, swap out winter-dormant plants like heuchera with spring-blooming pansies in early spring. Mulch the soil surface with ½ inch of organic mulch annually to retain moisture and suppress weeds. With consistent care, your hanging fence garden will provide year-round greenery and privacy while transforming an otherwise bare space.
Tips & tricks for perfect hanging fence garden design
A few strategic approaches will help you create a thriving vertical garden that not only maximizes space but also provides year-round privacy and beauty.
The Weight Distribution Secret: When spacing your 12-18 inch intervals for hanging straps or hooks, consider the mature weight of your plants. Trailing varieties like creeping jenny can become surprisingly heavy when fully established, so place them closer to the center of your fence where support is strongest. I've learned this the hard way after watching several containers swing dangerously in strong winds—always err on the side of closer spacing for heavier plants.
Container Selection Strategy: The 6-8 inch wide baskets for trailing plants might seem small, but they're perfect for creating that lush, cascading effect. For upright varieties like fuchsias, the 4-6 inch deep pockets provide enough root space while keeping the overall look cohesive. Pro tip: Choose containers with built-in drainage trays—this prevents water from pooling at the bottom, which can lead to root rot. I've found that plastic containers with drainage holes actually last longer than terracotta because they don't absorb moisture and crack in freezing temperatures.
Plant Placement Psychology: The descending height arrangement isn't just about aesthetics—it's a practical solution for light distribution. Taller plants at the top create a natural canopy that protects more delicate varieties below from harsh afternoon sun. I always start with my 6-inch fuchsias at the top because they handle full sun beautifully, then work my way down to more shade-tolerant plants. This layering also creates that coveted "living wall" privacy effect by obscuring views from different angles as you walk past.
Soil Stabilization Hack: That 24-48 hour stabilization period in Step 3 is crucial for preventing soil compaction and root stress. During this time, I like to gently tap each container on a solid surface to help settle the soil without compacting it. This creates larger air pockets that roots can more easily penetrate. If you're working with particularly heavy soil mixes, consider adding an extra ¼ cup of perlite to each container—it improves aeration without affecting moisture retention.
Pro Tips for Hanging Fence Garden
- A few strategic approaches will help you create a thriving vertical garden that not only maximizes space but also provides year-round privacy and beauty.
- The Weight Distribution Secret: When spacing your 12-18 inch intervals for hanging straps or hooks, consider the mature weight of your plants.
- Container Selection Strategy: The 6-8 inch wide baskets for trailing plants might seem small, but they're perfect for creating that lush, cascading effect.
Frequently asked questions
Got questions about transforming your fence into a lush, functional garden? Here are answers to the most common ones—so you can get growing with confidence!
What’s the best time of year to install a hanging fence garden?
Aim for spring or early fall when temperatures are mild (50–75°F). This gives plants time to establish roots before extreme heat or cold. Avoid winter unless you’re planting hardy evergreens or bulbs. Pro tip: If you must install in summer, water deeply twice daily for the first 2 weeks!
How do I keep my fence from sagging under the weight of plants?
Use heavy-duty hooks or brackets (like powder-coated steel) and distribute weight evenly. For tall fences, add horizontal support beams every 4–6 feet. Lightweight options like bamboo trellises or coconut coir pots reduce strain. Warning: Avoid overloading with succulents—they’re heavy when watered!
How often should I water a hanging fence garden?
Water daily for the first 2 weeks, then taper to every 2–3 days (check soil moisture). Hanging planters dry out faster—use self-watering systems or drip irrigation for consistency. Morning watering prevents evaporation and fungal issues. Drought-tolerant plants (like lavender or sedum) need less frequent watering.
Can I use a hanging fence garden for edibles, or is it just for ornamentals?
Grow herbs (basil, thyme), strawberries, cherry tomatoes, or peppers in lightweight containers. Just ensure your fence gets 6+ hours of sunlight for veggies. Container size matters: Larger pots (5+ gallons) support root growth better than tiny baskets.
How do I prevent pests (like aphids or spider mites) in a hanging garden?
Start with pest-resistant plants (e.g., marigolds, nasturtiums). Use neem oil or insecticidal soap for early signs. Physical barriers like fine mesh over pots work too. Encourage predators like ladybugs by adding companion plants. Check undersides of leaves weekly—early detection is key!
What if my fence isn’t sturdy enough for heavy planters?
No problem! Try lighter alternatives like:
- Fabric pockets (sewable or pre-made) with small plants.
- Vertical planters with built-in drainage (e.g., felt pockets).
- Wall-mounted planters if your fence is weak.
Wrapping up and next steps
A hanging fence garden isn’t just a stylish upgrade—it’s a game-changer for small spaces, offering privacy, greenery, and year-round beauty without sacrificing square footage. Whether you’re a beginner or a seasoned gardener, this vertical solution proves that creativity and functionality can grow together. 🌿
Ready to transform your fence into a lush, living masterpiece? Start small—pick a section, gather your supplies, and let your green thumb shine! Plant your first vine or flower today, and watch your outdoor space bloom in ways you never imagined.