
Vegetables
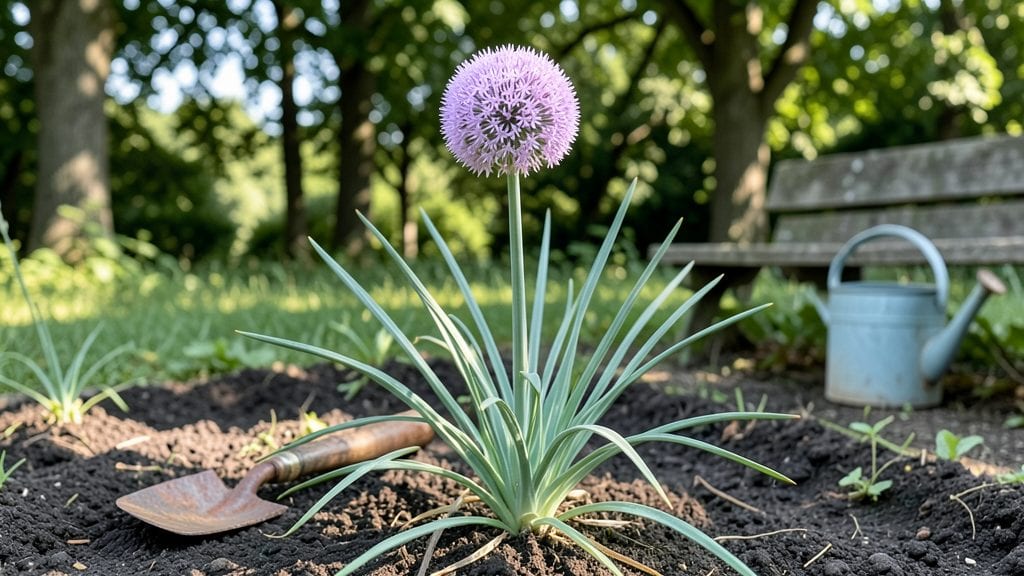
Creating a garden for living means turning your yard into a daily sanctuary where beauty and function grow together—no matter how small your space. 🌿 I designed mine around a 4x6-foot patio, blending herbs, salad greens, and a compact seating area where I can sip morning coffee surrounded by fresh basil.
The key isn’t just what you grow, but how you live among it.
Start with multi-purpose zones: a raised bed for greens doubles as a dining table, while trellised vines provide shade and edible fruit. Permaculture principles like companion planting save space—think marigolds deterring pests near your tomatoes, or strawberries growing under fruit trees.
Even balconies work with vertical planters and hanging baskets stuffed with peppers and lettuce.
By summer, you’ll harvest dinner ingredients steps from your kitchen, and by winter, evergreens and citrus keep the space lively. The best part? Every season offers something new—spring’s tender shoots, summer’s shade, fall’s pumpkins, and winter’s fragrant rosemary. It’s not just gardening; it’s creating a lifestyle.
Whether you’ve got a postage-stamp yard or just a sunny windowsill, these ideas adapt. The first step is simply choosing one corner to begin—your future self will thank you when dinner comes fresh from the garden, not the store.
📚 In This Guide
- What you need
- Instructions
- Tips and common mistakes
- Wrapping up and next steps
What you need
- ● Containers or Raised Beds: 2–5 10–20 gallon containers (for herbs, greens, or compact veggies like cherry tomatoes)
- ● 1 4’x8’ raised bed (for larger crops like peppers, bush beans, or salad mixes)
- ○ Self-watering options (optional but highly recommended for small spaces)
- ● Growing Medium: 1–2 cubic yards of high-quality potting mix (look for "organic" or "vegetable garden blend")
- ● 1–2 bags of compost (for nutrient boost—aim for 20% compost mix)
- ○ Optional: Worm castings (1–2 cups per container for extra fertility)
- ● Seeds or Seedlings: Choose fast-growing, compact varieties like: Leafy greens (e.g., baby kale, spinach, lettuce)
- ● Herbs (e.g., basil, cilantro, parsley)
- ● Dwarf tomatoes (e.g., ‘Tiny Tim’ or ‘Patio’)
- ● Peppers (e.g., ‘Jalapeño M’ or ‘Shishito’)
- ● Start with 5–10 seeds/seedlings per container (thin to 3–4 strong plants)
- ● Basic Hand Tools: 1 trowel (for planting and transplanting)
- ● 1 pruners (for harvesting and trimming)
- ● 1 small hand fork (for aerating soil)
- ○ Optional (But Helpful!): Drip irrigation kit (for hands-off watering)
- ● Garden gloves (to protect your hands)
- ● Grow lights or LED bulbs (for winter or low-light spaces)
- ● Thermometer/hygrometer (to monitor microclimates)
- ● Location: At least 6 hours of sunlight daily (south-facing windows or balconies work!)
- ● Access to Water: A hose or watering can with a spray nozzle (or a self-watering system)
- ● Time Commitment: 10–15 minutes daily for watering/weeding (or 1 hour weekly if using drip irrigation)
- ● Knowledge Level: Beginner-friendly! (But read seed packets for spacing/depth tips.)
How to design a year-round edible garden in small spaces
Here's the practical approach I use to turn even tiny patios and balconies into vibrant, food-producing gardens.
🌱 Step 1: Plan Your Seasonal Layers
Start by dividing your space into three planting zones: cool-season crops (spring/fall), warm-season crops (summer), and winter greens. I like to sketch a simple grid of my 4'x6' balcony—this helps visualize how each plant will fit without overcrowding. Cool-season crops like kale and spinach can handle 40-50°F temps, while warm-season tomatoes and peppers need 70°F+.
For year-round production, prioritize fast growers in winter (like radishes) and slow growers in summer (like squash). I always reserve the shadiest corner for winter crops—lettuce and arugula thrive in partial sun when summer plants need full exposure. This layered approach ensures you're always harvesting something fresh.
🪴 Step 2: Select Compact, High-Yield Varieties
Skip the sprawling plants—opt for dwarf or bush varieties designed for containers. Cherry tomatoes like 'Tiny Tim' produce 1-pint yields in 5-gallon pots, while bush beans like 'Contender' grow just 18 inches tall in 12-inch pots. Herbs are my secret weapon for small spaces: 'Spicy Globe' basil fits perfectly in 6-inch pots and gives me enough for pesto all season.
I always check the plant tag for "container-friendly" labels—this tells me the variety has been bred for small spaces. For example, 'Patio' eggplants stay under 2 feet tall and produce 4-inch fruits in 15-gallon pots. This precision planting keeps your harvests abundant without taking over your space.
☀️ Step 3: Optimize Light and Microclimates
Move your containers to follow the sun's arc: place them on the south-facing side in summer for 6+ hours of direct light, then shift them to east-facing in winter when the sun is lower. I use a rolling cart with wheels to easily reposition plants—this simple trick gives winter crops the light they need without competing with summer's sun-lovers.
Create microclimates by grouping plants with similar needs. For example, place heat-loving peppers and eggplants together in a sunny corner, while cooler-tolerant greens get a slightly shaded spot. Use reflective surfaces like white trays under containers to bounce extra light onto leafy plants during shorter winter days.
💧 Step 4: Implement a Watering System That Works Year-Round
Install a drip irrigation system with adjustable emitters to deliver ½ inch of water weekly in summer and ¼ inch in winter. I set mine on a timer for 10 minutes daily in summer, then reduce to 5 minutes in cooler months. The key is keeping soil consistently moist but never soggy—this prevents both wilting and root rot.
Group containers by water needs: herbs and lettuce like even moisture, while tomatoes and peppers tolerate slightly drier soil. I use a moisture meter to check 1 inch below the surface—if it reads dry, it's time to water. This method saves time and prevents the common mistake of overwatering in winter when plants grow slower.
✂️ Step 5: Maintain Continuous Harvests Through Pruning
Train vining plants like cucumbers and beans to grow vertically using 5-foot trellises in 5-gallon containers. This saves space and keeps fruits off the ground where they're more vulnerable to pests. I pinch back the tips of herbs like basil and thyme to encourage bushier growth—this gives me more leaves to harvest without sacrificing plant health.
Deadhead flowers regularly to redirect energy into fruit production. For example, when tomato flowers fade, snip them off just above the next leaf cluster. This simple pruning trick keeps your plants focused on producing larger, tastier fruits instead of wasting energy on seeds. I harvest every other day in peak season to encourage continuous production.
Tips & tricks for year-round edible gardens in small spaces
A few simple strategies can transform your tiny space into a thriving edible garden that delivers fresh produce all year long.
Temperature Zoning: When planning your seasonal layers in Step 1, remember that cool-season crops like kale and spinach thrive between 40-50°F while warm-season plants need 70°F+. I've found that using a simple thermometer in your garden area helps track these temperature shifts. Place your cool-season crops in the shadiest corner first—they'll appreciate the cooler microclimate, especially during summer heatwaves.
Container Size Matters: In Step 2, those container sizes aren't arbitrary—they're designed for optimal root growth. For example, 'Tiny Tim' cherry tomatoes need those 5-gallon pots to support their vines and fruit production. If you're tempted to use smaller containers to save space, you'll likely end up with stunted plants and smaller yields. I always double-check the plant tags for recommended container sizes before purchasing.
Sunlight Strategy: That 6+ hours of direct light in summer mentioned in Step 3 is crucial for fruiting plants like tomatoes and peppers. If your space gets less than that, consider using grow lights for 4-6 hours daily during the growing season. I've had great success with LED grow lights placed just above my containers—they're energy-efficient and provide the full spectrum of light plants need.
Watering Wisdom: Your 10-minute daily watering in summer might seem like a lot, but it's designed to deliver that ½ inch of water weekly without overwatering. I recommend checking your irrigation system after the first week to ensure all emitters are working properly. For containers, I've found that adding a layer of mulch helps retain moisture and reduces evaporation, meaning you might only need that 5-minute watering in cooler months.
Pro Tips for Gardens For Living
- A few simple strategies can transform your tiny space into a thriving edible garden that delivers fresh produce all year long.
- Temperature Zoning: When planning your seasonal layers in Step 1, remember that cool-season crops like kale and spinach thrive between 40-50°F while warm-season plants need 70°F+.
- Container Size Matters: In Step 2, those container sizes aren't arbitrary—they're designed for optimal root growth.
Frequently asked questions
Got questions about creating a thriving edible garden in small spaces?
You’re not alone! Here are answers to the most common queries—because every inch of your garden should work for you, not against you.
What are the easiest vegetables to grow in small spaces?
Start with leafy greens (lettuce, spinach), herbs (basil, parsley), radishes, and bush beans—they thrive in containers or raised beds with minimal space. Cherry tomatoes and peppers also do well in hanging baskets or vertical planters. Pro tip: Choose compact or dwarf varieties labeled for containers!
When is the best time to plant for year-round harvests?
For cool-season crops (kale, carrots, peas), plant in early spring or fall. Warm-season veggies (tomatoes, cucumbers, squash) need to go in after the last frost (check your USDA zone). Succession planting—sowing new seeds every 2–3 weeks—keeps harvests rolling! Use a planting calendar for your region to stay on track.
How can I save money by growing my own food?
Focus on high-value crops like herbs, peppers, and tomatoes (often pricier at stores). Reuse containers (old buckets, pallets) and compost kitchen scraps to cut costs. Seed swaps or buying in bulk also stretch your budget. Track savings by estimating how much you’d spend buying the same produce!
What’s the best way to deal with pests in small gardens?
Prevent pests with row covers, companion planting (e.g., marigolds + tomatoes), and neem oil. Handpick bugs like aphids or use soapy water sprays for mild infestations. Encourage beneficial insects (ladybugs, lacewings) with native plants—they’re your garden’s free pest control!
Can I grow edibles in apartments or balconies without a yard?
Use hanging planters (strawberries, herbs), vertical gardens (greens, peas), or window boxes (lettuce, microgreens). Even a sunny windowsill can host herbs or cherry tomatoes in pots. South-facing windows get the most light—supplement with grow lights if needed.
Wrapping up and next steps
Creating a year-round edible garden in small spaces isn’t just possible—it’s a rewarding way to nourish your body and soul! 🌱 Whether you’re growing herbs in pots, leafy greens in vertical towers, or root veggies in raised beds, every bite connects you to the earth.
Start small, experiment fearlessly, and watch your green thumb flourish.
Ready to take the next step? Pick one plant to grow this week—even a single container of basil or a windowsill salad kit—and let your garden for living journey begin! 🌟