
Pests
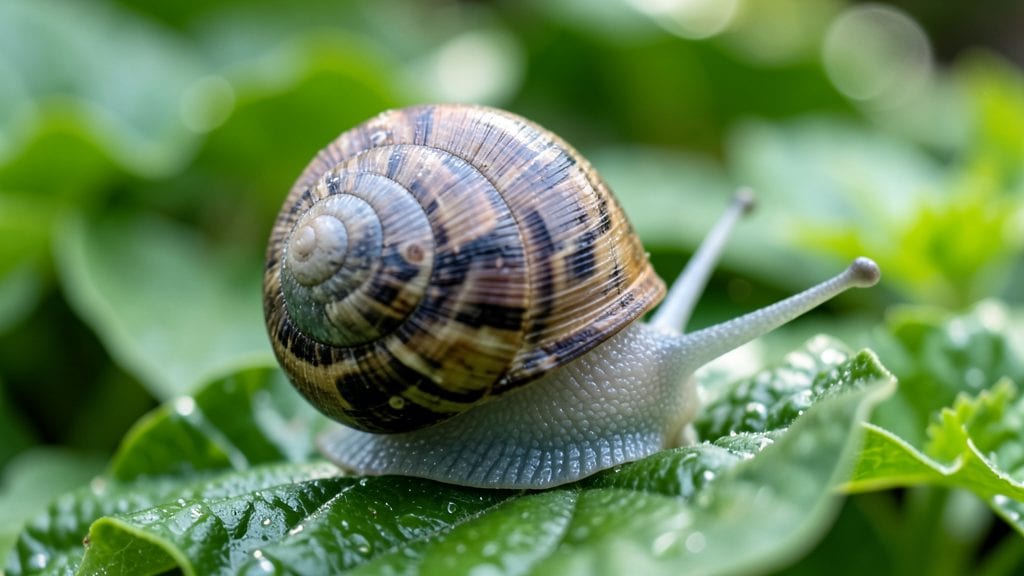
Finding garden snail shells scattered like tiny white landmines in your beds is a dead giveaway—your garden’s become an all-you-can-eat buffet. 🐌 I’ve lost count of the times I’d wake up to chewed lettuce leaves and half-eaten petunias, only to find those glistening trails leading to hiding spots under boards or rocks.
The problem isn’t just the damage; it’s the helpless feeling of watching your hard work get devoured overnight.
Here’s the thing—chemicals might kill them fast, but they wreck your soil and the critters that actually help your garden. Instead, I’ve tested three humane traps that work without harming the ecosystem, using stuff you probably already have lying around: beer, shallow containers, and a little nighttime patience.
No baiting with poison, no waiting for a chemical war to play out.
What you’ll get is a garden where the snails meet their match—not in a brutal chemical battle, but in a trap they can’t outsmart. The best part? You’ll end up with clean beds by morning, and zero guilt about what you’re leaving behind.
Plus, those shells? Don’t toss them—crush them into mulch or turn them into whimsical garden art. Every problem has a solution that works with nature, not against it.
Whether you’re dealing with a sudden outbreak or just want to stay ahead, these traps cut down on snail populations without turning your yard into a toxic zone. Let’s get those slugs where they belong—far from your prize plants.
📚 In This Guide
- What you need
- Instructions
- Tips and common mistakes
- Wrapping up and next steps
What you need
- ● Garden snail shells: Collect 10–20 clean, empty shells (no residue). Rinse with water if needed.
- ● Beer or yeast solution: 1 cup of beer (or 1 tbsp yeast dissolved in warm water) per trap.
- ● Shallow containers: 3–5 small bowls, plates, or lids (6–8 inches wide).
- ● Water: A spray bottle or small cup for hydration.
- ○ Gloves (optional): For handling shells or relocating snails.
- ● Diatomaceous earth (food-grade): Light dusting around traps to deter snails (use sparingly).
- ● Garden twine or string: To secure traps in windy areas.
- ● Flashlight: For evening setup or snail relocation.
- ● Small shovel or trowel: For digging safe release holes in your garden.
Step-by-step instructions for humane snail shell removal
Here's how to clear your garden of snails without harming them or using toxic baits.
🪴 Step 1: Gather Your Humane Trapping Supplies
You'll need 4 shallow containers (like plastic lids or small bowls) and a few beer or milk (both work—snails can't resist the smell). I like to use lids from takeout containers because they're just the right size for a few snails and easy to move around. Place these containers around your garden, especially near plants snails love like lettuce or hostas.
Don't use deep containers—snails can't climb out of shallow ones. The key is making the entry easy but the exit impossible. A little bit of liquid in the bottom (about ½ inch deep) will attract them without drowning them immediately. This method works because snails are drawn to fermenting smells, and they'll crawl in but can't get out.
🌿 Step 2: Set Up Traps in High-Traffic Areas
Place your traps near moist, shaded spots where you've seen snail activity. Check for slime trails—these are your best clues. I usually set them in the evening when snails are most active. If you're dealing with a heavy infestation, space the traps about 3 feet apart to cover more ground.
Here's the thing—snails are slow but persistent. If you don't see results after the first night, move the traps closer to where you've spotted them. They're more likely to wander into a trap if it's near their favorite hiding spots, like under mulch or large leaves.
💧 Step 3: Check and Empty Traps Daily
In the morning, carefully lift the traps and release any snails you find. I like to do this in the shade near a water source so they can rehydrate before heading back into the garden. If you're feeling particularly kind, you can release them in a wooded area far from your garden—they'll find new homes without harming your plants.
Empty any remaining liquid and refill the traps with fresh beer or milk each evening. Snails will keep coming back to the same spots if the bait is fresh. This daily routine ensures you're not overwhelming yourself with a sudden influx of snails—it's a steady, manageable process.
☀️ Step 4: Create Natural Barriers to Prevent Return
Once you've cleared out the snails, keep them away by creating simple barriers. Sprinkle dried coffee grounds or diatomaceous earth (food-grade only) around the base of plants. These create an unpleasant texture that snails avoid. I also like to use copper tape around raised beds—it gives them a mild electric shock when they touch it, which they dislike.
Water your plants in the morning so the soil is less moist by evening—snails prefer damp conditions. If you're dealing with a particularly stubborn snail, place a few traps near their favorite hiding spots overnight. This way, you're not just reacting to the problem but actively preventing it from coming back.
⏰ Step 5: Monitor and Maintain Long-Term Control
Keep an eye on your garden for the next few weeks. If you notice new slime trails, set out a few more traps or reinforce your barriers. Snails are persistent, but with consistent effort, you'll see a reduction in their numbers. I usually check my traps for about 2-3 weeks to ensure the population is under control.
Real talk: You might not eliminate every snail, and that's okay. A few won't harm your garden, but they'll also remind you to stay vigilant. Once you've got the process down, it becomes second nature—just like watering your plants. The key is consistency, not perfection.
Tips & tricks for effective humane snail trapping
These practical tips will help you maximize your snail removal success while keeping the process efficient and kind.
Trap Placement Strategy: Focus on areas with visible slime trails—they're your best indicator of snail activity. I've found that placing traps near the base of plants (about 6-12 inches away) works best, as snails travel along these paths to reach their food. For containers, use something with slightly rough edges—smooth plastic lids might not catch as many snails because they can't grip the surface as easily.
Bait Refresh Timing: The key to consistent results is refreshing your beer or milk bait every evening. I've noticed that after about 12 hours, the bait loses its effectiveness as it starts to evaporate and lose its fermenting smell. Using a spray bottle to lightly mist the bait with fresh liquid can help maintain its potency between refills, especially on hot days when evaporation happens faster.
Release Location Matters: When releasing snails, choose spots that are at least 50 feet away from your garden to prevent them from returning. I like to release them in wooded areas with plenty of leaf litter and moisture—these mimic their natural habitat. If you're releasing multiple snails, spread them out in different directions to avoid creating a new colony near your garden.
Natural Barrier Boost: For extra protection, create a double barrier system. First, apply your chosen barrier material (coffee grounds, diatomaceous earth, or copper tape) around plant bases. Then, create a wider ring about 12 inches from the plant using crushed eggshells or sharp sand—they're harmless to plants but create an unpleasant texture for snails to cross. This layered approach makes it much harder for them to reach your plants.
Pro Tips for Garden Snail Shell
- These practical tips will help you maximize your snail removal success while keeping the process efficient and kind.
- Trap Placement Strategy: Focus on areas with visible slime trails—they're your best indicator of snail activity.
- Bait Refresh Timing: The key to consistent results is refreshing your beer or milk bait every evening.
Frequently asked questions
Why do snail shells stay behind after I remove the snail?
Snails leave their shells behind when they’re injured, molting, or simply too lazy to carry it! If you’re trapping them, shells may remain if the snail died inside or escaped. Always check traps daily to avoid a future snail buffet in your garden.
How long does it take for snail shells to decompose naturally?
Under ideal conditions (moisture, warmth, and microbial activity), a snail shell can take 6 months to 2 years to break down. To speed it up, crush the shells (wear gloves!) or compost them—they’re calcium-rich and great for soil.
Are there humane alternatives to traps if I don’t want to use beer or containers?
Try these snail-free methods:
- Copper tape: Snails hate copper—wrap it around pots or borders.
- Diatomaceous earth (food-grade): Sprinkle lightly around plants (reapply after rain).
- Natural predators: Encourage ducks, chickens, or frogs—they’ll snack on snails for you!
Can I reuse snail shells for anything after removal?
Yes! Beyond composting, snail shells can be:
- Crushed into calcium-rich fertilizer for acid-loving plants.
- Used as organic mulch to deter slugs (they dislike the texture).
- Repurposed into art or garden decor—paint them and turn them into tiny planters!
What do I do if snails keep coming back despite my traps?
Persistent snails? You might need a multi-pronged approach:
- Check for hidden habitats (piles of wood, dense mulch, or damp corners).
- Traps should be baited with lettuce or citrus—snails are picky eaters!
- Consider early morning patrols with a flashlight—snails are most active at dawn.
If all else fails, a commercial iron phosphate bait (like Sluggo) is a chemical-free last resort.
Wrapping up and next steps
Removing garden snail shells doesn’t have to be a battle—with the right humane traps and a little patience, you can reclaim your garden without harming these slow-moving creatures. 🐌 From beer traps to copper barriers, these methods are effective, eco-friendly, and kind to wildlife.
Whether you’re dealing with a small infestation or a full-blown snail party, you’ve got this!
Ready to take action? Start by picking one method from this guide and set it up tonight. Check your traps in the morning, and soon, your garden will be snail-free—without the guilt! 🌱