
Fertilization
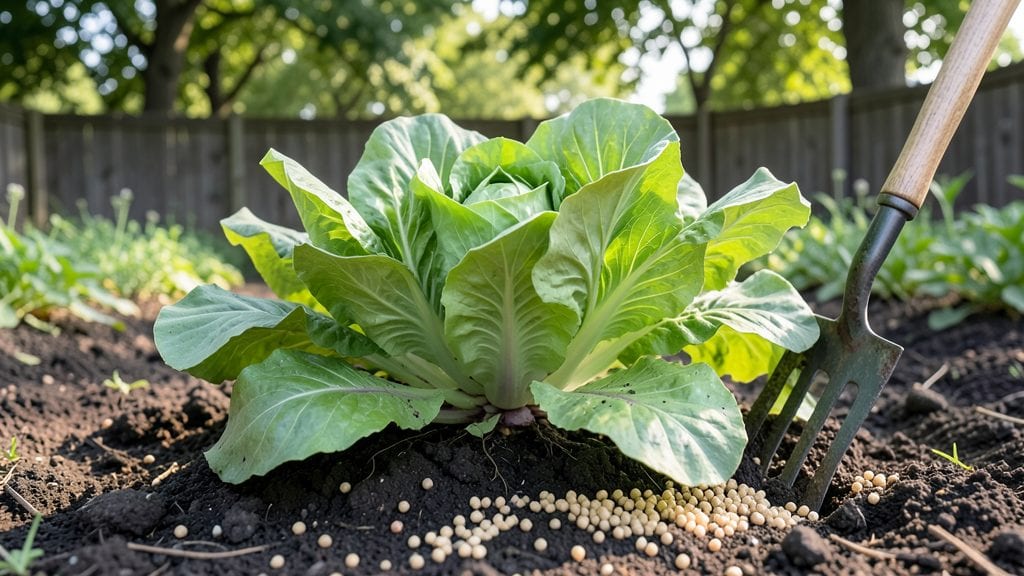
Fertilizing garden soil transforms your yard from struggling to shockingly lush—here’s how I’ve done it without overcomplicating things. 🌱 The key isn’t just throwing down fertilizer; it’s matching what your plants need with what your soil already has.
I’ve tested everything from compost to chemical blends, and the results speak for themselves: bigger tomatoes, greener lawns, and fewer wilting plants by midsummer.
Start with a simple soil test kit—most garden centers sell them for under $20—and check your soil’s pH and nutrient levels. Then, pick your fertilizer: organic options like compost or worm castings build soil health slowly, while synthetic fertilizers deliver quick, measurable boosts.
My go-to is a balanced 10-10-10 mix for vegetables, but herbs and flowers often do better with a lower nitrogen ratio. Timing matters too: feed cool-season crops in early spring and warm-season plants after the last frost.
You’ll see the difference within weeks—deep green leaves, sturdy stems, and plants that actually produce what you planted them for. The secret isn’t fancy equipment; it’s paying attention to your soil’s personality and feeding it right.
Once you nail this, your garden will reward you with harvests that make your neighbors ask, “What’s your secret?”
Works for backyard plots, raised beds, or even container gardens—just adjust the amounts. And don’t worry if you’ve over- or under-fertilized before; I’ve made those mistakes too. The good news? Soil forgives a lot when you start with the right approach.
📚 In This Guide
- What you need
- Instructions
- Tips and common mistakes
- Wrapping up and next steps
What you need
- ● Organic Fertilizers (Choose 1-2): Compost (2-4 inches spread per garden bed)
- ● Well-rotted manure (e.g., cow, horse, or chicken—avoid fresh!) (1-2 gallons per 10 sq ft)
- ● Worm castings (1-2 cups per sq ft for a gentle, nutrient-rich boost)
- ● Bone meal (1-2 tbsp per sq ft for phosphorus-rich soil, great for root growth)
- ● Kelp meal or fish emulsion (1 tbsp per sq ft for micronutrients and potassium)
- ○ Inorganic Fertilizers (Optional but Helpful): Balanced NPK fertilizer (e.g., 10-10-10 or 5-10-10, 1 lb per 100 sq ft)
- ● Slow-release granules (e.g., Osmocote, 2-3 lbs per 100 sq ft)
- ● Soil Amendments: Peat moss or coconut coir (1-2 inches mixed into top 6 inches of soil for moisture retention)
- ● Perlite or vermiculite (1 part per 4 parts soil for aeration)
- ● Garden fork or tiller (for turning soil—rent one if needed!)
- ● Garden gloves (to protect your hands from rough soil and fertilizers)
- ● Garden rake (for leveling and spreading amendments evenly)
- ● Measuring scoop or bucket (for precise fertilizer application)
- ○ pH test kit (optional but highly recommended—aim for 6.0-7.0 for most veggies)
- ● Watering can or hose (with a gentle spray nozzle for even moisture distribution)
- ● Test your soil’s current pH and nutrient levels (use a DIY kit or send a sample to a local extension office).
- ● Clear the garden bed of weeds, rocks, and debris (aim for a clean slate!).
- ● Loosen the top 6-12 inches of soil (especially if it’s compacted or clay-heavy).
- ● Water the soil 1-2 days before fertilizing (moist soil absorbs nutrients better!).
Step-by-Step guide to fertilizing garden soil for maximum growth
Here’s how to feed your soil the right way—no guesswork, just science-backed results.
🌱 Step 1: Test Your Soil First
Before adding anything, grab a soil test kit (or send a sample to your local extension office) to check pH and nutrient levels. Most home kits cost under $20 and take just 10 minutes to use. I like to test in early spring—this tells me if my soil needs nitrogen, phosphorus, potassium, or lime to balance acidity.
If your soil is too acidic (pH below 6.0), you’ll need pelletized lime to raise it. For alkaline soil (pH above 7.5), sulfur or peat moss helps lower it. Aim for a pH of 6.0–7.0—that’s sweet spot for most vegetables and flowers. Skipping this step means wasting fertilizer on nutrients your plants can’t use.
💧 Step 2: Choose the Right Fertilizer Type
Pick your fertilizer based on what your plants need most. For leafy greens and veggies, go with a balanced 10-10-10 or 5-5-5 formula—equal parts nitrogen (N), phosphorus (P), and potassium (K). For flowering plants, a 5-10-10 or 10-20-20 gives them the phosphorus boost they crave.
Slow-release options like organic compost or granular fertilizers (like Osmocote) feed plants steadily over 2–3 months, while liquid fertilizers (like fish emulsion) work faster but require weekly applications. I mix half organic, half synthetic—the organic builds soil health long-term, and the synthetic gives a quick nutrient kick when plants are hungry.
☀️ Step 3: Apply Fertilizer Correctly
For granular fertilizers, scatter ¼ cup per 10 square feet evenly over the soil surface. Lightly rake it in ½ inch deep—this keeps it away from plant roots but still accessible. Water deeply right after to dissolve and distribute nutrients. If you’re using slow-release pellets, follow the package rate (usually 1–2 pounds per 100 sq ft for general gardens).
For liquid fertilizers, mix the concentrate with 1 gallon of water per the label, then apply every 2–4 weeks during the growing season. Always water the soil first—this prevents fertilizer from burning tender roots. I set a weekly reminder on my phone so I never forget, especially during hot summers when plants drink up nutrients fast.
✂️ Step 4: Feed at the Right Time
Timing matters more than you think. Side-dress (apply fertilizer to the soil beside plants) midway through the growing season—usually 6–8 weeks after planting. This gives plants a nutrient boost when they’re actively growing but not yet flowering. For tomatoes, peppers, and squash, I also add a high-potassium fertilizer (like 0-0-50) 2 weeks before harvest to sweeten fruit and improve disease resistance.
Avoid fertilizing within 2 weeks of planting—new roots are sensitive, and excess nutrients can burn them. Also, stop fertilizing 4–6 weeks before harvest for root crops (carrots, potatoes) so they don’t absorb bitter chemicals. I mark my calendar with these deadlines so I never overdo it.
🌿 Step 5: Maintain Soil Health Long-Term
Fertilizer isn’t a one-time fix—think of it as topping off a gas tank while also fixing leaks in your soil. After each harvest, mix in 2–3 inches of compost to replenish organic matter. Cover bare soil with mulch (like straw or wood chips) to slow moisture loss and feed soil microbes naturally.
Rotate crops yearly to prevent nutrient depletion and pest cycles. For example, tomatoes and peppers (heavy feeders) go where beans or clover (nitrogen-fixers) grew last year. I keep a simple garden map to track what went where—it saves me from repeating mistakes and keeps my soil happy for decades.
Tips & tricks for perfect soil fertilization
Took me years to figure out these soil secrets—here's how to avoid common mistakes and get the most out of your garden.
Soil Test Timing: That 10-minute soil test in Step 1 is your foundation. I always do mine in early spring because summer heat can alter pH levels. If you test after rain or irrigation, wait 24 hours for results to stabilize—moisture affects pH readings. The goal is to catch nutrient deficiencies before planting season begins.
Fertilizer Mix Strategy: In Step 2, I've learned that mixing half organic and half synthetic works best for me. The organic portion (compost or Osmocote) builds soil structure over 2-3 months, while the synthetic provides that immediate nutrient boost. For heavy feeders like tomatoes, I'll actually increase the synthetic portion to 60% during fruiting stages—this prevents blossom end rot.
Application Precision: When applying that ¼ cup of granular fertilizer per 10 square feet in Step 3, I use a simple trick: divide your garden into 10-square-foot sections and mark them with stakes. This ensures even distribution. For liquid fertilizers, I always use a watering can with a fine rose attachment—it helps prevent runoff and gives me better control over application patterns.
Seasonal Calendar: The 6-8 week timing in Step 4 is critical, but I've created a simple system to track it. I mark my calendar with three key dates: planting day, the mid-season fertilizer application (6-8 weeks later), and the harvest date. For root crops, I add a red marker for the 4-6 week pre-harvest cutoff. This visual system prevents me from missing these important windows.
Pro Tips for Fertilizing Garden Soil
- Took me years to figure out these soil secrets—here's how to avoid common mistakes and get the most out of your garden.
- Soil Test Timing: That 10-minute soil test in Step 1 is your foundation.
- Fertilizer Mix Strategy: In Step 2, I've learned that mixing half organic and half synthetic works best for me.
Frequently asked questions
Got questions about fertilizing your garden soil?
You’re not alone! Here are answers to the most common concerns—so you can grow like a pro.
What’s the best time of year to fertilize garden soil?
For most plants, spring (just before planting) and early fall (after harvest) are ideal. Warm-season crops like tomatoes thrive with a mid-season boost, while cool-season veggies benefit from a light application in early spring. Pro tip: Avoid fertilizing right before heavy rain to prevent runoff!
Can I over-fertilize my garden? What are the signs?
Yes! Over-fertilizing can burn roots, stunt growth, or pollute waterways. Signs include yellowing leaves, leaf drop, or white crust on soil. If this happens, flush the soil with water and reduce future applications. Always follow package instructions for rates!
Are organic fertilizers better than synthetic ones?
It depends on your goals! Organic fertilizers (compost, manure, bone meal) improve soil long-term and support microbial life, but they release nutrients slowly. Synthetic fertilizers (like 10-10-10) provide quick, precise nutrition. Many gardeners use a mix for balanced results.
How do I fertilize without chemicals?
Try these natural options:
- Compost: Mix 2–3 inches into soil before planting.
- Manure tea: Steep well-aged manure in water for 1–2 days, then dilute.
- Green manure: Plant cover crops (like clover) in fall, till them in spring.
- Eggshells: Crush and bury for calcium-rich soil.
Why isn’t my soil responding to fertilizer?
Check these common culprits:
- Poor soil pH: Test your soil (ideal pH: 6.0–7.0 for most veggies). Adjust with lime (to raise pH) or sulfur (to lower it).
- Compacted soil: Aerate with a fork or compost to improve nutrient absorption.
- Wrong fertilizer: Match nutrients to your plants’ needs (e.g., nitrogen for leafy greens, phosphorus for flowers/fruit).
- Drought stress: Water deeply before and after fertilizing.
Wrapping up and next steps
Fertilizing your garden soil isn’t just about adding nutrients—it’s about unlocking the full potential of your plants for vibrant blooms and bountiful harvests. 🌱 By understanding your soil’s needs, choosing the right fertilizers, and applying them thoughtfully, you’re setting the stage for a thriving garden.
Now that you’re armed with science-backed strategies, it’s time to get your hands dirty and watch your garden flourish!
Ready to take the next step? Start small—test a patch of soil, experiment with a few fertilizers, and observe the results. Your green thumb is closer than you think!