
Landscaping
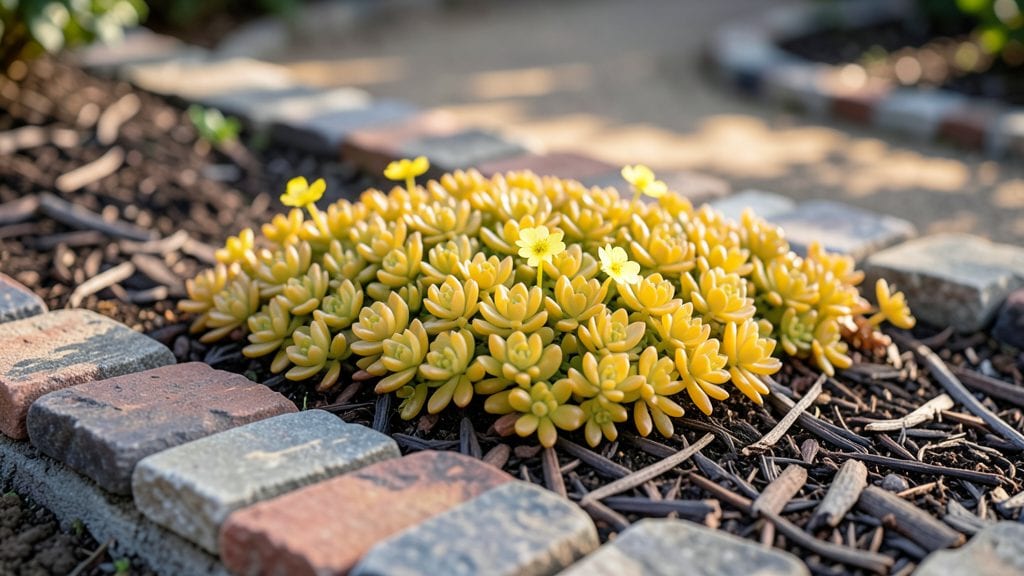
Crafting cobblestone edging transforms a garden from chaotic to curated—those uneven, weathered stones instantly add charm and structure to any space. 🌿 I’ll never forget the first time I laid them around my herb spiral: the way they caught the late afternoon light while keeping weeds at bay.
It wasn’t just a border; it became the garden’s backbone, defining where plants began and paths continued.
The beauty of cobblestones lies in their versatility—whether you’re framing a flower bed, lining a walkway, or creating a rustic planter, they blend effortlessly with almost any style.
You’ll need basic tools (a shovel, mallet, and level), a sturdy base of sand or gravel, and stones that feel right in your hands—smooth river rocks or rough fieldstone, depending on your vibe. The installation takes a weekend, but the impact lasts for years.
What you’ll end up with is a garden that feels intentional, where every plant has its place and every step feels like a deliberate choice. The stones stay cool underfoot, resist erosion, and age beautifully, developing that sought-after "lived-in" look over time.
Imagine your morning coffee by a border that’s as timeless as the garden itself.
Works equally well for cottage gardens, modern minimalist spaces, or anything in between. The key is letting the stones guide your layout—no need for perfect lines, just natural rhythm. Ready to define your garden’s edges with character?
📚 In This Guide
- What you need
- Instructions
- Tips and common mistakes
- Wrapping up and next steps
What you need
- ● Cobblestones: Quantity: ~10-15 stones per linear foot (adjust based on stone size).
- ● Size: 3-6 inches in diameter (uniform or mixed for texture).
- ● Type: Smooth, flat stones (e.g., slate, limestone, or granite).
- ● Base Materials: Landscape fabric (to prevent weed growth).
- ● Crushed gravel or sand (2-3 inches deep for drainage).
- ○ Adhesive (Optional): Concrete or landscape adhesive for securing stones (if needed).
- ● Tools: Shovel or spade (for digging).
- ● Wheelbarrow (for transporting materials).
- ● Level (to ensure even placement).
- ● Rubber mallet (for tapping stones into place).
- ● String line & stakes (to mark your design).
- ● Safety gloves & knee pads (for comfort).
Step-by-Step guide to creating a cobblestone edging garden
Transform your garden with timeless charm using cobblestones—it’s easier than you think.
🪴 Step 1: Mark Your Garden Border and Gather Materials
Start by outlining your garden bed with spray paint or a garden hose to visualize the shape. Use a tape measure to ensure straight lines and consistent curves—this is your roadmap. I like to lay down a landscape fabric first to suppress weeds before adding stones, so I won’t waste time pulling them later.
Gather your cobblestones (about 12-15 per linear foot for a standard 4-inch-wide edging) and check their size. If they vary, sort them into groups—this keeps your finished look uniform. A rubber mallet and landscape rake are your best friends for settling stones evenly. Don’t skip the gravel base—it’s the foundation that keeps everything stable.
💧 Step 2: Prepare the Base for Stability
Dig a trench along your marked border about 3-4 inches deep and 4-6 inches wide. The depth ensures stones sit flush with the ground, while the width gives you room to work. Use a shovel to loosen the soil, then add a 2-inch layer of compacted gravel at the bottom of the trench. This layer drains water and prevents weeds from creeping up later.
Pack the gravel firmly with a plate compactor or by stomping it down—you want it as solid as a sidewalk. If the ground is uneven, add or remove soil in spots to create a level base. A slight slope (about 1/4 inch per foot) helps water run off instead of pooling against your stones. Test it by placing a 2x4 board across the trench—if it rocks, keep compacting.
☀️ Step 3: Lay the Cobblestones Evenly
Start at one corner and begin placing cobblestones along the trench, leaving about 1/4 inch gap between each stone. Use the landscape rake to spread them out evenly—this prevents sinking or shifting over time. For curves, lay stones with their flat sides facing outward to maintain a clean, cohesive look. If a stone feels wobbly, tap it gently with the rubber mallet until it settles.
Check your progress every few feet by running a straightedge or level along the top of the stones. Adjust any high or low spots by adding or removing a tiny bit of gravel underneath. The goal is a smooth, even line that guides the eye—no bumps or dips. If you hit a tricky spot, don’t force it; step back and problem-solve from a distance.
✂️ Step 4: Secure the Edging and Finish
Once all stones are in place, fill the gaps between them with sand to lock everything together. Use the landscape rake to sweep sand into the crevices, then dampen it with a garden hose—this helps it settle and harden. Let it dry for about 30 minutes, then rake again to ensure no gaps remain. For extra stability, top with a thin layer of polymeric sand (if available), which binds like glue when wet.
Finally, trim any excess landscape fabric that peeks out from under the stones. Water the surrounding soil lightly to help it settle and prevent erosion. Step back and admire your work—your garden now has a polished, rustic border that defines the space beautifully. This edging will last for years with minimal maintenance, so enjoy the process!
Tips & tricks for perfect cobblestone edging
Here's what I've learned after creating these borders in multiple gardens—tricks that'll save you hours of frustration and ensure your edging looks professional from day one.
Stone Selection Tip: I always sort my cobblestones by size before starting. Even if they're from the same bag, stones can vary by up to 1/2 inch. Grouping them into three piles—small, medium, and large—creates a more natural, intentional pattern. For a standard 4-inch edging, I aim for 12-15 stones per linear foot, but I adjust this if I have particularly large stones that need more space.
The Gravel Foundation Secret: In Step 2, don't just eyeball that 2-inch gravel layer—measure it! Use a straightedge to check depth every few feet. The gravel should be packed firm enough that when you press your thumb into it, it doesn't leave more than a 1/4-inch impression. This prevents stones from sinking over time. I've seen projects fail when homeowners skip this step and end up with uneven, wobbly edging after just one season.
Leveling Hack: For Step 3, I use a simple trick to keep my stones perfectly level: place a 2x4 board across the trench and run my straightedge along the top. If any stones stick up, I gently tap them down with the rubber mallet. For low spots, I add a thin layer of gravel underneath—just enough to bring that stone up to the line. This method ensures your finished edging has that clean, polished look without hours of adjusting individual stones.
Final Setting Strategy: When you're filling those 1/4-inch gaps with sand in Step 4, dampen the sand with your hose before letting it dry for 30 minutes. This creates a natural binding effect that locks the stones in place. For extra stability—especially in high-traffic areas—I add a thin layer of polymeric sand after the initial drying. It's worth the extra few dollars for the peace of mind that your edging won't shift with seasonal ground movement.
Pro Tips for Cobblestone Edging Garden
- Here's what I've learned after creating these borders in multiple gardens—tricks that'll save you hours of frustration and ensure your edging looks professional from day one.
- Stone Selection Tip: I always sort my cobblestones by size before starting.
- The Gravel Foundation Secret: In Step 2, don't just eyeball that 2-inch gravel layer—measure it!
Frequently asked questions
Got questions about cobblestone edging? You’re not alone! Here are some of the most common concerns—and their practical solutions—to help you plan with confidence.
What’s the best way to lay cobblestone edging without it shifting over time?
To prevent shifting, always use a sturdy base. Start with a 2–3 inch layer of compacted gravel, then add landscape fabric to block weeds. For extra stability, interlock stones with a thin layer of sand or polymeric sand between each row. A slight taper (higher at the base) also helps with drainage and longevity.
Can I install cobblestone edging myself, or should I hire a pro?
DIY is totally doable for small projects! If your edging is under 50 feet or on flat ground, you’ll likely succeed with basic tools (shovel, tamper, level). For slopes, curves, or heavy stones (like flagstone), consider hiring a pro to avoid costly mistakes. Pro tip: Rent a plate compactor if you’re unsure about hand-tamping.
How much does cobblestone edging cost compared to alternatives like brick or metal?
Costs vary by material and region, but here’s a quick breakdown:
Material
Avg. Cost per Linear Foot
Longevity
Cobblestone
$8–$20
20–30+ years (with proper base)
Brick
$10–$25
25–50+ years
Metal (e.g., aluminum)
$5–$15
10–20 years (prone to rust)
Will cobblestone edging kill my grass or plants along the border?
Not if installed correctly! Avoid burying grass too deeply—keep the top 1–2 inches exposed to sunlight. For plants, use edging to define their space (e.g., a 6-inch gap between stones and mulch). If weeds pop up, pull them early or apply pre-emergent herbicide before planting season. Pro tip: Edge with landscape fabric beneath stones to smother weeds long-term.
How do I prepare cobblestone edging for winter or extreme weather?
Cobblestones handle frost well, but prevent water pooling to avoid shifting. Ensure a slight slope (1/4 inch per foot) away from your garden. In freeze-thaw climates, check for gaps annually and top off sand between stones. For heavy snow, avoid piling it directly on the edging—use a snow shovel to clear around (not over) the stones.
Wrapping up and next steps
Transforming your garden with cobblestone edging isn’t just about aesthetics—it’s about crafting a timeless, functional border that elevates your outdoor space. Whether you’re embracing rustic charm or adding structure to your landscape, these versatile stones deliver durability and elegance with minimal upkeep. 🌿✨
Ready to take the next step? Start small—sketch your design, gather your tools, and dive in! With patience and creativity, your cobblestone edging will become the stunning focal point your garden deserves. Happy landscaping!