
Landscaping
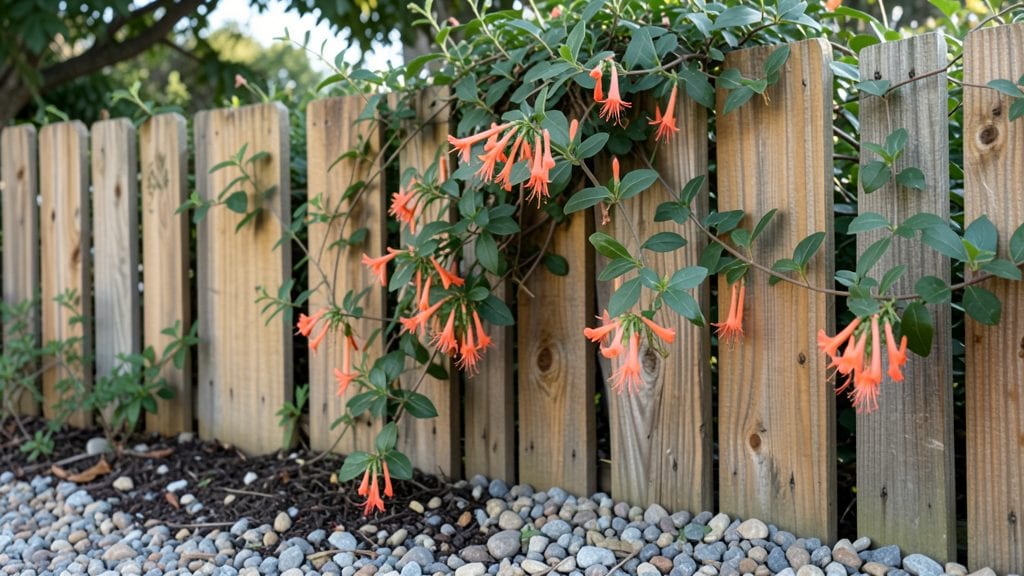
Building a garden fence transforms your yard into a private retreat where every season feels like a postcard—whether it’s a rustic cedar picket or a sleek modern design. 🌿 I’ve crafted fences that double as security, windbreaks, and living art. sleek metal panels that blend with modern landscaping.
The right design doesn’t just block views; it frames your garden like a gallery, making every walk through feel like stepping into a curated space.
The materials you choose will dictate everything from cost to upkeep. Cedar resists rot and smells amazing when fresh-cut, while vinyl stays low-maintenance for decades. Metal offers durability and a contemporary edge, though it requires more planning for rust prevention.
I’ve found that lattice-style fences add vertical interest while still allowing light and air to flow—perfect if you want privacy without cutting off your garden’s breath.
Once installed, your fence becomes the backbone of your outdoor design. It can hide unsightly views, create cozy nooks for seating, or even support climbing roses and clematis for year-round color.
The best part? A well-built fence lasts for years, saving you from seasonal repairs and letting you focus on what really matters—enjoying your garden in peace.
Whether you’re framing a vegetable patch, enclosing a flower bed, or simply adding structure to your yard, the right fence turns chaos into charm. Let’s get you started with designs that work as hard as they look—no shortcuts, just timeless results.
📚 In This Guide
- What you need
- Instructions
- Tips and common mistakes
- Wrapping up and next steps
What you need
- ● Fence panels or pickets: Pre-made wood, vinyl, or composite panels (check measurements for your space—typically 4x8 ft or 6x8 ft). Pro tip: Vinyl resists rot, while wood offers classic charm!
- ● Posts: Pressure-treated 4x4 lumber (8 ft long) for corner/end posts, and 6 ft for intermediate posts. Quantity: 1 post per 6–8 ft of fence length.
- ● Concrete: Quick-setting mix (60 lb bags) or pre-mixed bags for post footings. Quantity: ~1 bag per 2 posts.
- ● Hardware: 3-inch galvanized screws (for attaching panels to posts).
- ● 2-inch deck screws (for securing panels to rails).
- ○ Post caps (optional but stylish!).
- ○ Rails (optional for wood fences): 2x4 lumber (8 ft long) for horizontal support.
- ● Essentials: Tape measure, speed square, circular saw or miter saw, drill/driver, level, post hole digger (manual or auger), wheelbarrow.
- ● Extras: Concrete mixer (if mixing large batches), staple gun (for wire mesh fences), and a fence stapler.
- ● Safety gear: Work gloves, safety glasses, and ear protection.
- ● Check local building codes for height restrictions (often 6 ft max for residential).
- ● Mark your fence line with stakes and string before digging.
- ● Clear the area of debris and call 811 to check for underground utilities.
- ● Weather window: Aim for dry, mild days to avoid concrete curing delays.
Step-by-step guide to building a sturdy garden fence
Here’s how to create a lasting privacy screen that keeps your garden looking lush and protected.
🪴 Step 1: Plan and Mark Your Fence Line
Start by measuring your garden’s perimeter and marking the fence line with wooden stakes and string. I like to use a 4-foot spacing between stakes for a standard privacy fence—adjust if your design calls for something taller or shorter. Double-check measurements with a tape measure to avoid gaps or uneven sections later.
For a curved fence, use a flexible measuring tape or a garden hose to outline the shape before driving stakes. This ensures smooth, professional-looking lines. If you’re working with uneven ground, mark the highest point of the fence line first—this will help you level the posts correctly.
🌱 Step 2: Dig Post Holes and Set the Foundation
Dig holes for your fence posts using a post hole digger or auger, spacing them 6-8 feet apart for most privacy fences. The hole should be one-third the height of the post—for a 6-foot fence, aim for 2-foot-deep holes. Tap a post into the hole to test depth before removing it.
For extra stability, especially in windy areas, mix concrete in the bottom third of the hole before setting the post. Use a level to ensure the post is perfectly vertical—this prevents leaning or wobbling later. Let the concrete set for 24 hours before attaching fence panels.
☀️ Step 3: Attach Fence Panels or Pickets
For a privacy fence, attach pre-made panels to the posts using galvanized screws or lag bolts. Space panels ½ inch apart at the top to allow for slight expansion in heat. If you’re building a picket fence, nail or screw pickets into the rails, starting from the center and working outward to keep them straight.
Use a speed square to mark screw placement for even spacing. For a rustic look, leave small gaps between pickets; for full privacy, overlap panels slightly. Always pre-drill holes in wood to prevent splitting—this is where most DIY mistakes happen.
✂️ Step 4: Reinforce and Finish the Fence
Add horizontal braces between posts for extra strength, especially if your fence is tall or in a windy area. Use 2x4 lumber cut to fit between posts, securing with deck screws. For a decorative touch, stain or paint the fence after it’s fully assembled—this protects the wood and extends its life.
Check for loose screws or wobbly panels before finalizing. A quick walk along the fence with a hammer or screwdriver tightens everything up. If you’re using pressure-treated wood, apply a wood sealant to prevent cracking and warping over time.
⏰ Step 5: Maintain for Long-Lasting Beauty
Inspect your fence twice a year—spring and fall—for loose screws, rot, or insect damage. Tighten screws and replace any damaged sections immediately. A power washer (on a low setting) keeps the fence looking fresh by removing dirt and mildew without damaging the wood.
For extra longevity, reapply stain or paint every 2-3 years, depending on your climate. If you notice leaning posts, dig around the base and add more concrete or soil to stabilize them. A little maintenance now saves big repairs later.
Tips & tricks for building a sturdy garden fence
A few game-changing strategies that'll help you avoid common mistakes and create a fence that lasts for years.
Marking Your Fence Line: Use a garden hose to outline curved sections first—it's flexible and lets you adjust before driving stakes. I've seen people spend hours fixing crooked lines because they didn't test-fit the curve. Also, for uneven ground, use a string level to find the highest point along your fence line before marking. This ensures all posts will sit level, even if the ground slopes.
Post Hole Depth: The one-third rule for hole depth (2 feet for a 6-foot fence) is non-negotiable for stability. I learned this the hard way when my first fence leaned after a strong wind. Use a post to test depth—it should sit with about 6 inches above ground level after concrete is poured. For rocky soil, rent a post hole auger to make clean holes without damaging your posts.
Concrete Setting Time: That 24-hour wait for concrete to cure is crucial—don't rush it! I've seen people try to attach panels too soon and end up with posts that shift. Keep a damp cloth over the concrete during curing to prevent cracking. For extra stability in windy areas, consider adding gravel around the base after concrete sets to create a wider support zone.
Panel Attachment: The ½-inch gap at the top of panels is essential for expansion—skipping this can cause warping when wood expands in heat. I recommend using a speed square to mark screw placement every 12 inches along the panel edge. For a more secure hold, pre-drill holes ⅛ inch smaller than your screws to prevent wood splitting, especially with pressure-treated lumber.
Pro Tips for Build Garden Fence
- A few game-changing strategies that'll help you avoid common mistakes and create a fence that lasts for years.
- Marking Your Fence Line: Use a garden hose to outline curved sections first—it's flexible and lets you adjust before driving stakes.
- Post Hole Depth: The one-third rule for hole depth (2 feet for a 6-foot fence) is non-negotiable for stability.
Frequently asked questions
Got questions?
Building a garden fence is exciting, but it’s natural to have doubts along the way. Here are answers to the most common queries to help you plan like a pro!
What’s the best time of year to build a garden fence?
Spring or early fall are ideal! Temperatures are mild, ground is workable, and rain helps stabilize new fences. Avoid winter (freezing soil) and peak summer (heat exhaustion risk). Check local frost dates to ensure deep footings aren’t affected.
Do I need a permit to build a garden fence?
It depends on your location! Many areas require permits for fences over 6 feet tall or near property lines. Check with your city’s building department or zoning office. Skipping permits can lead to fines or removal orders—worth the quick call!
Can I build a fence myself, or should I hire a pro?
DIY is doable for simple designs (e.g., wood picket or vinyl panels), but complex projects (like curved or tall fences) may need expertise. Assess your skills: digging post holes, leveling, and sealing gaps require precision. Pros save time and ensure code compliance.
What’s a good alternative to a traditional wood fence?
Consider privacy screens, lattice panels, or bamboo fencing for low-maintenance options. Metal (like corrugated steel) adds durability, while living hedges (e.g., arborvitae) grow into natural barriers. Vinyl mimics wood but resists rot—ideal for moisture-prone areas.
My fence posts keep leaning—how do I fix it?
Start by digging deeper (at least 1/3 of the post’s height below ground). Use gravel or concrete for stability, then tamp soil firmly. For existing posts, brace them with stakes and wire temporarily while you reinforce the base. Uneven settling? Check for rocky soil or poor drainage.
Wrapping up and next steps
Building a garden fence is a rewarding project that boosts privacy, security, and curb appeal—and you’ve got all the know-how to make it happen!
Whether you’re leaning toward rustic wood, sleek metal, or lush living hedges, the right design will transform your outdoor space into a serene retreat. Now’s the time to roll up your sleeves, gather your tools, and turn your vision into reality.
🚀 Next step: Sketch your design, check local permits (if needed), and start with a small section to build confidence. Before you know it, you’ll be enjoying your private, beautiful garden oasis all year round!