
Watering
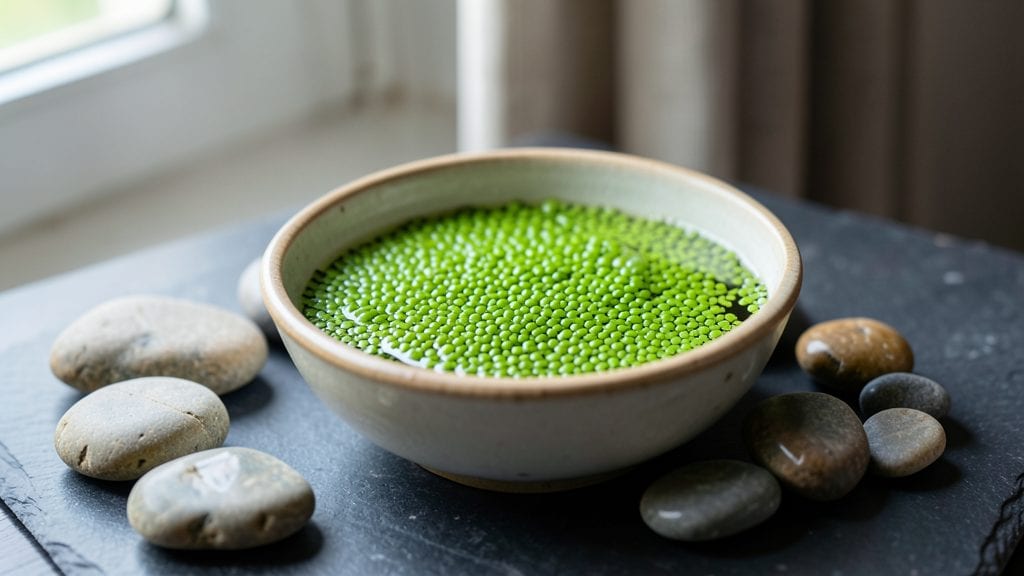
A bowl water garden transforms any sunny spot into a thriving mini-ecosystem—no pond required. 🌿 I started with a simple ceramic bowl and now have a self-contained world where plants and fish coexist beautifully.
The magic happens with the right balance of aquatic plants, a tiny substrate layer, and just enough water to create a microhabitat.
You’ll need a shallow container (at least 6 inches deep), small fish like guppies or bettas, floating plants such as water lettuce, and rooted species like anacharis or hornwort. The substrate—gravel or sand—keeps the water clean while providing anchorage for plants.
Light is key: place your garden near a bright window or use a small LED grow light to prevent algae buildup.
Within weeks, you’ll see your ecosystem come alive with oxygenating plants filtering the water, fish darting among the foliage, and a lush, green surface that looks like a tiny jungle. The best part? It stays balanced with minimal effort—just occasional pruning and a splash of dechlorinated water when levels drop.
Perfect for apartments, offices, or patios—this garden thrives year-round as long as you keep it indoors during freezing temperatures. The secret lies in the plants: they outcompete algae, keep the water clear, and create a serene, living centerpiece that never stops evolving.
📚 In This Guide
- What you need
- Instructions
- Tips and common mistakes
- Wrapping up and next steps
What you need
- ● Container: A wide, shallow bowl (12–18" diameter) with a depth of at least 4–6". Tip: Choose a material like ceramic, glass, or food-safe plastic for durability and aesthetics.
- ● Water: Dechlorinated water (use a water conditioner like Seachem Prime to remove chlorine) – ~3–5 gallons, depending on bowl size.
- ● Substrate: Small pebbles or smooth river rocks (1–2" diameter) – ~2–3 lbs to cover the bowl’s base (1–2" layer).
- ● Plants: 1–2 floating plants (e.g., Water Lettuce or Duckweed) for oxygenation.
- ● 1–3 submerged plants (e.g., Anacharis or Hornwort) for stability.
- ● 1–2 marginal plants (e.g., Water Hyacinth or Mini Water Lilies) for roots.
- ○ Fish (optional but recommended): 1–2 small, hardy fish like Guppies or Endler’s Livebearers (ensure they fit the bowl’s size).
- ● Lighting: A small LED aquarium light (5–10W) or natural sunlight (indirect, 4–6 hours/day).
- ○ Air Pump (optional): A tiny air stone or sponge filter for added oxygen if using fish.
- ● Tools: Tweezers or small net for plant placement.
- ● Spray bottle for gentle water adjustments.
- ○ pH test kit (optional but helpful for water balance).
- ● Prerequisites: Space with stable temperature (65–80°F ideal).
- ● Basic knowledge of plant care (or willingness to learn!).
- ● Patience for the ecosystem to balance (1–2 weeks).
- ● Decorative elements: Small driftwood, smooth stones, or LED tea lights for ambiance.
- ● Automatic topper: A small solar-powered fountain for extra aeration.
- ● Live snails: Nerite Snails to help clean algae naturally.
- ● Water conditioner refills: For ongoing maintenance.
Step-by-step instructions for creating a bowl water garden
Here’s how to craft a thriving micro-ecosystem that brings life to any space—no green thumb required.
🪴 Step 1: Select and Prepare Your Containers
Choose shallow bowls or wide, flat containers with a minimum depth of 3-4 inches—deeper water encourages stagnation. I prefer ceramic or glass because they maintain stable temperatures and resist algae buildup better than plastic. Clean each bowl thoroughly with a 1:10 bleach-water solution, then rinse and dry completely to eliminate any residue that could harm plants or aquatic life.
For drainage, place a 1-inch layer of small gravel or aquarium substrate at the bottom. This prevents root rot by allowing excess water to drain while keeping plants anchored. Skip this step only if your bowl has pre-drilled drainage holes—though most decorative bowls don’t. Here’s the thing: stagnant water turns toxic fast, so circulation matters more than you’d think.
💧 Step 2: Layer and Balance the Ecosystem
Add 2-3 inches of aquatic soil mix (designed for water gardens, not regular potting soil) over the gravel. This lightweight medium holds roots while allowing oxygen to reach them. Press it down gently—just enough to remove air pockets, but don’t compact it like garden soil. You’re aiming for a fluffy texture that mimics natural wetlands.
Place 3-4 small aquatic plants (like water hyacinth or miniature lotus) in the center, spacing them 2-3 inches apart. For a self-sustaining system, include 1-2 snails (like nerite snails) to graze on algae. Avoid fish unless your bowl is at least 6 inches deep—they disrupt the delicate balance. Real talk: snails are your unsung heroes here. They’ll keep the water crystal clear without chemicals.
☀️ Step 3: Add Water and Establish the Cycle
Fill the bowl with dechlorinated water (use a water conditioner or let tap water sit for 24 hours to off-gas chlorine). Fill to 1-2 inches below the rim, leaving space for plants to breathe. Submerge the plants just enough to cover their roots, then adjust as they grow. I like to use a soft spray bottle to mist the leaves—this mimics natural rainfall and prevents sudden temperature shocks.
Place the bowl in bright, indirect light (like an east-facing window). Direct sun accelerates algae growth, while too little light weakens plants. You’ll know it’s balanced when you see tiny bubbles rising from the substrate—this means beneficial bacteria are breaking down organic matter. Wait 7-10 days before adding any additional decor. Patience here prevents overloading the ecosystem.
✂️ Step 4: Maintain and Refresh the System
Check the water level weekly and top off with dechlorinated water as needed. Over time, plants will absorb nutrients, but 20-30% of the water should be replaced monthly to prevent buildup of waste. Use a small cup or turkey baster to avoid disturbing the plants. I schedule this during the plants’ active growth phase (spring and summer) to minimize stress.
Prune any yellowing or overgrown leaves with clean, sharp scissors to encourage new growth. If algae starts forming (green film on the water’s surface), add 1-2 additional snails or increase light exposure slightly. Never use chemical treatments—they’ll kill your plants and snails. This is a closed loop, and chemicals break the cycle. Trust the natural balance.
Tips & tricks for perfect bowl water gardens
Creating a thriving mini-ecosystem isn't rocket science, but these practical tips will help you avoid the most common pitfalls and create a self-sustaining beauty that lasts.
Container Selection Matters: While ceramic or glass bowls are ideal for temperature stability, don't overlook the importance of size. A 3-4 inch depth is perfect for aquatic plants—any deeper creates stagnant zones where harmful bacteria thrive. I've learned the hard way that wider bowls (8+ inches in diameter) actually work better than deep ones for circulation. The key is surface area for oxygen exchange, not volume. Also, avoid metal containers—they can leach into the water and harm your ecosystem.
Soil Layering Technique: When adding your 2-3 inches of aquatic soil mix in Step 2, think of it like building a cake layer—light and airy on top, with slightly more compaction near the bottom. Press down just enough to remove air pockets, but don't pack it like garden soil. Here's what nobody tells you: mix a handful of small aquarium gravel into the top inch of soil. This creates tiny air pockets that prevent anaerobic zones where toxic gases build up.
Plant Placement Strategy: The 2-3 inch spacing between your 3-4 aquatic plants isn't just about aesthetics—it's about airflow. Crowding plants creates micro-climates where humidity builds up, encouraging fungal growth. Place your fastest-growing plants (like water hyacinth) toward the edges where they'll get more light, and slower growers (like miniature lotus) in the center. This creates a natural light gradient that prevents algae blooms in shady spots.
Water Chemistry Secret: The 24-hour dechlorination period is non-negotiable, but here's the pro move: add a pinch of aquarium salt (just 1 teaspoon per gallon) to your water before adding it to the bowl. This helps stabilize the water chemistry and supports beneficial bacteria growth. I also recommend using a glass measuring cup when adding water—plastic can leach chemicals over time that disrupt your delicate ecosystem balance.
Pro Tips for Bowl Water Garden
- Creating a thriving mini-ecosystem isn't rocket science, but these practical tips will help you avoid the most common pitfalls and create a self-sustaining beauty that lasts.
- Container Selection Matters: While ceramic or glass bowls are ideal for temperature stability, don't overlook the importance of size.
- Soil Layering Technique: When adding your 2-3 inches of aquatic soil mix in Step 2, think of it like building a cake layer—light and airy on top, with slightly more compaction near the bottom.
Frequently asked questions
Got questions about creating your own bowl water garden? You're not alone!
Here are some of the most common inquiries—and their straightforward answers—to help you get started with confidence.
How do I keep my bowl water garden from getting cloudy or smelly?
Cloudiness or odors usually mean excess nutrients or decaying matter. Start with dechlorinated water and avoid overfeeding plants. Add a small air stone or pump to improve oxygen flow, and trim dying leaves promptly. A thin layer of aquatic moss or duckweed can also help absorb excess nutrients naturally.
How long does it take for a bowl water garden to become self-sustaining?
With the right balance of plants, bacteria, and filtration, most bowl water gardens stabilize within 4–8 weeks. Patience is key—rush the process with too many fish or plants, and you risk algae blooms or ammonia spikes. Start small (e.g., 1–2 hardy plants like Java fern or Anubias) and monitor water parameters weekly.
Are there affordable alternatives to a pre-made bowl water garden kit?
Skip the kit and use a glass or ceramic bowl (wide and shallow works best), a small air pump ($10–$20), and gravel or lava rock for filtration. For plants, opt for low-light varieties like water lettuce or hornwort, which are often free or cheap at aquarium stores. DIY filters made from sponges or bio-balls also work well.
Can I add fish to my bowl water garden right away?
Not recommended! Fish introduce ammonia, which can crash your new ecosystem. Wait until your garden has established roots, beneficial bacteria, and stable water parameters (test for 0 ammonia, 0 nitrites, and low nitrates). Start with 1–2 small, hardy fish like guppies or endler’s livebearers and monitor closely. Overstocking is the #1 mistake!
How do I care for a bowl water garden in winter?
Most bowl gardens thrive year-round indoors, but light and temperature matter. Move your garden near a south-facing window or use a low-watt LED grow light (6–8 hours/day). Avoid drafts, and reduce feeding if plants slow down. If outdoors, bring it inside before temps drop below 50°F (10°C). A small heater (for aquariums) can help in freezing climates.
Wrapping up and next steps
A bowl water garden isn’t just a decorative centerpiece—it’s a thriving, self-sustaining ecosystem that brings life and tranquility to your space. Whether you’re drawn to the meditative appeal of water features or the joy of nurturing aquatic plants, this project is simpler and more rewarding than you might think.
With the right balance of plants, fish, and maintenance, you’ll create a year-round oasis that evolves with your green thumb.
Ready to dive in? Start small—pick a bowl, gather your materials, and let your creativity flow! Your next step: sketch a simple design, then review the supplies to ensure you’re fully prepared. Soon, you’ll be enjoying the soothing sounds and vibrant beauty of your very own bowl water garden! 🌿💧