Vegetables
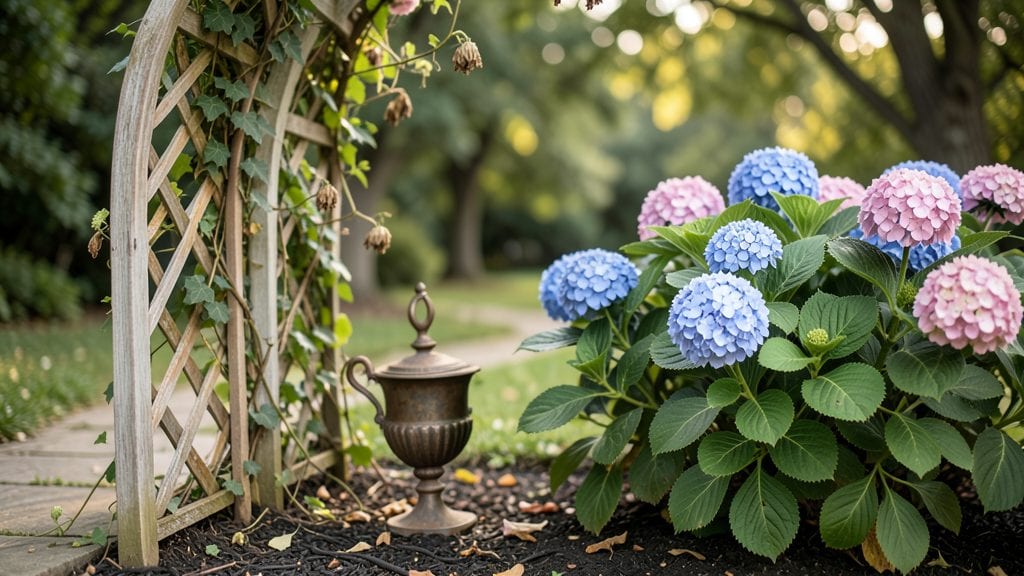
Creating a beautiful secret garden in a compact space transforms overlooked corners into enchanting retreats. I designed mine behind a bamboo screen, where ivy climbs a trellis and fragrant herbs spill over stone edges—every detail whispers intimacy.
The key is layering plants that thrive year-round, from evergreen ferns to winter-blooming hellebores, so your garden stays lush even when others fade.
Start with a focal point—a rustic bench, a moss-covered stone, or a small fountain—to anchor the space. Use vertical elements like trellises or hanging baskets to maximize square footage without sacrificing privacy.
My secret garden fits in a 6-foot square but feels vast because of the layered textures: velvety lamb’s ear, glossy hostas, and delicate ferns create depth instantly. Even in tight spots, a mix of tall grasses and low-growing perennials tricks the eye into seeing more.
You’ll end up with a space that feels like a hidden world—soft lighting, scented blooms, and the quiet hum of bees. The magic happens in the details: dappled shade from a small tree, a winding path lined with pebbles, and containers brimming with trailing thyme.
This isn’t just gardening; it’s crafting a sanctuary where you can escape for tea or quiet reflection, no matter the season.
Adapt the design to your climate: in hotter zones, opt for shade-loving plants like astilbes and ferns; in cooler areas, add evergreen shrubs for structure. The same principles apply whether your space is a balcony nook or a backyard corner—privacy, layers, and a touch of whimsy make all the difference.
Let’s bring your secret garden to life.
📚 In This Guide
- What you need
- Instructions
- Tips and common mistakes
- Wrapping up and next steps
What you need
- ● Spring: 3-5 Pansy plants, 2 Dwarf Tulip bulbs, 1 Strawberry plant (trailing variety)
- ● Summer: 2 Cherry Tomato plants (bush variety), 3 Basil plants, 1 Zinnias (dwarf, 6-pack)
- ● Fall: 4 Kale seedlings, 2 Pumpkin vines (miniature), 1 Sweet Potato vine
- ● Winter (Cold Climates): 3 Winter Greens (e.g., Spinach or Lettuce), 1 Dwarf Citrus (in pots, if hardy)
- ● 1 Garden trowel (5-inch, stainless steel)
- ● 1 Pruning shears (bypass, for trimming)
- ● 3 Gallon-sized pots (with drainage holes) or 1 raised bed (4’x2’ max)
- ○ 1 Self-watering planter (optional, for drought-prone areas)
- ● 1 Organic potting mix (10-15 lbs) + compost (5 lbs)
- ● 1 Slow-release fertilizer (e.g., Osmocote, 1 lb)
- ● 1 Mulch (2-3 bags, shredded bark or straw)
- ○ 1 Drip irrigation kit (optional, for automated watering)
- ● ✅ Sunlight: At least 4-6 hours/day (south-facing is ideal). Adjust plant choices for shadier spots (e.g., ferns, hostas).
- ● ✅ Space: Minimum 2’x2’ area (or equivalent vertical space for trellises).
- ● ✅ Drainage: Ensure pots/beds have exit holes or slope gently to avoid waterlogging.
- ● ✅ Climate Zone: Check your USDA Hardiness Zone for winter-hardy plants (e.g., Zone 5+ for kale, Zone 8+ for citrus).
- ● 🌿 Vertical gardening: Add wall-mounted pockets or hanging baskets for herbs and trailing plants.
- ● 🎯 Layering: Plant fast growers (e.g., radishes) alongside slow growers (e.g., carrots) to maximize space.
- ● ✨ Decorative touches: Use terracotta pots, fairy lights, or pebble pathways to enhance the "secret garden" vibe.
Instructions for designing year-round layers in compact secret gardens
Transform even the smallest hidden corner into a lush, ever-changing sanctuary with these strategic layering techniques.
Analyze Your Space and Sunlight Patterns
Begin by mapping your garden’s sunlight exposure for each season. Use a notebook to track sunlight hours at different times of day—morning, midday, and evening—over a week. Note which areas receive full sun (6+ hours), partial shade (3-6 hours), or deep shade (less than 3 hours). This ensures you place sun-loving plants like lavender and rosemary where they’ll thrive, while shade-tolerant ferns and hostas get the protection they need.
Measure the dimensions of your space, including vertical height, to determine how many layers you can incorporate. Even a 3-foot-wide area can support three distinct layers: a tall structural plant at the back, mid-height foliage in the middle, and low-growing ground cover at the front. Sketch a rough layout to visualize how each plant will contribute to the overall height and texture.
Select Plants for Seasonal Interest and Texture
Choose plants that offer year-round visual appeal, balancing evergreens, deciduous foliage, and seasonal blooms. For the tallest layer, consider ornamental grasses like fountain grass or bamboo, which add movement and structure. In the mid-height layer, incorporate shrubs like hydrangeas or boxwoods for dense foliage, while low-growing perennials such as creeping thyme or ajuga will fill the front layer with vibrant color and texture.
Select plants with varying leaf shapes and colors to create depth. For example, pair broad-leaved hostas with narrow-leaved sedum and spiky yucca for contrast. Include at least one plant with winter interest, such as evergreen hemlock or witch hazel, to ensure your garden remains dynamic even in colder months. Group plants with similar water and sunlight needs together to simplify maintenance.
Prepare the Soil and Install Drainage
Test your soil’s drainage by digging a small hole and filling it with water. If the water drains within a few hours, your soil is well-draining. If it pools, amend the soil with 1 part perlite or coarse sand to 3 parts native soil to improve aeration. For compacted or clay-heavy soil, mix in 2 inches of organic compost to enhance fertility and structure.
Mark the planting locations with stakes or spray paint, spacing plants according to their mature size. Dig holes slightly larger than the root balls of your plants, ensuring the top of each root ball sits 1 inch below the soil line to encourage stability. Backfill with the amended soil, pressing gently around the roots to remove air pockets. Water deeply to settle the soil and eliminate gaps.
Layer Plants Strategically for Depth and Flow
Start by planting the tallest elements at the back of your garden, followed by mid-height plants, and finally low-growing ground covers. Space taller plants 12-18 inches apart to allow airflow and prevent overcrowding, while smaller plants can be placed 6-12 inches apart. Arrange plants so their foliage cascades slightly forward, creating a natural flow that draws the eye through the garden.
Incorporate climbing plants like clematis or jasmine vertically to add height without taking up ground space. Train them to grow along trellises, arbors, or fences, which also adds architectural interest. For a cohesive look, group plants with similar colors or textures together, such as pairing silver foliage plants with other silvery-leaved varieties for a unified aesthetic.
Mulch and Maintain for Long-Term Beauty
Apply a 2-3 inch layer of organic mulch, such as shredded bark or wood chips, around your plants to retain moisture, suppress weeds, and regulate soil temperature. Keep mulch 2 inches away from plant stems to prevent rot. Water deeply once a week, adjusting for rainfall, and fertilize with a slow-release granular fertilizer in early spring to support steady growth throughout the season.
Monitor your garden regularly for signs of stress, such as yellowing leaves or wilting, which may indicate overwatering, underwatering, or nutrient deficiencies. Prune leggy or overgrown branches in late winter or early spring to encourage bushier growth. By summer, your layered garden should look full and vibrant, with each plant contributing to the overall harmony of the space.
Tips & tricks for perfect year-round secret garden layers
Creating a compact yet stunning layered garden requires attention to detail—here’s how to elevate your design from good to breathtaking.
Sunlight Mapping Strategy: In Step 1, when tracking sunlight patterns, use a simple app or even your phone’s timer to record exact hours of exposure. I’ve found that morning sun behaves differently than afternoon—note which areas get dappled light versus full sun. This precision ensures you place sun-lovers like lavender in their ideal spots while protecting shade plants from scorching.
Plant Layering Geometry: For Step 4’s spacing, visualize your garden as a three-tiered cake. The tallest plants (like ornamental grasses) should occupy the back third of your space, mid-height shrubs the middle third, and ground covers the front. This creates instant depth. I recommend sketching your layout to scale—even a rough drawing helps prevent overcrowding that can stifle growth.
Soil Amendment Shortcuts: When amending soil in Step 3, don’t overlook the power of worm castings. Mix ½ cup into each hole for plants that need extra nutrients—it’s like a slow-release fertilizer that improves soil structure. For clay-heavy soil, add perlite gradually as you dig, rather than all at once, to prevent compaction.
Mulch Maintenance Hack: After applying your 2-3 inch mulch layer in Step 5, refresh it annually in early spring. I use a rake to pull mulch away from stems (keeping that 2-inch clearance) and redistribute it evenly. This prevents that “mulch volcano” effect that suffocates plant bases while keeping weeds at bay.
Pro Tips for Beautiful Secret Gardens
- Creating a compact yet stunning layered garden requires attention to detail—here’s how to elevate your design from good to breathtaking.
- Sunlight Mapping Strategy: In Step 1, when tracking sunlight patterns, use a simple app or even your phone’s timer to record exact hours of exposure.
- Plant Layering Geometry: For Step 4’s spacing, visualize your garden as a three-tiered cake.
Frequently asked questions
about creating your own beautiful secret gardens in compact spaces—we’ve got you covered! Here are some of the most common questions to help you plan like a pro.What’s the best time of year to start a secret garden?
For most climates, spring (after the last frost) is ideal for planting perennials, herbs, and cold-hardy veggies. However, fall is perfect for cool-season crops like kale or lettuce. If you’re using containers, you can start indoors in early spring or even year-round in greenhouses!
How do I maximize space in a small garden?
Think vertically! Use trellises for climbing plants (like beans or cucumbers), stack containers, and choose compact varieties of vegetables (e.g., ‘Patio’ tomatoes or ‘Bush’ beans). Interplanting (pairing fast growers with slow ones) also saves space while keeping your garden productive.
What’s the easiest low-maintenance secret garden setup?
Opt for self-watering containers, drought-tolerant plants (like succulents or rosemary), and mulch to retain moisture. Herbs in pots (basil, thyme, parsley) thrive with minimal care, while edible flowers (nasturtiums, pansies) add beauty without fuss. A drip irrigation system can also automate watering!
How do I keep pests out of my compact garden?
Start with healthy soil (rich in compost) to strengthen plants. Use physical barriers like row covers or mesh for delicate greens. Companion planting (e.g., marigolds with tomatoes) deters pests naturally. For stubborn bugs, try neem oil or soapy water sprays—gentle but effective!
Can I grow a secret garden indoors year-round?
Use grow lights (LED or fluorescent) for 12–16 hours daily, and choose low-light-friendly plants like leafy greens, microgreens, or dwarf peppers. Windowsills work for herbs, but a small greenhouse or sunroom boosts success. Just ensure proper ventilation to prevent mold!
Still stumped? Drop your question in the comments—we’re happy to help your secret garden thrive!
Wrapping up and next steps
Creating your own beautiful secret gardens is all about embracing creativity and sustainability—no matter how small your space! 🌿 With the right layers, you can grow lush vegetables year-round while transforming even the tiniest corner into a thriving, hidden oasis.
The key? Start small, experiment fearlessly, and let nature do the rest.
Ready to dive in? Grab your tools, sketch a design, and begin layering your garden today! Whether you’re a beginner or a seasoned green thumb, every seed planted is a step toward a greener, more beautiful world. Happy gardening! 🌱