Pruning
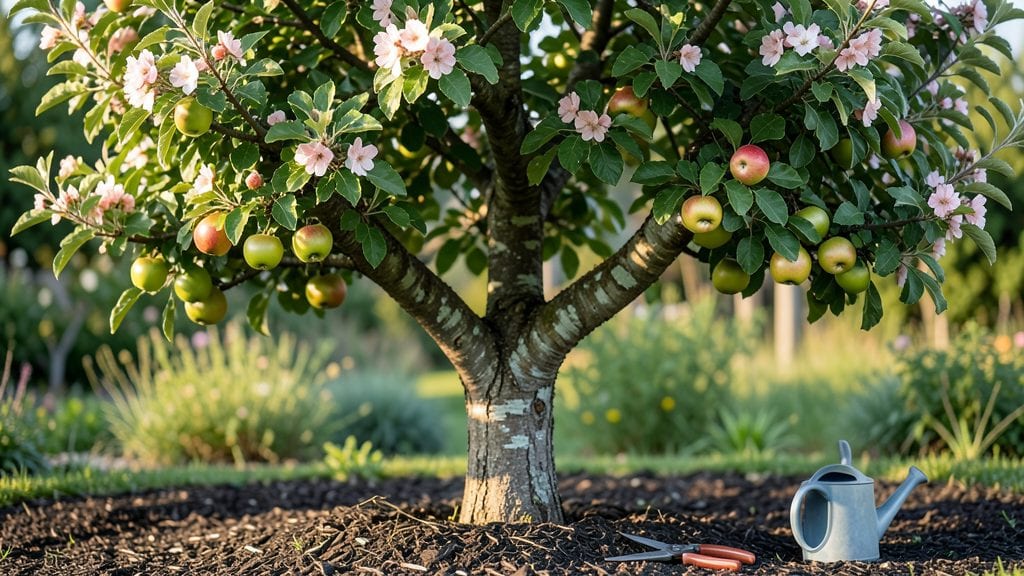
Growing apple trees from bare roots to fruit-bearing giants is one of the most rewarding gardening challenges you'll ever tackle. 🌱 I've watched my own trees go from spindly saplings to heavy-branched producers, and the secret isn't just in the planting—it's in the year-round care that turns good harvests into spectacular ones.
The first year sets the foundation, but the real magic happens in how you prune, water, and protect the tree through every season.
You'll need a sunny spot with well-draining soil, the right variety for your climate zone, and basic tools like pruners and a soil tester. Most people overlook how critical the first three years are—proper pruning in those early years determines how productive the tree will be in its prime.
I learned this the hard way when my first tree grew too many weak branches, leading to smaller fruit and more disease pressure.
By following the seasonal care schedule, you'll end up with a tree that produces hundreds of pounds of fruit each year while staying healthy and disease-resistant. The smell of fresh apples in fall and the sight of blossoms in spring make every hour of work worthwhile.
Plus, homegrown apples taste nothing like store-bought—they're crisp, sweet, and packed with flavor that changes with each variety.
Whether you're starting with a bare-root sapling or caring for an established tree, the principles stay the same. This guide covers everything from site selection to winter protection, so you can avoid common mistakes and get the most out of your orchard. Let's get those roots growing!
📚 In This Guide
- What you need
- Instructions
- Tips and common mistakes
- Wrapping up and next steps
What you need
- ● Apple Tree Saplings: 1-3 bare-root or container-grown trees (choose disease-resistant varieties like Honeycrisp or Fuji for best results).
- ● Shovel & Trowel: A sturdy digging shovel (18-24” blade) and a hand trowel for precision planting.
- ● Pruning Tools: Bypass pruners (for clean cuts on branches ≤¾” thick).
- ● Loppers (for branches ¾”–2” thick).
- ● Pruning saw (for thick branches >2” thick).
- ○ Grafting Tools (Optional for Variety Control): Grafting knife, grafting tape, and compatible rootstock scions.
- ● Mulch: 2-3 inches of organic mulch (wood chips, straw, or pine needles) to retain moisture and suppress weeds.
- ● Fertilizer: Balanced organic fertilizer (10-10-10 NPK ratio) or composted manure (apply sparingly in early spring).
- ● Pest Control: Horticultural oil, neem oil, or insecticidal soap (for organic pest management).
- ● Watering Supplies: Drip irrigation system or a 5-gallon watering can with a long spout.
- ● Tree stakes and ties (for young trees in windy areas).
- ● Soil pH test kit (ideal range: 6.0–7.0 for apple trees).
- ● Tree guards or fencing (to protect from deer or livestock).
- ● Pollination aids (if growing self-sterile varieties, like bees or a second compatible tree).
- ● Post-harvest storage bins (for preserving apples after picking).
Step-by-step guide to planting and caring for young apple trees
Here's how to give your new trees the strong foundation they need for decades of fruit.
🌱 Step 1: Choose the Right Planting Location and Prepare the Soil
Apple trees thrive in full sun—pick a spot that gets at least 6-8 hours of direct sunlight daily. Avoid low areas where cold air settles, as young trees are vulnerable to frost damage. I dig a hole twice as wide as the root ball but only as deep—planting too deep suffocates the roots and causes stress.
Use the native soil you removed from the hole to backfill, mixing in 2-3 inches of compost for nutrients. The soil should drain well but hold moisture—apple trees hate soggy roots. If your soil is heavy clay, amend it with 1-2 inches of coarse sand or pearlite to improve drainage.
🪴 Step 2: Plant the Tree Properly for Strong Growth
Gently remove the tree from its container and loosen any circling roots with your fingers—these will strangle the tree if left intact. Position the tree so the graft union (the bump near the base where the scion was attached) sits 2-3 inches above soil level. This ensures the tree develops a strong root system below ground while protecting the graft from rot.
Place the tree in the hole and fill around the roots with the amended soil, pressing lightly to remove air pockets. Water deeply to settle the soil and eliminate gaps. The top of the root ball should sit 1-2 inches below the surrounding soil level—this helps prevent the graft from rotting and encourages root growth.
☀️ Step 3: Mulch and Water for Establishment
Spread a 3-inch layer of mulch around the base of the tree, keeping it 6 inches away from the trunk to prevent rot. Organic mulch like wood chips or straw helps retain moisture and regulates soil temperature. Water the tree deeply right after planting, then again every 5-7 days during the first growing season to encourage root development.
Young apple trees need consistent moisture but hate soggy soil. Check the soil 1 inch below the surface—if it's dry, water again. Avoid overhead sprinkling, which can spread disease. Instead, use a soaker hose or water at the base of the tree.
✂️ Step 4: Prune for Shape and Health in Late Winter
Prune your apple tree in late winter or early spring, before buds swell but before new growth begins. Remove any dead, diseased, or crossing branches first—these compete for energy and invite pests. I look for branches that grow inward or rub against each other and cut them back to the main trunk or a healthy side branch.
Shape the tree by opening the center to allow sunlight and air circulation. Aim for a balanced, vase-like shape with the main branches spaced 12-18 inches apart. Sterilize your pruning shears with rubbing alcohol between cuts to prevent spreading disease. After pruning, apply dormant oil to smother overwintering pests like scale insects.
🌿 Step 5: Fertilize and Monitor for Pests/Diseases
Feed your apple tree in early spring with a balanced, slow-release fertilizer (10-10-10 ratio). Spread the fertilizer evenly under the tree's drip line and water it in thoroughly. Avoid over-fertilizing, which can lead to excessive leaf growth at the expense of fruit production. I also side-dress with compost in late fall to replenish nutrients for the next growing season.
Watch for common apple tree pests like aphids, codling moths, and apple scab. Use neem oil or insecticidal soap for soft-bodied pests, and apply copper fungicide in early spring to prevent fungal diseases. Regularly inspect leaves, fruit, and bark for signs of trouble—catching issues early makes treatment easier.
Tips & tricks for perfect apple tree gardening
A few strategic moves will help your young apple trees thrive for decades to come.
Sunlight Strategy: While 6-8 hours of sunlight is ideal, don't panic if your spot gets slightly less. Apple trees can adapt to 5 hours of direct sun, though fruit production may be reduced. Place the tree where it gets the most sun possible, even if it means moving it later in the season when shadows shift. I've seen trees in partial shade still produce fruit—just expect smaller yields and less vibrant growth.
Soil Depth Secret: When planting, make sure the root ball sits 1-2 inches below the surrounding soil level—this is critical. The graft union should remain 2-3 inches above soil level, but the root ball itself needs that slight burial. I've seen beginners bury the entire root ball too deep, which suffocates roots and causes stress. Use a level or stick to check depth before backfilling completely.
Watering Wisdom: The 5-7 day watering schedule works best when your soil drains well. In heavy clay soils, you may need to water more frequently—check the soil 1 inch below the surface daily during hot weather. I use a moisture meter to track soil moisture, especially during the first growing season when roots are establishing. Overwatering is just as harmful as underwatering for young apple trees.
Pruning Pro Tip: When shaping your tree in Step 4, aim for branches spaced 12-18 inches apart. This spacing allows sunlight to reach all parts of the tree and prevents branches from rubbing against each other. I like to visualize an open vase shape—this promotes better air circulation and reduces disease risk. Always sterilize your pruning shears between cuts to prevent spreading pathogens.
Pro Tips for Apple Tree Gardening
- A few strategic moves will help your young apple trees thrive for decades to come.
- Sunlight Strategy: While 6-8 hours of sunlight is ideal, don't panic if your spot gets slightly less. Apple trees can...
- Soil Depth Secret: When planting, make sure the root ball sits 1-2 inches below the surrounding soil level—this is cr...
Frequently asked questions
When is the best time to plant an apple tree?
The ideal window is late fall or early spring, when the tree is dormant. This gives roots time to establish before extreme heat or cold. Avoid planting in summer—stress from transplanting can weaken young trees. If you must plant in summer, water deeply and mulch well to retain moisture.
How do I prune an apple tree for maximum fruit production?
Prune in late winter or early spring (before buds swell) to shape the tree and encourage airflow. Focus on removing:
- Dead or diseased branches (cut at the branch collar).
- Crossing or rubbing branches (to prevent wounds).
- Suckers (shoots at the base—remove them to redirect energy to fruit).
What are the most common pests or diseases, and how do I prevent them?
Apple trees often face apple scab (fungus causing black spots), codling moths (larvae in fruit), or aphids. Prevent issues with:
- Regular pruning for airflow.
- Organic sprays like neem oil or copper fungicide.
- Row covers in early spring to block moths.
- Removing fallen fruit/leaves to reduce fungal spores.
How long does it take for an apple tree to bear fruit?
Most dwarf varieties produce fruit in 2–4 years, while standard trees take 4–7 years. Patience is key! Ensure your tree gets:
- Full sun (6+ hours/day).
- Well-draining soil (amend with compost if needed).
- Regular watering (deep, infrequent soakings).
Can I grow an apple tree in a container, or do I need a yard?
Yes! Dwarf or semi-dwarf varieties thrive in large containers (15+ gallons) with drainage holes. Use a high-quality potting mix and repot every 2–3 years. Place in a sunny spot (like a patio or balcony) and move indoors if temps drop below 20°F (-7°C). Containers limit root growth, so expect smaller yields—but you’ll still get fresh apples!
Wrapping up and next steps
Growing your own apple tree is a rewarding journey that combines patience, care, and a deep connection to nature. 🌳 By mastering year-round pruning, proper tool selection, and seasonal maintenance, you’ll set the stage for a thriving tree and delicious, homegrown fruit.
Whether you’re a beginner or a seasoned gardener, every snip and spray brings you closer to that sweet, sun-ripened harvest.
Ready to take the next step? Start small—prune a single branch today, research your apple variety, or sketch a pruning plan. Your future orchard awaits! 🍏✨