Fertilization
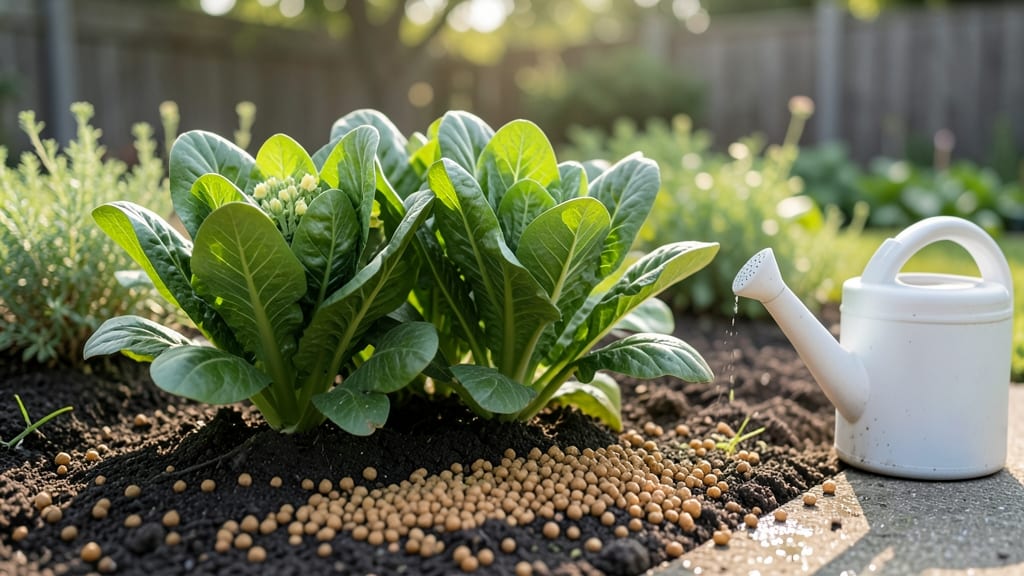
Here are some garden fertilizing tips that’ll turn your tomatoes into showstoppers and have neighbors begging for your basil’s secrets—because it’s not just about the granules. I learned the hard way that overdoing it burns roots, while skipping it leaves plants starving, even when the soil looks rich.
The right approach means stronger stems, bigger blooms, and vegetables that actually taste like they came from a garden.
Start with the basics: a soil test to know what's missing, then choose between organic (slow-release, soil-building) or synthetic (fast-acting, precise) fertilizers. My go-to is a balanced 10-10-10 for general growth, but I switch to high-phosphorus (like 5-10-10) when flowers or fruits appear.
Timing matters too—feed new plants lightly at planting, then every 4-6 weeks unless they're heavy feeders like peppers or tomatoes.
You'll see the difference within weeks: deeper green leaves, faster growth, and plants that bounce back from pests better. The key is consistency—don't overdo it, and always water after applying.
For a natural boost, try compost tea or fish emulsion; they're gentler than chemicals and work just as well when done right. Ready to give your plants the fuel they actually need?
This works for flower beds, vegetable patches, and even container gardens—just adjust the amounts for smaller spaces. The same principles apply whether you're growing in full sun or partial shade. Let's get those roots fed properly, once and for all.
📚 In This Guide
- What you need
- Instructions
- Tips and common mistakes
- Wrapping up and next steps
What you need
- ● Fertilizer: Granular fertilizer (e.g., 10-10-10 NPK ratio) – 10 lbs per 100 sq ft
- ● Slow-release organic fertilizer (e.g., composted manure or bone meal) – 5 lbs per 100 sq ft
- ● Liquid fertilizer (e.g., fish emulsion or seaweed extract) – 1-2 gallons for foliar spraying
- ● Soil Amendments: Compost – 2-3 inches mixed into topsoil
- ● Peat moss or coconut coir – 1-2 bags (3-4 cu ft each)
- ● Tools: Garden gloves (nitrile or leather) – 1 pair
- ● Hand trowel or transplant spade – 1 unit
- ● Garden fork – 1 unit (for aerating soil)
- ● Watering can or hose with spray nozzle – 1 unit
- ● Measuring cup or scale (for precise fertilizer dosing) – 1 unit
- ● pH testing kit – To monitor soil acidity/alkalinity
- ● Soil moisture meter – For tracking hydration levels
- ● Broadcast spreader – For even granular fertilizer distribution
- ● Organic mulch (straw, wood chips) – 2-3 bags (2 cu ft each)
- ● Epsom salt (magnesium sulfate) – Small bag (for magnesium-deficient plants)
- ● Garden journal – To track fertilizing schedules and plant responses
Step-by-Step guide to smart garden fertilizing
Here’s how to feed your plants the right way—without wasting money or overdoing it.
Test Your Soil First
Before adding any fertilizer, grab a soil test kit from your local garden center. This tells you exactly what nutrients your plants are missing—whether it’s nitrogen for leafy growth, phosphorus for roots, or potassium for strength. I’ve seen gardeners skip this step and end up drowning their plants in fertilizer they don’t need. Test in spring or early summer when soil is most active.
Dig a small sample from 4-6 inches deep, mix it in the kit, and follow the instructions for results. If your soil is already rich in nutrients, you might not need much extra. But if it’s sandy or clay-heavy, you’ll know to focus on organic matter first.
Choose the Right Fertilizer Type
Not all fertilizers work for every plant. Fast-growing veggies like lettuce and spinach thrive on a high-nitrogen feed, while flowering plants like tomatoes need a balanced 10-10-10 mix. Slow-release granules are great for perennials, while liquid fertilizers give quick results for annuals. I always match the fertilizer to the plant’s needs—nothing worse than watching roses struggle because they got too much nitrogen.
Read the label carefully. The three numbers (like 5-10-5) tell you the ratio of nitrogen, phosphorus, and potassium. For most garden plants, a 10-10-10 or 5-10-10 blend is a safe starting point. If your soil test shows a deficiency in one area, pick a fertilizer that targets that specific nutrient.
Apply at the Right Time
Timing matters just as much as what you use. For most plants, the best times to fertilize are early spring when growth starts and mid-summer when they’re pushing hard. Avoid fertilizing in extreme heat or drought—plants stressed by dry soil can’t absorb nutrients properly. I’ve learned this the hard way: fertilizing during a heatwave leads to burned roots and stunted growth.
Water your plants deeply 24 hours before applying fertilizer. This helps wake up the roots and ensures they’re ready to absorb nutrients. After fertilizing, water again to help the nutrients soak into the soil. Never fertilize right before a heavy rain—you’ll just wash it away.
Feed in Stages, Not All at Once
One of the biggest mistakes gardeners make is dumping a whole bag of fertilizer at planting time. Instead, split applications into three feedings: once when planting, again in 4-6 weeks, and a final time in 8-10 weeks. This keeps nutrients available as the plant grows, rather than overwhelming it early on. For example, tomatoes need a steady supply of phosphorus to develop strong roots, so I give them a light feeding every 2-3 weeks once they start flowering.
For organic fertilizers like compost or manure, mix them into the top 2-3 inches of soil rather than scattering on the surface. This protects earthworms and encourages slow, steady nutrient release. If you’re using synthetic granules, sprinkle them evenly over the soil and water them in well.
Monitor and Adjust
Watch your plants closely after fertilizing. Yellowing leaves can mean too much nitrogen, while weak stems or slow growth might signal a lack of potassium. If you notice dark green leaves with pale veins, your plants could be phosphorus-deficient. I keep a small notebook by my garden to track what I’ve fed and how the plants respond—it’s saved me from repeating mistakes.
Adjust your feeding schedule based on what you see. If your plants are thriving, you might not need to fertilize again until next season. But if they’re struggling, a light feeding with a low-nitrogen, high-phosphorus mix can help. Always err on the side of caution—over-fertilizing is easier to fix than under-fertilizing, but both can stress your plants.
Tips & tricks for smart garden fertilizing
These proven techniques will help you avoid common mistakes and maximize your garden's potential without wasting resources.
The Soil Test Secret: Don't skip the soil test in Step 1—this is the foundation of everything. I've seen gardeners overspend on fertilizers only to discover their soil already had plenty of nutrients. Test in early summer when soil is most active, and pay special attention to the 4-6 inch depth sample. This tells you exactly what your plants need rather than guessing.
Fertilizer Matching: In Step 2, remember that the three numbers on fertilizer labels (like 10-10-10) tell you the ratio of nitrogen, phosphorus, and potassium. For flowering plants like tomatoes, stick with balanced mixes, but fast-growing veggies can handle higher nitrogen. I always keep a small notebook by my garden to track which plants respond best to which fertilizers—this becomes your personal garden bible over time.
Timing is Everything: The 24-hour watering rule before fertilizing in Step 3 is critical. This prepares your plants' roots to absorb nutrients properly. I've learned the hard way that fertilizing during drought or heat stress burns roots instead of nourishing them. Always check the weather forecast—if heavy rain is coming within 48 hours, skip fertilizing that day to prevent nutrient runoff.
Application Technique: When applying organic fertilizers in Step 4, mix them into the top 2-3 inches of soil rather than just scattering on the surface. This protects beneficial soil organisms and ensures slow, steady nutrient release. For synthetic granules, use a spreader for even distribution and water them in thoroughly. Uneven application leads to patchy growth patterns that are hard to correct later.
Pro Tips for Garden Fertilizing Tips
- These proven techniques will help you avoid common mistakes and maximize your garden's potential without wasting reso...
- The Soil Test Secret: Don't skip the soil test in Step 1—this is the foundation of everything. I've seen gardeners ov...
- Fertilizer Matching: In Step 2, remember that the three numbers on fertilizer labels (like 10-10-10) tell you the rat...
Frequently asked questions
Got questions about fertilizing your garden?
You’re not alone! Here are answers to the most common concerns to help you grow a thriving garden with confidence.
When is the best time to fertilize my garden?
The ideal time depends on your plants: spring (for early growth) and mid-summer (for flowering/fruiting) are key. For lawns, fertilize in early fall and spring. Always check your fertilizer’s label for specific timing—overdoing it can burn roots!
How often should I fertilize my plants?
Most gardens need feeding every 4–6 weeks during the growing season (spring to fall). Slow-release fertilizers last longer (3–6 months), while liquid feeds require more frequent applications. Observe your plants: yellowing leaves or stunted growth may signal it’s time to feed!
Are organic fertilizers better than synthetic ones?
It depends on your goals! Organic fertilizers (like compost or manure) improve soil health long-term and feed microbes, but they release nutrients slowly. Synthetic fertilizers provide quick, precise nutrition but lack soil benefits. Many gardeners use a mix of both for balanced results.
What should I do if my plants look burned after fertilizing?
Over-fertilizing causes fertilizer burn—crispy edges or brown spots on leaves. Act fast: Water the soil deeply to dilute excess salts, then reduce fertilizer strength by half. Avoid fertilizing until new growth appears. For severe cases, flush the soil with water for 10–15 minutes.
Can I use coffee grounds or eggshells as fertilizer?
Coffee grounds add nitrogen (great for compost) and eggshells provide calcium (helps prevent blossom-end rot in tomatoes). Crush shells into a fine powder and mix into soil, or compost them first. Just avoid overdoing it—balance is key!
Still unsure? Start with a soil test to tailor your approach—your plants will thank you!
Wrapping up and next steps
Mastering the art of garden fertilizing doesn’t have to be complicated—just consistent and informed! 🌱 By choosing the right fertilizer, timing applications wisely, and paying attention to your plants’ needs, you’ll watch your garden thrive like never before.
Start small, experiment with techniques, and soon you’ll be reaping the rewards of lush, healthy growth.
Ready to take the next step? Grab your gloves, pick a sunny patch, and begin your fertilizing journey today! Your green thumb is closer than you think.